Secrets About Your KitchenAid Mixer You'll Wish You Knew Sooner
We may receive a commission on purchases made from links.
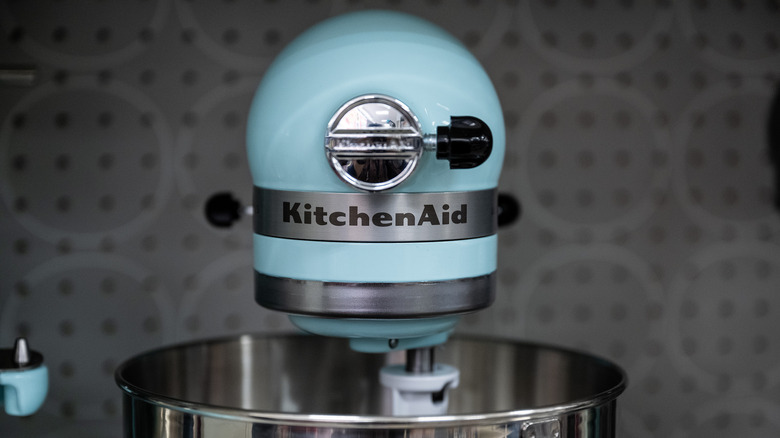
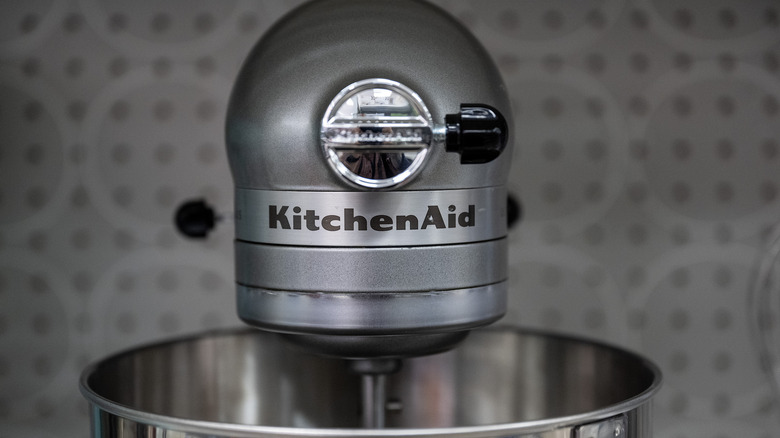
Forget turning 21 — for many of us, a color-coordinated KitchenAid mixer on the counter is a true marker of adulthood. A must-have on any wedding registry, KitchenAids are among the rare objects that manage to be practical, durable, and chic all at the same time. If you're a newlywed lucky enough to receive one, chances are it'll still be beating and whipping like new by the time your silver anniversary rolls around. And having one on display is a sure sign you're a serious cook — or at the very least, you aspire to be one.
But besides being a godsend for frequent home bakers, KitchenAid mixers are incredibly cute. Available in a wide range of eye-popping colors and finishes, from classic white or silver to teal and fire-engine red, there seems to be one to match every conceivable home décor. So it's hard to believe the mixers have actually been around for more than 100 years — the first models were introduced in 1919. A miniaturized version of a mixer originally designed for professional bakers, the iconic mixer got its name when the wife of a company executive testing one of the prototypes called it "the best kitchen aid I've ever used." As we love them, however, most of us don't take advantage of their full potential. Here's what you need to know to make your KitchenAid mixer an even more powerful helper in the kitchen.
Beater acting wonky? Here's how to fix it
We all love how a KitchenAid mixer makes short work of creaming butter and sugar together and transforming egg whites into fluffy meringue. But you might have noticed that over time, your beaters start to act a bit off — perhaps they're no longer reaching the bottom of the bowl, forcing you to stop and manually mix everything to ensure it's combined. Or you might have the opposite problem — for some random reason, the beaters are hitting the sides and bottom of the bowl, making an unholy racket whenever you turn the mixer on.
These issues mean your beaters are out of alignment. But this is easy to fix: To check the beater position, put a dime in the bowl and turn the mixer on. Ideally, the beater should just graze the dime. If your beater is too low, the dime will move around actively; if it's too high, it won't move at all. To adjust beater height on a tilt-head mixer, unplug it, raise the head, and turn the hinge screw right to lower the head, or left to raise it. For bowl lift models, fully lower the bowl lift. Look for the lone screw in the center of the bowl-lift casing (in the inside of the stand) or the small screw below the two screws on the casing, depending on your model. Turn the screw to raise or lower the beater position as needed.
Don't toss your rusted mixing bowl
One reason KitchenAid mixers are so respected is because they're sturdy and dependable. And the stainless steel bowl that comes as the default with each model looks indestructible and should last for as long as the mixer — but harsh cleansers and rough scouring pads can make the bowls vulnerable to rust.
If you do find some rust spots on your bowl, don't despair – they can be easily removed with a thick paste of vinegar and baking soda mixed together. Cover any rust spots with a layer of the paste and let it sit for at least 10 minutes (for persistent rust, let it sit for a few hours). Scrub the rust off with a scratch-free scouring pad (scrub in a circular motion for best results). Rinse the paste (and rust) off, then wash the bowl with soap and water. To prevent rust from forming in the first place, avoid cleaning your bowl with bleach or detergents containing chlorine, bromine, iodine, fluorine, or the antibacterial agent Triclosan. Also avoid scraping anything metal against your bowl — and this includes stainless-steel pads. Drying your bowl thoroughly after washing can also help protect it.
Build a unique mixer with KitchenAid's customization tool
If you visit any large, high-end kitchenware shop, you'll likely see an assortment of KitchenAid mixers in different colors and finishes. But few (if any) retail outlets have the space to display the multitude of possible configurations available for the mixers. Besides being able to choose from more than two dozen different colors and finishes, you can choose from among eight patterned and textured ceramic mixing bowls, along with the stainless-steel bowl already included.
While we love to have choices, too many options can lead to decision paralysis. To make it easier for you to visualize your options (and know which would look best in your kitchen), KitchenAid offers an online customization tool that lets you choose your preferred color and extra bowl (or bowls), and even lets you see how your custom-colored bowl and mixer will look together. If you're buying a mixer as a wedding or housewarming gift for someone special — or just want to make your own mixer uniquely yours – you can even use the customizer to order a brief personalized engraving.
Here's when to use the three basic attachments

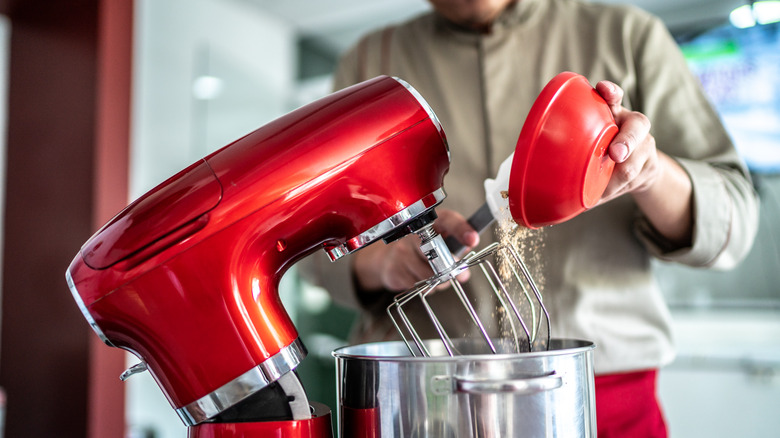
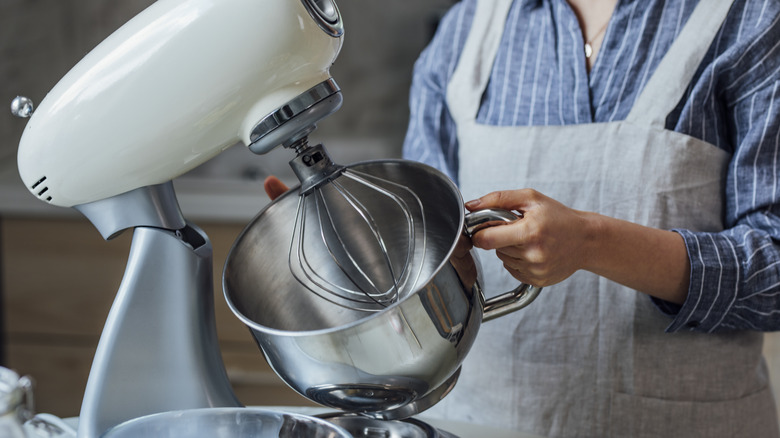
When you purchase a KitchenAid mixer, you don't just get a mixer — you also get a stainless-steel mixing bowl and three attachments for mixing, stirring, and beating. If you're not already an experienced cook and familiar with these attachments, your first impulse may be to use the whisk attachment for everything, since you probably already know what hand whisks look like and what they do. Meanwhile, the other two attachments — a large, thick hook with a blunt tip and a flat paddle-like attachment with large openings — might seem a bit mysterious, and thus remain unused on your kitchen shelf.
Each of the three attachments, however, has a useful role to play, and once you understand them, you may find yourself using all of them more than you expected. The whisk, as you suspected, is used for beating air into preparations such as whipped cream and meringues. The paddle, or flat beater, is ideal for creaming butter and mixing batters. It can also be used to mash potatoes, make meatloaf mixtures, and shred cooked meat. The hook is especially designed to handle and knead stiff doughs such as bread and pizza dough. Using the wrong attachment is unlikely to damage your machine — but using the right one will get you good results a lot faster.
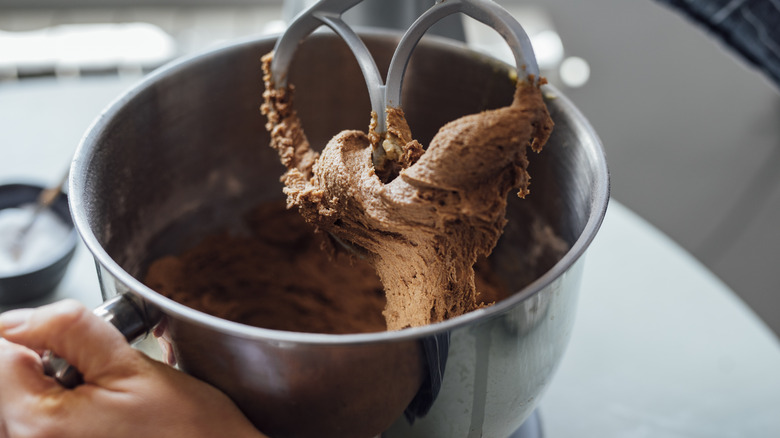
Serious bakers should try a flex-edge beater
Besides the three basic attachments that come included with KitchenAid mixers, numerous others are available for purchase. One attachment worth considering if you're a serious baker, especially if you make a lot of recipes that involve creaming butter or folding delicate batters, is the flex-edge beater. It looks and acts much like the standard flat beater, but with one significant difference: One of the edges features a wide, flexible blade that gently scrapes the sides of the bowl as the attachment turns.
This flexible blade is handy in recipes in which you'd normally find yourself stopping the mixer to scrape down the sides, such as some cake batters and buttercream recipes — the blade will reduce or eliminate the need for manual scraping. As a rule of thumb, it's a good choice for any preparation you'd mix by hand with a spatula. The regular flat beater, on the other hand, is the best tool for mashing or shredding foods or mixing ground meat mixtures or soft doughs such as pie doughs. So if it's a preparation you'd normally mix by hand with a wooden spoon, use the standard flat beater.
Here's how to keep grease from dripping into your bowl
KitchenAid mixers are blissfully low-maintenance. As long as you keep your mixer clean, handle and store it responsibly, and use it as intended, it'll most likely need little more attention from you than a quick wipe or an occasional minor adjustment. One of the features that allows the mixers to work so effortlessly is they come pre-lubricated – the engine contains a lifetime supply of industrial grease, which keeps all the moving parts moving as intended.
Occasionally, however, you'll find yourself getting odd drips of grease falling from the machine into your mixing bowl. Warm weather can sometimes trigger this, but more often, this happens either when a mixer is used infrequently or when it's overheated. So if you only pull out your mixer on special occasions and always notice grease drips, you can prevent them by running the mixer empty on high for two minutes, then wiping off any grease splatters and excess grease on the machine's moving parts before using it for real. If you notice grease drips when you're doing a lot of heavy mixing, be sure to give your mixer time to cool off before getting back to all the fun!
With the right attachments, your KitchenAid mixer can replace multiple appliances
If you're an adventurous cook, strolling through a cookware shop can feel like being a kid in a candy store. With so many cool devices available to help you make your favorite dishes — everything from ice cream makers to pasta rollers and cookie presses and more — it's hard to take it all in and not feel inspired. And it can be tempting to buy everything — even if you lack counter space. But here's the thing: You don't have to buy all that other fancy equipment.
Because if you have more culinary ambition than kitchen space, you might already be better equipped than you think. If you already have a KitchenAid mixer, for example, you have the means to not only mix and beat, but to shape pasta, make shaved ice desserts, and even custom-grind your own sausage meat. KitchenAid offers a number of optional attachments specifically designed to do these tasks — they attach to the stubby tube at the front of your mixer arm. In short, with the addition of a few compact attachments, your mixer can shape-shift into a pasta machine or sausage maker — saving you cash and counter space.
You can make much more than baked goods with your KitchenAid mixer

Most of us associate our KitchenAid mixers with big baking projects — a favorite layer cake or the meringue topping for a creamy pie, for instance. And of course, the mixers are a real godsend for these projects, enabling us to whip up egg whites and fluffy fillings and batters in just a few minutes. But if that's all you're using your mixer for, you're missing out on its many other time-saving opportunities.
Here's an example: Say you're planning on making meatballs and mashed potatoes for dinner. Instead of mixing your meat by hand, use your KitchenAid mixer with the flat beater attachment – you'll save time while keeping raw meat off your hands. As for those mash potatoes: Use the mixer and flat beater again — your arms will thank you. The flat beater is also surprisingly efficient at shredding meat — it's excellent if you need to shred a bunch of chicken for a sandwich filling, for example, or are preparing pulled pork for serving. And with the right attachments, you can grind your own sausage meat or roll out fresh pasta. So if you have a lot of cooking to do but not as much time as you'd like, think of how your mixer can help.
Don't plug your KitchenAid mixer into a power strip
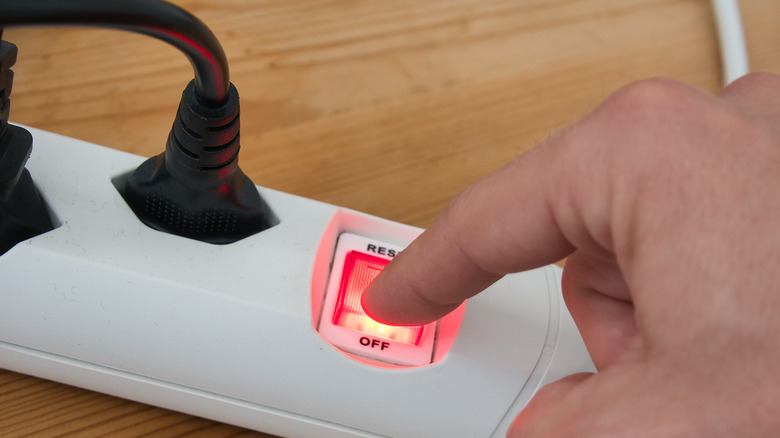
If you've ever mixed bread or pizza dough in a KitchenAid mixer, you've seen what a powerful machine it is. It seems that no matter how stiff the dough, it just keeps pushing on. You might hear some engine strain or feel the casing warm up a bit, but a KitchenAid mixer is no diva — when there's serious mixing or kneading to do, it's strong enough to do it.
But just as some elite athletes need to consume more calories than couch potatoes, a KitchenAid mixer needs to consume more electricity than most small appliances in order to work as intended. So to ensure your mixer gets the juice it needs as safely as possible, be sure to plug it directly into a wall socket rather than into a surge protector or power strip. Pulling large amounts of power through these intermediary devices risks not only damaging your mixer's engine, but raises the risk of a cord shorting out and potentially causing a fire.
A few easy strategies can help you avoid mixing messes
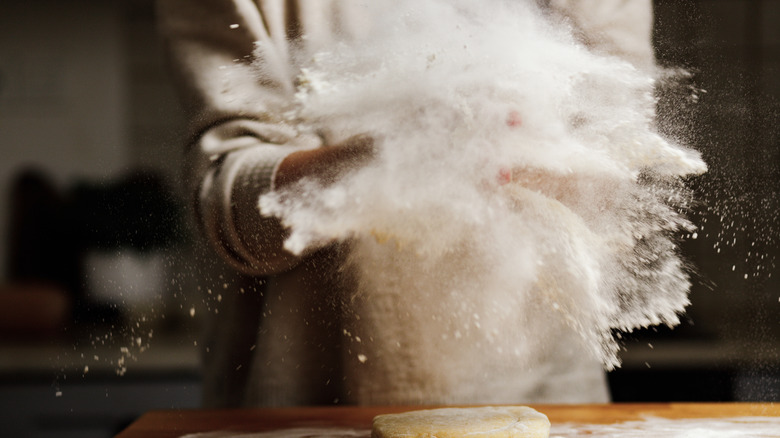
We've all done this: You're happily standing by your KitchenAid mixer as the beater spins its way around a bowlful of creamed butter, sugar, and eggs. Looking to the next step in your recipe, you see it's time to add the dry ingredients. So you grab your measuring cup full of flour and leavening, pour it into the bowl — and find yourself in the middle of a flour explosion as big clouds of the stuff blow all over the counter and into your hair and face. Nope, it's not fun!
But luckily, it's totally avoidable. To make sure your dry ingredients and your batter stay where they belong, rather than flying all over you and your kitchen, choose from a couple simple strategies. One is to start mixing in the dry ingredients at low speed – you might find it works best to turn off the mixer first, put the dry ingredients in, then turn the mixer on at the lowest speed. Another is to improvise a bowl cover to keep any flyaway ingredients contained. You can drape a dish towel over the arm of the mixer to cover the bowl or cut a hole into the middle of a large plastic lid and place this over the bowl to keep dry ingredients from escaping — the beater attachment will fit through the hole. Whichever method you choose, you'll never have to worry about mixer-induced flour explosions again.
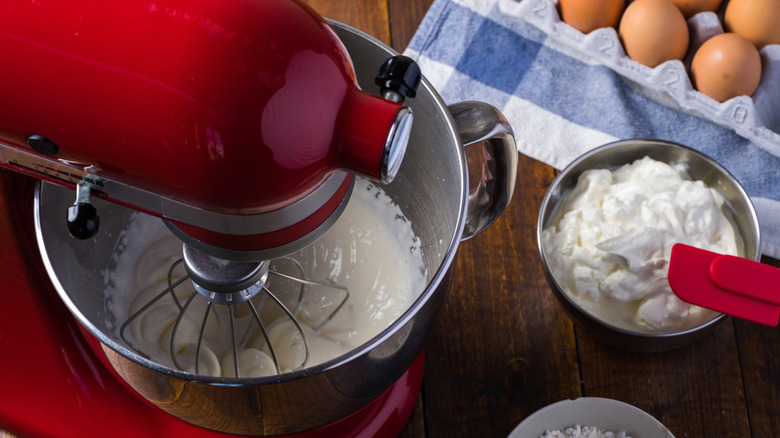
For faster, fluffier whipped cream, chill the mixing bowl

Before the advent of electric mixers, making whipped cream was a test of your dedication to dessert: Was the prospect of sweet, fluffy clouds of cream with your pudding or pie enough motivation to get you through a long, physically tiring bout of whipping your cream by hand? Anyone who's tried whipping a large quantity of cream with just a hand whisk can confirm it's an easy way to get a super sore arm. And while KitchenAid mixers do a great job of whipping up cream quickly, you might have noticed that sometimes it whips up faster than others.
With a little advance planning, however, you can speed up your whipped cream production even more while ensuring consistently firm, fluffy peaks every time. Cream whips best when it's really cold. So besides starting with cream straight from the fridge, chill your mixing bowl before you begin. This will ensure your cream stays cold as you whip it, which can give it a welcome boost on the days when your kitchen is warm.
Spray-paint your mixer to give it a fresh new look
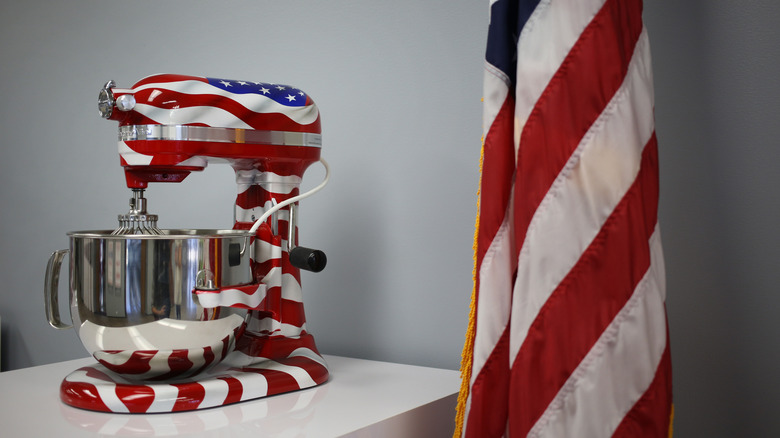
If you've had your KitchenAid mixer for several years, you've probably come to appreciate its reliability and how it speeds up and simplifies otherwise complicated cooking and baking projects. But as much as you love it, you might occasionally eye some of the newer, more trendy color choices for the mixers and start experiencing some serious FOMO. It would be so nice to have a new mixer that just happens to match your newly renovated kitchen, but ditching your trusty old mixer just feels wrong, not to mention wasteful.
Fortunately, you don't need a brand-new mixer to get a hot new color — all you need to give it a makeover is a can of spray paint and a bit of elbow grease. First, unscrew and remove any parts that can be removed from the mixer's exterior — such as the metal band with the KitchenAid logo and the metal base that holds the bowl. Take pictures first to make reassembly easier. Next, sand the painted surfaces with a 120-grit sanding block until the paint is no longer glossy. Next, spray paint the mixer, applying a few light coats until the old color is completely covered. Once the paint has dried, seal with polyurethane, following the product instructions. Finally, reattach the external pieces you removed — and your newly renovated mixer is ready for its closeup.