10 Knife Sharpening Myths You Need To Stop Believing
Every cook needs a reliable set of knives in the kitchen, or at the very least, these three essential ones. Whether you use stainless or carbon steel, a sharp set of knives is essential for cooking. While it might seem counterintuitive, the sharper the knife is, the safer it is. Dull knives can slip off food and into your fingers very easily, so maintaining the blade's edge can save you time, money, and a great deal of pain in the long run. A properly honed knife can also make chopping onions less tear-inducing, showing another practical side of a good blade edge.
It's understandable to be a little apprehensive if you've never tried sharpening your own knives before. Using a whetstone, steel honing rod, or even a specially-made knife sharpener takes a bit of trial and error, but it is absolutely worth it to be able to maintain your own cutlery safely. Hacks like using the bottom of a ceramic bowl might sound easy, but they are actually dangerous. With that in mind, we've compiled some of the most common knife-sharpening myths out there — and the tips that will help you forget them.
Hard pressure hones a blade
Many people think that bearing down on a blade while sharpening it will result in a finer edge. The truth is that pressing too hard can damage the blade, chipping or snapping it if the metal is thin enough. Neither is helpful because a chipped blade will snag on whatever it's cutting and tear it. And of course, a snapping blade is downright dangerous.
To avoid flying pieces of sharp metal, it's essential to apply a consistent, steady, and firm pressure as you run the knife's edge along the whetstone or through the specialized sharpener. The pressure should only come from your fingers and not from your entire hand. The grit of the whetstone does the majority of the work for you, so using too much pressure wears down the knife faster than it should. As a general rule, if you see muddy, dark gray streaks after a few full strokes along the whetstone, you've likely got the pressure correct. The streaks are small metal shavings, and they can help you create more friction to get the knife sharper without extra work.
Sharpen your knife often
Knives need to be regularly maintained, or honed, for the best performance. But that doesn't mean that you need to sharpen them every week, or even every month. Over-sharpening a knife wears down the blade, decreasing the utensil's lifespan. So, sharpening your cutlery before it's needed will result in you replacing pieces before you have to.
Honing a blade involves using a steel rod called a honing steel, honing rod, or sharpening steel. Whatever name it goes by in your home, the simple tool helps realign blades without removing much metal. Sharpening has to remove pieces of the blade to create a new cutting edge, which is why over-sharpening ruins your cutlery.
There are several ways to know when it's time to resharpen your knives. If the blade is slipping off foods or has visible chips, it's time to break out the whetstones. If there's only a little dullness on the blade's edge, you can hone the knife instead. To determine which is necessary (or to see how sharp your knives have gotten) there are a couple of tests you can try: A bread test for serrated blades and a tomato test for straight-edged ones. Ideally, a sharp enough knife will pierce the fruit easily without pushing into the skin and crushing it first.
Changing the angle will get the edge sharper
This one is a game-changer for home cooks. Many people will change the angle when grinding their knife blades. This is a mistake because it rounds the edge, leaving it dull and unsafe. Instead, choose one direction to angle the knife and keep it consistent for the best results.
As HORL founder and CEO Timo Horl explained to Food Republic, kitchen knives should be sharpened at a consistent angle, ideally 15 to 20 degrees. There are lots of ways to be sure you've gotten the right angle, such as using a marker to color the edge of the knife. After you pass the edge over the whetstone a few times, check to see if the marker color is coming off evenly. If it is, you've found the correct angle. If it looks blotchy, re-position the angle and try again before checking.
You can also use the coin method, where a stack of two to three pennies helps the sharpener find the correct angle. Place the pennies under the hilt of the knife until the edge is flush with the whetstone. This is one of the best ways for beginners to learn how the knife feels when held at the proper sharpening angle.
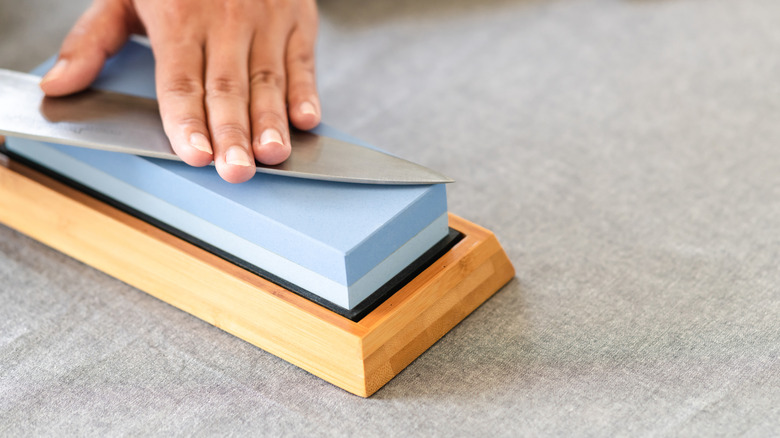
A dry stone is fine to use
To work properly, a sharpening stone, also known as a water stone or whetstone, needs to be just that — wet. Using a dry stone creates too much friction and will damage or chip the blade, not to mention sounding very much like fingernails on a chalkboard. Fortunately, it's easy to avoid that by prepping the stones. Water helps the metal slide over the rough stone surface, honing the edge into a fine cutting instrument.
There are many different grits, or grain sizes, of whetstones (more on that later). But whatever kinds you're using, they'll need to be soaked in water for between 10 and 20 minutes to fully saturate. When you first place the stone(s) in water, there will be a stream of bubbles as the stone hydrates. Wait until the bubbles stop before using the stone to be sure there are no dry spots when you start sharpening.
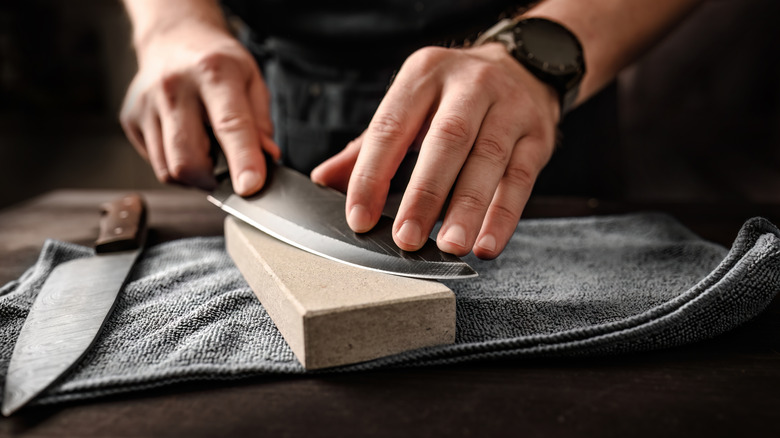
A burr isn't necessary when sharpening
A burr is a small hump on the metal that forms during sharpening. This is a good thing because it lets you know when to turn the knife over to work on the other side. Without a burr forming, you haven't ground the metal enough to effectively sharpen the knife. In fact, the burr itself forms when you've removed enough metal to make the blade's edge curve over to the opposite side. When that happens, flip the knife over to begin working on the other side. The burr should be completely removed when done sharpening to ensure the edge cuts correctly.
One of the best ways to do this is with a thick piece of leather called a strop. Leather strops have been used for centuries to help hone everything from knife blades to straight razors to scissors. If you don't have or don't want to invest in a strop, a finely grained whetstone removes burrs easily, too.
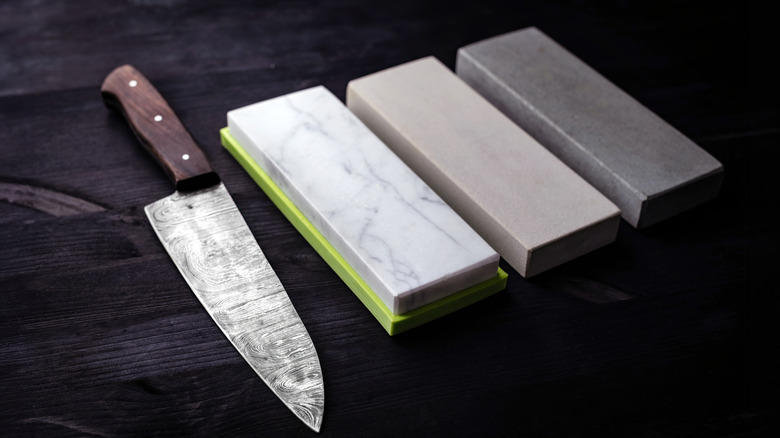
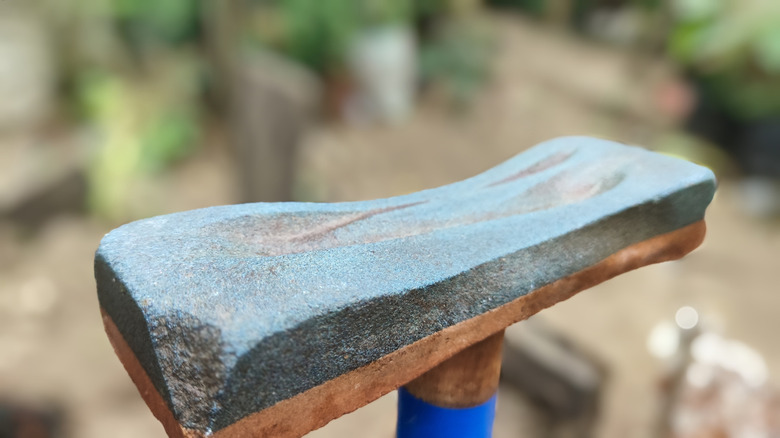
The grain of the stone doesn't matter
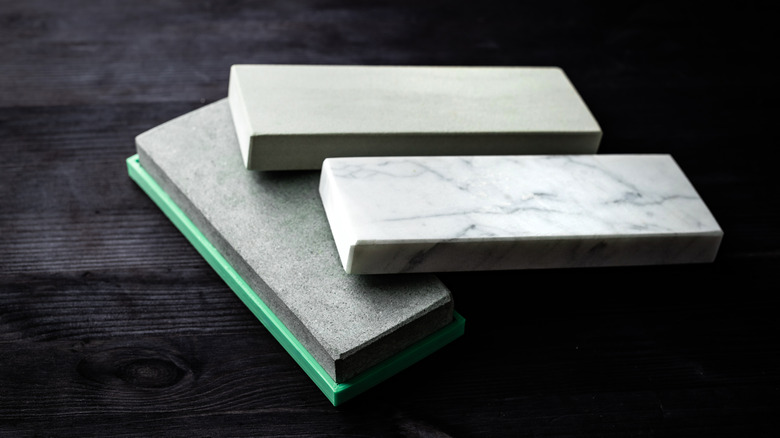
This is one of the most egregious errors a home cook can make when choosing the correct stone to sharpen their knife with. Different whetstones have different-sized grains, meaning that a fine grain is great for honing an edge but not for fixing notches along the edge. A coarser grain can grind out notches, but it isn't ideal for finishing the blade. It's easy to tell the difference between coarse and fine stones by their numbers. The coarser the grain, the lower the number will be, while the higher the number, the finer the grain will be.
You'll need several stones to properly sharpen the knife. Start with the coarsest stone to grind out the major imperfections and re-create the edge. Then move on to a medium-grained stone and repeat the process with consistent pressure to help shape the blade further. Finally, finish the knife by honing the blade on a fine-grained whetstone. This will remove the burr and help you achieve the most stable, sharp edge possible. For the best results, don't go beyond double the number of the previous stone. For instance, if you begin with a coarse 1,000-grit stone, the medium stone should be a 2,000 grit. The finer stone can be a 4,000 grit after that, and then even an 8,000 if you want a mirror finish on your knife.
It's a quick process
Master sharpeners and cooks with decades of experience can make honing a knife look suspiciously easy and quick. That often makes more inexperienced people think they're doing something wrong by taking longer than they think is necessary. While sharpening knives shouldn't take hours, there is a definite process that must be followed. Moving too quickly through steps like grinding and not being careful with the angles of the blade will leave you with an incomplete, uneven, and unsafe edge.
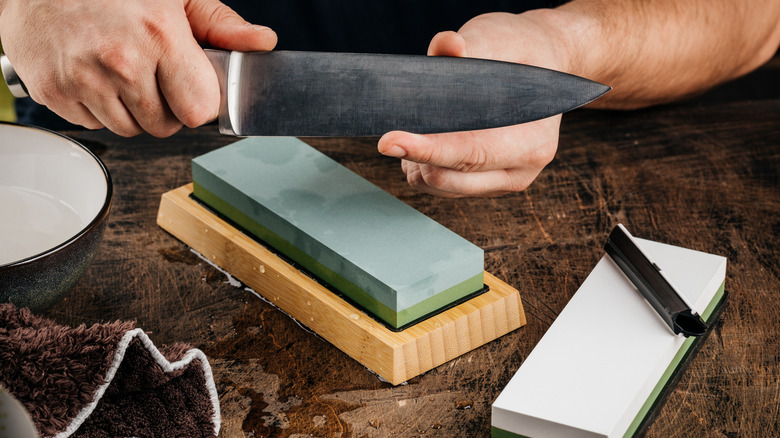
To create the best blade possible, gather whatever knives you need to sharpen, the whetstones, and a container of water if they're being used or a specialty sharpener if not. Soak the stones to hydrate them, make sure they're flattened (more on that later), and then place them on a tea towel or other non-slip surface before you begin. Some stones even come with their own wooden or rubber bases for safety and storage. Then take your knife and find the best angle for it using pennies or a marker. Apply steady pressure as you push or pull the blade.
Release the pressure, and bring the knife back to the starting position. Repeat the pressure and pull or push until you feel a burr has formed on one side. Flip the knife, and find the correct angle again before repeating the push/pull process on the coarse, then medium, and then fine-grained stones. Finish by testing the blade's sharpness on a piece of paper or a tomato, and put your supplies away until the next sharpening session.
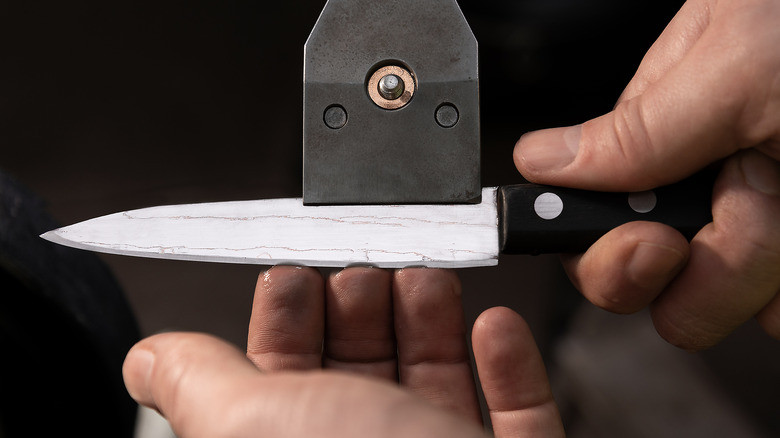
You can't grind the knife's tip

Sharpening the tip of a knife sounds daunting, and with good reason. The tip is the thinnest, most pointed part of the blade, and is harder to make even. Some people don't even want to attempt shaping the knife tip, but that's a big mistake when it comes to maintaining your cutlery. When cooks fail to sharpen the tip, what they're actually doing is flattening the blade. This keeps the knife from easily completing a full stroke through the food because the edge is uneven.
To avoid this, try lifting the handle of your knife to make the tip flush with the whetstone. From there, you can gently angle the blade while completing short strokes on the stone. It's best to check the tip frequently to be sure it's even and in line with the rest of the edge. If it isn't, repeat the tip-sharpening steps a few more times until your fingers can't detect a difference in thickness along the blade.
Whetstones can be curved
This one might seem odd, but sharpening stones have to be regularly flattened out to work properly. Stones with curved sides, called dishes, will produce uneven blades, so the whetstone has to be flat to achieve the correct angle to sharpen the metal. It takes a long time to create dishes in a whetstone, but, luckily, it doesn't take very long to remove them.
When it comes time to flatten a sharpening stone, grab a pencil and draw cross-hatching across the entire surface. A specialized flattening plate is used to rub the whetstone's surface and restore it. After a couple of passes over the flattening plate, check to see if the cross-hatching on the stone is wearing away evenly. If it isn't, there are still curves on the surface. Another quick way to see if the stone is flattened is to place a ruler on top of it. If any light shines under the flat edge, there are still dishes to be ground out.
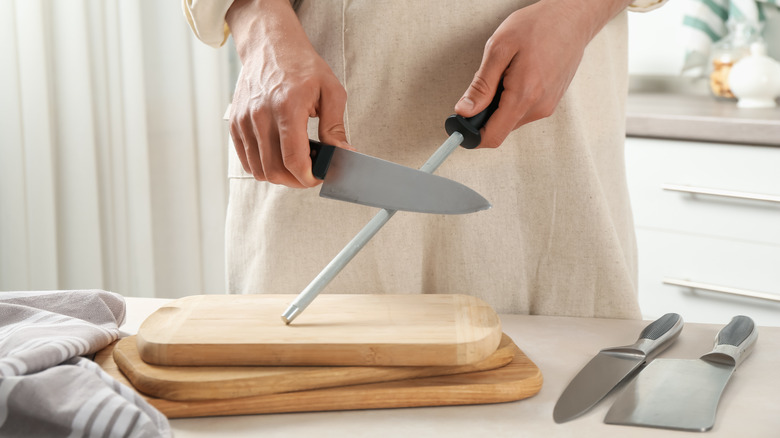
Steel honing rods aren't needed
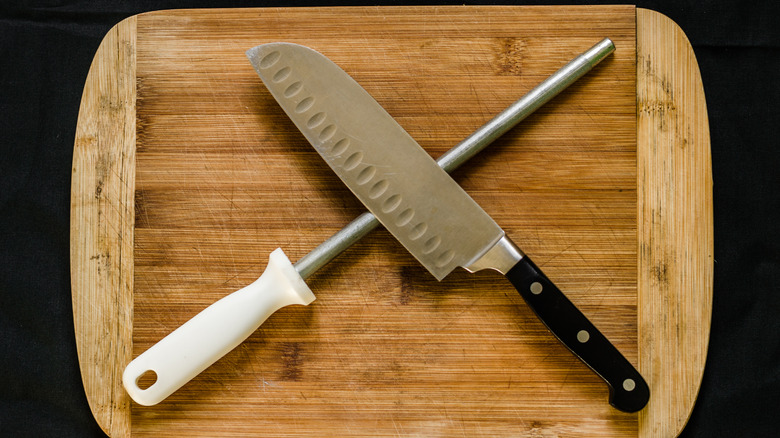
A good steel rod to hone your knife's edges is every bit as essential to maintaining a knife as a series of whetstones. The steel allows you to quickly hone a knife blade, keeping it maintained between sharpening sessions. Many knife sets come with a honing rod, so if it's been sitting in a drawer for a while, now's a great time to fish it out.
If you've never worked with a sharpening steel before, it follows the same principle as a good whetstone, but without the water. Take the knife blade and hold it at a 15- to 20-degree angle against the rod. Keep the pressure consistent as you pull or push the blade across the steel. Honing doesn't remove the same amount of metal as sharpening does, so don't expect to see a burr form here. Instead, pass both sides of the knife over the steel four or five times each, alternating each time to keep the re-aligned edge even.