The 2 Major Drawbacks Of A Bread Maker
If you're a Millennial, you might remember your parents getting a bread maker (or machine) in the 1990s and whipping up fresh — though oddly shaped — loaves with minimal work. Many of us, however, preferred the bread from the grocery store, so those machines were eventually tucked away on a dark shelf, destined for Goodwill as artifacts of a bygone era. While bread machines as a whole never disappeared, they have since improved and are now considered smart kitchen gadgets. But according to Nathan Myhrvold of Modernist Cuisine — the co-author of "Modernist Bread at Home" — the devices still have two major drawbacks.
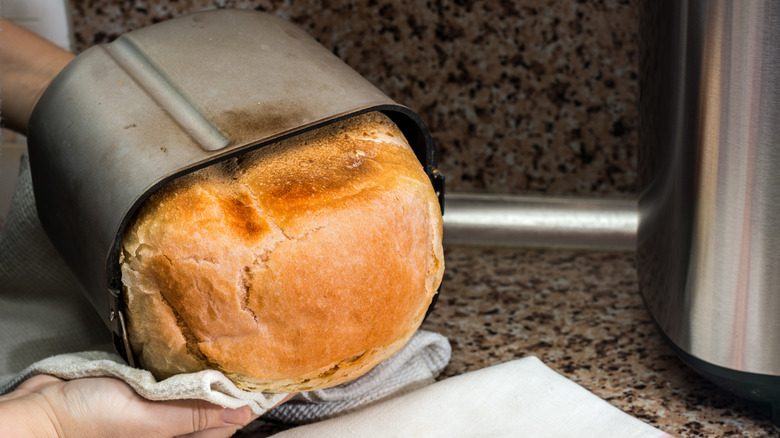
"First, they have a limited amount of torque, which means they aren't powerful enough to properly mix the dough," Myhrvold explained. Secondly, he noted, most bread machines can't reach the high enough temperatures needed for the ultra-delicious Maillard reaction to occur. "Bread machines don't bake bread so much as slow-cook it," he said. This means loaves often end up with pale, par-baked tops rather than the deep golden crust you want.
How to get better results with a bread machine
We get it — making bread by hand isn't for everyone. So, how can you get the best possible performance out of your machine despite its drawbacks? For starters, Nathan Myhrvold suggests mixing the dough separately. You can do this by hand, in which case he recommends using the "autolyse technique" — which requires combining only the flour and water and letting the mixture rest for at least 20 minutes before adding the salt — or you can rely on your stand mixer (just make sure it's working properly). Once all the ingredients have combined, scrape the dough out and place it either in a plastic tub with lightly oiled sides and bottom, or in a bowl covered with plastic wrap.
Myhrvold then suggested letting the dough ferment in the refrigerator for 12 to 18 hours. The bread machine finally comes into play when you use it to proof your loaf. He advised doing so at room temperature, with the lid closed so the dough doesn't dry out (further proof that you don't need a dedicated proofing box for great bread). After baking, if you want the top crust to take on a deeper golden color, Myhrvold recommended popping the bread into a preheated oven for 5 to 10 minutes.