12 Tips You Need When Cooking Ribs
Mastering the art of cooking ribs is not for the faint of heart. While an incredibly rewarding experience, achieving the perfectly tender and smoky rib is a labor of love. It requires time, patience, and — most importantly — knowledge. You can't simply throw a rack of ribs in the oven for a few hours and expect greatness. As any pitmaster can attest to, there is a lot that goes into getting it right. You need to know which type of meat to use, which type of wood works best, how to prep your ribs, how long to cook them for, how to keep them moist in the heat — the list goes on.
And while it may seem intimidating, don't worry; mouthwatering homemade ribs are at your fingertips. All you need are a few tips under your belt. Once you know what it takes to make the perfect rack of ribs, you'll make the transition from home cook to pitmaster in no time.
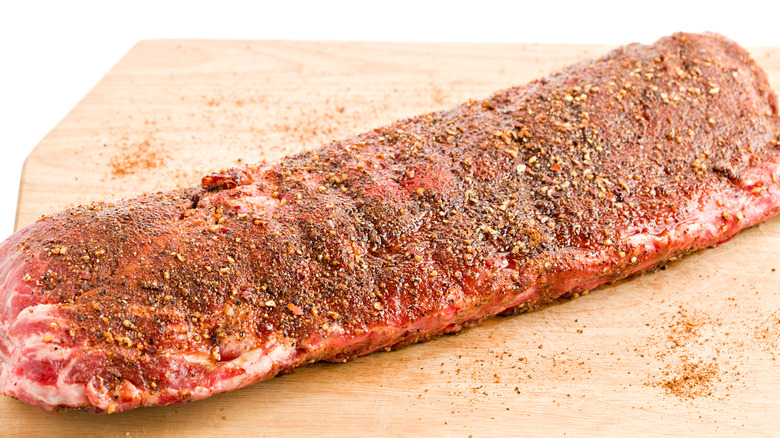
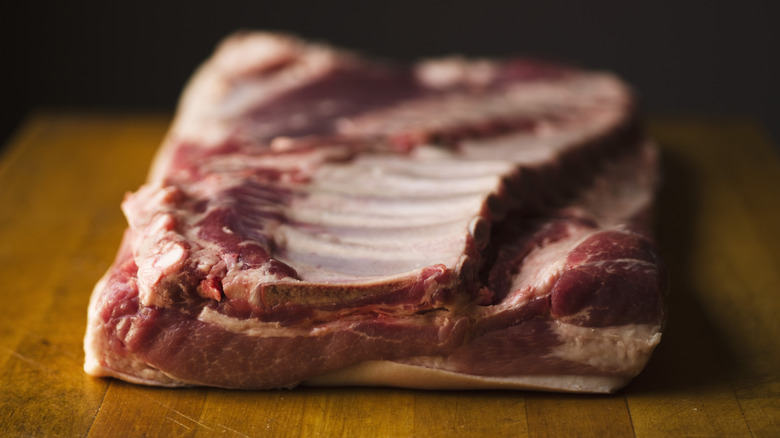
Buy the right meat
Serving up the perfect rack of ribs starts at the grocery store. Not all pork ribs are created equal, so you'll need to know what to buy to ensure the finished product meets your expectations.
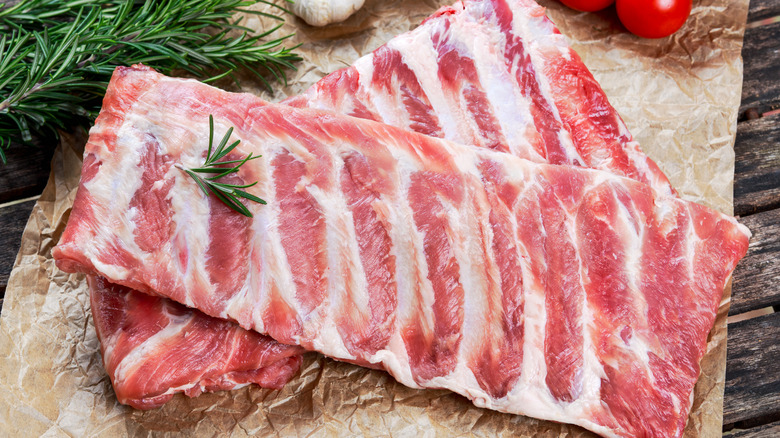
There are three main cuts of ribs to choose from: baby back ribs, spare ribs, and St. Louis spare ribs. Baby back ribs are leaner than the other cuts but still very meaty. They don't need to be cooked for as long or at as low of a temperature as the other ribs, making them a good choice if you don't have a smoker. The cut is taken from the tenderloin that runs along the pig's spine, a relatively small section that gives the cut its name.
Spare ribs are the fattier cut, coming from the bottom of the rib cage where the ribs meet the belly. Since this cut contains a lot of fat and connective tissue, it's super important to cook spare ribs at a very low temperature for a long amount of time. Otherwise, they'll come out tough and chewy instead of tender and delicious.
Finally, there are St. Louis ribs, which are essentially spare ribs with a few pieces cut off. The result is a perfectly uniform rack of ribs that cooks way more evenly than their more asymmetrical counterpart. When it comes to the difference between St. Louis and baby back ribs, the former cut is generally meatier.
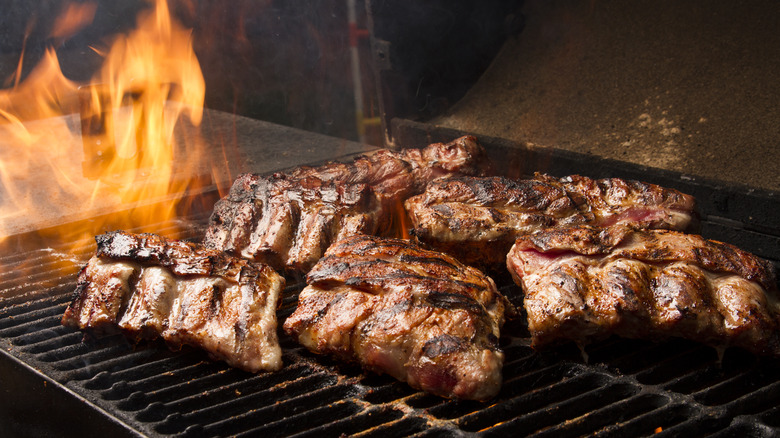
Cook your ribs low and slow
No matter what cut of ribs you choose, it's essential to cook them at relatively low temperatures for a good chunk of time. If you cook them over too high of a heat, you can kiss your chances of serving tender ribs goodbye. Super hot temps can easily overcook ribs and make them too tough to eat. With the low and slow method, the meat retains its juiciness while breaking down the connective tissue and rendering out the fat, leaving you with moist, fall-off-the-bone ribs.
The recommended amount of time for cooking ribs will depend on how you plan to cook them. You have three options: cooking them in a smoker, in an oven, or on the grill. Using a smoker will take the most amount of time, so plan for about four hours of cooking if this is your preferred method. BBQ pork ribs cooked in the oven and finished on the grill should take about three hours total: 2½ hours in the oven at 325 degrees Fahrenheit, and about 30 minutes on a high-heat grill, flipping halfway through.
Use a butter knife to remove the membrane
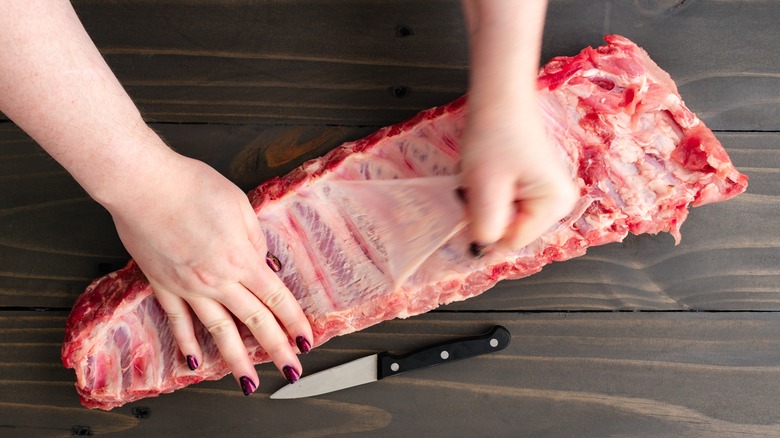
Every rack of ribs you purchase from the butcher or your local grocery store will come with a thin layer of membrane on it called the peritoneum. While some choose to leave the membrane on while cooking, the key to tender and flavorful ribs is to remove it. The membrane is made out of elastin, and no amount of cooking will break down or render it. So inevitably, leaving it on will make the ribs a bit more chewy than if it was removed in the beginning. Plus, it prevents the ribs from fully absorbing all the seasonings you'll add.
Removing the membrane is actually very simple to do, and all you'll need is a butter knife and a paper towel. Slide the butter knife between the rib meat and the membrane until it separates. Then, with a paper towel in your hand, grab the end of the loose membrane and gently peel until it's completely removed.
Pat your ribs dry before seasoning
Raw ribs will naturally have some moisture to them when they're fresh out of the packaging. And while you might think nothing of it, removing some of that moisture is actually super important for achieving the perfect rack of ribs. Wet ribs will produce a steaming effect, which is the opposite of what you want. Instead, you want your ribs to brown and create a delicious crust on the outside. This rule doesn't just apply to ribs: Patting your food dry first is essential for searing any type of meat to create that caramelization effect that is so desirable.
Since it's so important for meat to be dry before hitting the heat, adding moisture to the meat in the form of marination or basting isn't exactly ideal, either. But if you do choose to marinate your ribs in wet ingredients, plan to still pat them dry before cooking them. As a rule of thumb, using a paper towel to pat your meat is best for maximum absorption.
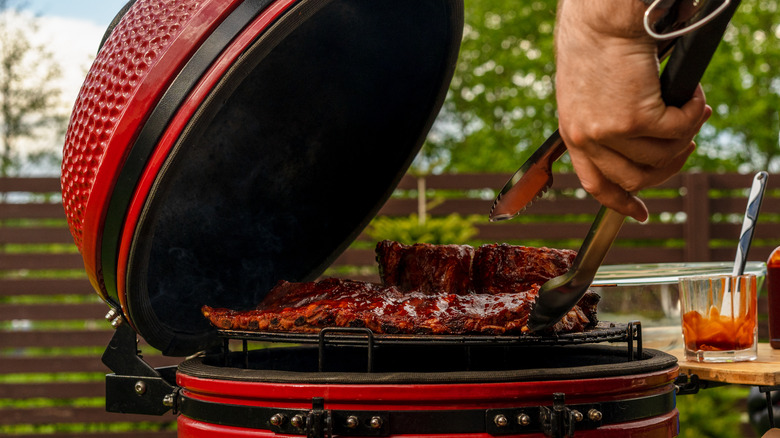
Turn your grill into a smoker
Cooking ribs in a smoker is hands down the best cooking method. It utilizes an indirect heat that lets your ribs cook low and slow until they're fall-off-the-bone tender. It also adds a layer of smokey flavor that you really can't get from an oven or grill alone.
But the truth is, smokers aren't exactly a typical household appliance. There is a workaround, though. If you want to make ribs at home without a smoker, you can fashion what is essentially a makeshift smoker with a grill and a smoker box or tube smoker (a stainless steel container you can fill with wood chips of your choice). The idea is to create a two-zone setup by building a fire on only one side of your grill and placing the ribs on the opposite end, letting them cook over indirect heat. This simple hack turns your grill into a smoker and allows for a delicious smoke to build up and permeate your ribs.
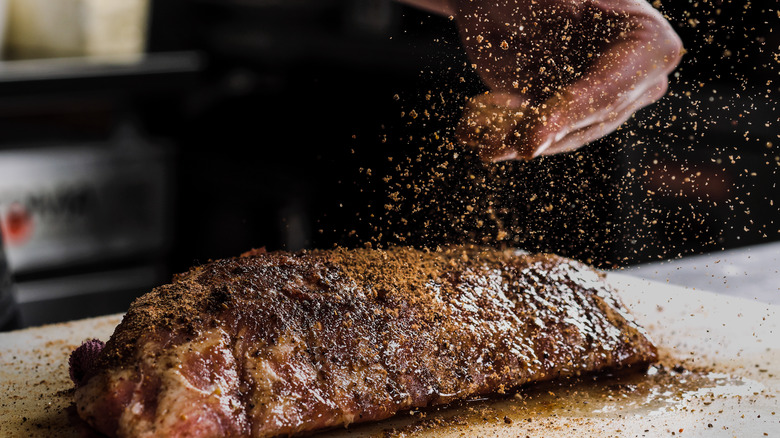
Let your ribs sit in the seasoning
The secret to delicious ribs is patience. Each step is basically just a waiting game and can sometimes require hours of time to ensure the ribs come out perfectly. And it's not just the cooking portion that's time-consuming — prepping your ribs can take just as much time, possibly even longer if you do it the right way.
The part of prepping that takes a while is letting the meat sit in your favorite dry rib rub. As a rule of thumb, you should wait two hours minimum for the flavor to fully penetrate the meat and take its full effect. However, the real flavor comes when you really plan ahead. Letting the seasoned ribs sit overnight in the fridge wrapped in foil is a game changer when it comes to flavor. For an added punch, we recommend covering your ribs in mustard before adding your seasoning. This will not only amp up the flavor but help the seasonings stick.
Use fruit wood when smoking your ribs
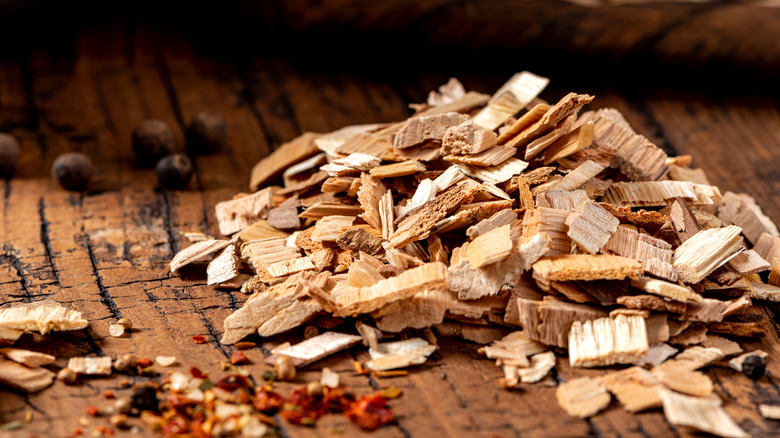
There's something about smoking your ribs with wood that adds a depth of flavor you can't achieve otherwise. And if you're a seasoned cook, you know that there are a ton of different types of wood that can be used, each imparting its own unique flavor to the food. So, what is the best wood to smoke when cooking pork ribs?
With ribs, you want wood chips that produce a lighter smoke, since a heavier smoke can easily overpower the taste of the pork and make it bitter. So, in this case, using a fruit wood is going to be your best bet. It creates a lighter smoke that'll infuse your ribs with a fruity flavor that will complement the pork well. Some popular types of fruit wood that work perfectly for smoking ribs include cherry, apple, and pecan. Do keep in mind that even with fruit wood, using too much can be bad news for your ribs — so only use a moderate amount at a time.
Wrap your ribs in foil while cooking
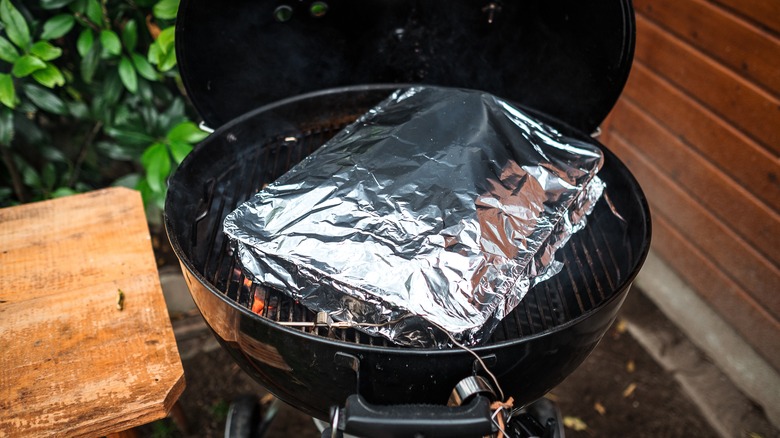
Dry ribs are every pitmaster's worst nightmare. It's an easy mistake to make, especially if you're new to the world of barbecue. Considering the fact that ribs need to cook for hours at a time, maintaining juicy ribs is no easy feat.
One way to ensure your ribs don't dry out is by wrapping them in foil for a couple of hours while they cook. This method allows the meat to braise in its own juices and fully absorb all the seasoning so you get a tender and delicious rack of ribs. This technique comes from the concept of wrapping food in banana leaves, which keeps the food from losing any flavor. When it comes to ribs, though, the key here is to smoke them for a few hours before wrapping them up so the meat has a chance to brown and develop a crust. Then, let them cook for another two hours fully wrapped.
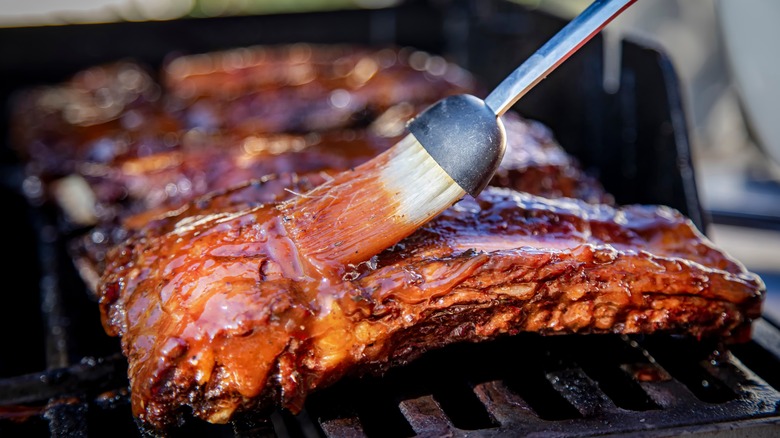
Keep your ribs moist while cooking
Beyond wrapping your ribs in foil, there are other ways to keep them moist while they cook. Two well-known methods for attaining juicy ribs are known as mopping and spritzing. Mopping is essentially brushing your meat with moist ingredients while spritzing is spraying the meat with moisture from a spray bottle. Using either method can be effective for keeping your ribs nice and juicy while they spend hours in the heat — but only if done correctly. While it might seem like common sense that adding moisture will keep food from drying out, sometimes it can do more harm than good. For ribs specifically, these methods run the risk of rinsing off the spice rub, preventing a crust from forming, and increasing cooking time.
When mopping or spritzing, the number one rule is to apply these ingredients only after a crust has formed on your ribs. That way, your crust can get as crispy as possible and you won't lose too much of your spice rub. If you choose to mop your ribs, use ingredients that are high in sugar and have an oil base to encourage a sugary crust to form. Warm up your brush and mop sauce before use to prevent an increase in cooking time.
Smoke your ribs bone side down
There are two sides to every rib. One side is meatier, while the other side has bones that are more visible. This is important to keep in mind as the side you cook your ribs on will have an impact on the quality of the final product.
As you might know, ribs cook best when exposed to indirect heat, since too high of a temperature can overcook ribs and dry them out. Because of this, it's always best to cook your ribs bone side down. This essentially means placing the side where the bones are most visible closest to the heat source. This does two things: It will protect the meatier side from getting too close to the heat so it can render out without becoming too dry. It will also allow your ribs to develop a nice crust, known as "bark," without being disturbed by the grates of the grill.
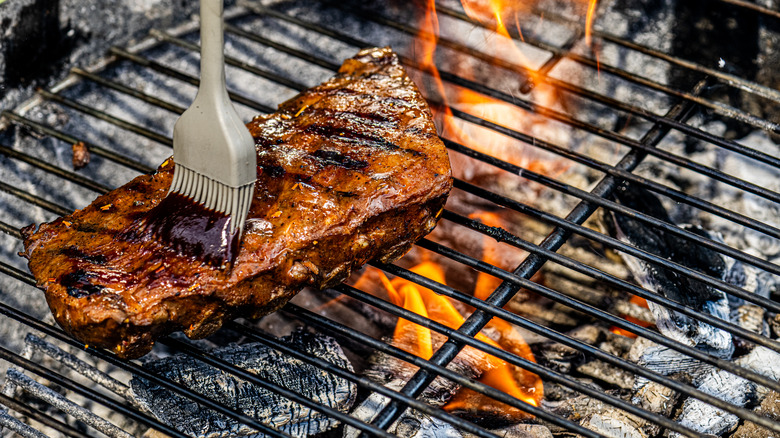
Add your sauce at the end
One common mistake that beginners make when cooking ribs is adding the sauce before putting it on the grill, in the oven, or in the smoker. While the goal might be to imbue the ribs with as much of that delicious BBQ flavor as possible, you really want to wait until your ribs are nearly done before applying your sauce. Since you'll be cooking your ribs for hours, adding your sauce too early can cause it to burn. When this happens, unfortunately, you'll be left with ribs that have a layer of burnt crust on the outside.
But that doesn't mean you don't want to cook the ribs at all after the BBQ sauce is applied. In fact, you should plan to cook your sauce-slathered ribs for at least another 10 minutes to an hour to achieve a perfectly crispy and flavorful result. Don't forget to cook your ribs for a few hours first for best results.
Let your ribs rest after cooking

If you thought the wait was over, then you're in for a surprise: Another resting period is required after your ribs are fully done cooking (don't worry, you're at the home stretch). Once the ribs are pulled from the oven, grill, or smoker, it's good practice to allow the meat to rest before digging in. And this doesn't just apply to ribs — generally all meat needs to rest after cooking. This helps the meat redistribute all the juices so every piece is as delectable as the last.
The ideal resting time for ribs is 10-20 minutes. The thicker the rib, the longer the rest period should be. To keep your ribs warm while they sit, one tip is to create a little tent with your foil and place it over the ribs. Keep it pretty loose, since a tight space between the foil and the meat can create a steaming effect that could affect the overall quality of your ribs.