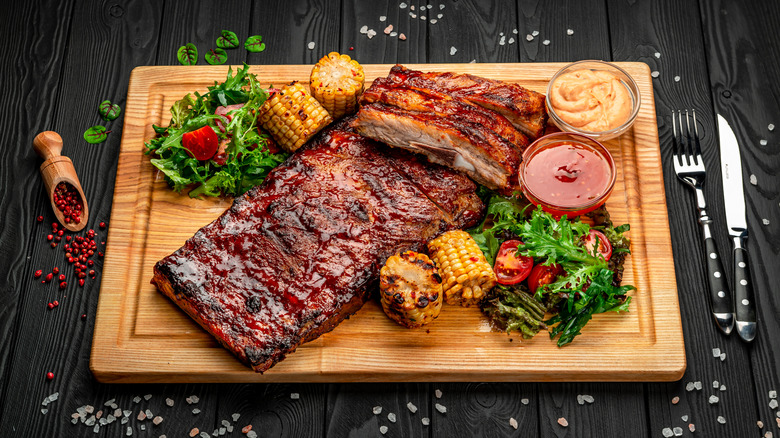
10 Mistakes You Could Be Making Cooking BBQ Ribs
Summertime means barbecue, and no food is more quintessentially barbecue than saucy, tender ribs. They're so good, in fact, that you've decided it's time to fire up the grill and whip up your own – you've got the equipment, a clear schedule, and enough patience to babysit the meat for several hours. What could go wrong?
Well, churning out the perfect rack of ribs isn't quite as easy as Food Network chefs or the most popular BBQ chains make it look. There are a number of tips and tricks for cooking them, but perhaps even more crucially, simple mistakes you'll want to avoid. Nobody wants to bite into a rib that's dry, overly chewy, or lacks flavor. And while ribs might not seem like they need much attention to cook — there's a fair bit of waiting, after all — they're extremely eager to expose every teensy shortcut you thought you got away with. That's where we come in. From sauce to silverskin, we've rounded up some of the biggest reasons your barbecue ribs keep falling short to help give you an edge before your next backyard cookout.
Cooking on a dirty grill or smoker
Sometimes issues with ribs go beyond technique. One of the best places to start is your grill — specifically, whether you're cleaning the grease on there often enough.
Without proper, regular cleaning, grease from old cooks can build up on the grates or in the trays below the grill. Once heated, those greasy grates can kick up bad smoke, lending an acrid, bitter taste to your ribs. Carbonized grease on the lid can also flake off and drop back onto your food, bringing harsh, scorched notes. Dirty grates are woefully sticky, so instead of gradually forming bark, your ribs could latch onto the grates and refuse to release properly. Ash and gunk buildup can block airflow, too, keeping your grill or smoker from reaching temperature properly and throwing the whole cook off course.
To keep this landslide of problems at bay, it's a good idea to clean your grates every time you use them, preferably while they're still warm. Pay attention to the grease traps and drip trays as well, and clear them out regularly to prevent flare-ups. Vinegar, mild dish soap, warm water, and manufacturer-approved grill grate cleaners will serve you well here. Steer clear of harsh, corrosive cleaners, including oven cleaner, as these can damage your grill, especially stainless steel or coated surfaces. Try to avoid wire-bristle brushes, too. While effective, the bristles can detach, cling to the grates, and later hitch a ride onto your food. If swallowed, they can cause serious injuries to the mouth, throat, or digestive tract.
Boiling before grilling
You've done the math: Six hours is far too long to spend negotiating with ribs. So you come up with a brilliant shortcut: Boil the stuff first. It might technically get you to the finish line faster, but faster doesn't always mean better.
Meat gets part of its flavor from water-soluble amino acids, peptides, nucleotides, and carbohydrates, some of which can leach into the water when you pre-boil. So if you go this route, you may want to lower your flavor expectations by a lot. Low-and-slow grilling also gives the tough collagen in the meat time to gradually break down into gelatin, turning the ribs tender in just the right way. Boiling cooks the meat fast, yes, but it may not give the collagen enough time to convert properly, which is how you can end up with ribs that are technically cooked, but still dry-tough, rubbery, or stringy.
Slow grilling gives the exterior time to dry out, brown, and develop bark; smoke is also allowed to work its way into the outer layers of the meat, giving it smoky depth. Pre-boiling takes all of this out of the equation, which is why pre-boiled ribs might look a little naked and carry only hints of smoke and char, if any. If you're really pressed for time, experiment with braising your ribs in the oven and then finishing them on the grill. It won't give you quite the same romantic smokiness as the full low-and-slow smoke, but it's a lot better than waterboarding the ribs.
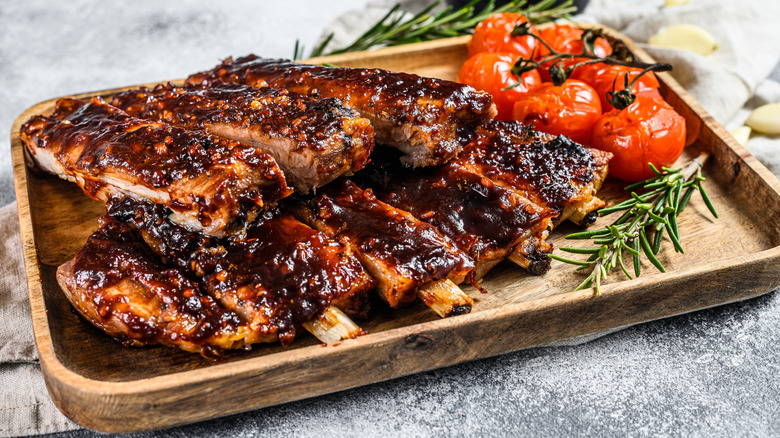
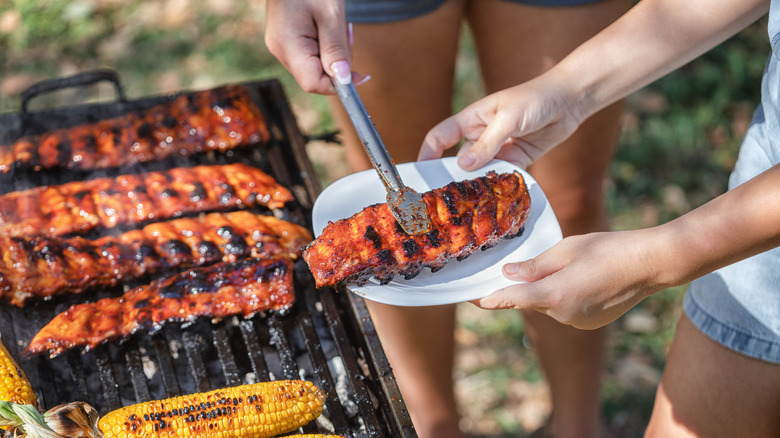
Adding barbecue sauce too early

So you've spent hours smoking your ribs, but they're still a far cry from those finger-lickingly delicious restaurant pork ribs you envisioned at the start. It might be tempting to reach for the sauce — it is, after all, what gives ribs that shiny, lacquered flourish you're accustomed to — but you really must resist the urge.
Many of the best barbecue sauces are built around sugar. Adding the sauce too early can cause that sugar to char before your ribs are done. Flavor takes the hardest hit here — instead of bringing tacky sweetness, your barbecue sauce can end up lending bitterness, harsh caramel, and cooked-ketchup notes. Your best bet is to brush on the sauce 20 to 30 minutes before your ribs are ready to leave the smoker or grill. That small window is enough for the sauce to caramelize nicely and tack onto the meat without burning.
But what if you're really itching to sauce your ribs and can't wait until the end? Good news! You might be able to get away with being trigger-happy with some sauces. An Eastern North Carolina-style vinegar sauce, for instance, is very forgiving. It's thin, tangy, and, most importantly, low in sugar and tomato, so it's unlikely to give you those harsh, acrid notes you'd get from something thick and sugar-heavy if you add it a touch earlier or even use it as a mop.
Grilling with the bone-side membrane still on

Ribs don't really have a lot of real estate on them, so every little bit counts. But there is one part of your rack that should hit the trash: the silverskin, that thin piece of connective tissue on the bone side of the rack. It's collagen-heavy, stubborn, and wildly uninterested in softening no matter how long you cook it. It acts like a protective barrier, which means it won't take to seasoning readily and can keep the meat on that side from getting properly acquainted with your dry rub.
The membrane is pretty slippery, so technique matters. Start by flipping the ribs bone-side up, preferably when completely dry. Then slide something blunt — a butter knife, spoon handle, or even your finger — under one edge of the silverskin and pull it slowly across the rack. The membrane is a little delicate, so don't worry too much if it tears as you pull. Just grab another loose piece and keep pulling. After that, the bone side should be ready to pick up seasoning, so grab your rub and go to town.
It's a crucial step, but it might slip your mind from time to time. If your ribs are not too far gone on the smoker, just pull them out, give them a few moments to cool, then remove the membrane. Heat makes it cling tighter onto the meat, so arm yourself with a paper towel for grip. If you can't get enough grip to get it out, cut or puncture it so smoke and spices can get through. You'll still get some chew, but it'll be much better than leaving it intact.
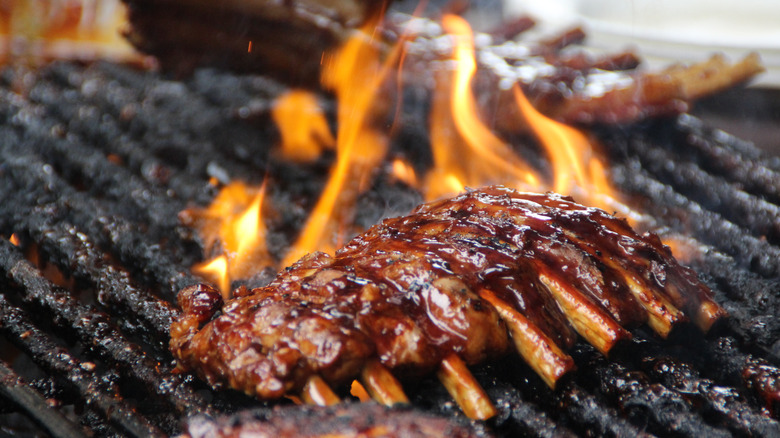
Opening the smoker/grill lid too often
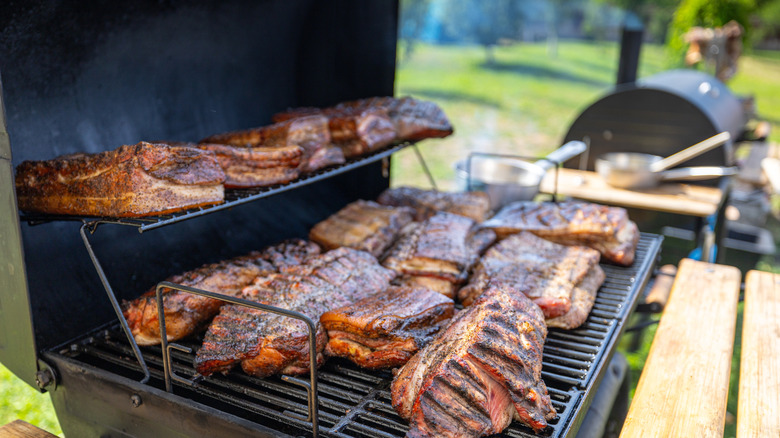
According to the old barbecue saying, "if you're lookin', you ain't cookin'." With the lid closed, your smoker or grill functions sort of like an oven – hot air circulates through the cavity instead of only hitting the ribs from below. If you keep flapping the lid, that hot air escapes from the sides and top. Meanwhile, the underside is still taking heat from the grates or coals below, which means you could very well end up with ribs that are singed at the bottom yet still pale on top.
The temperature inside the smoker cavity also takes some punishment every time you crack the lid open. That means your smoker or grill may spend a decent chunk of the cook recovering from all those peeks. This can drag out the cook, leaving you guesstimating when your ribs are done. And of course, every smoker has its own recovery M.O. Pellet smokers, for instance, tend to feed more fuel to bounce back. That's great for recovery time, but they can occasionally overshoot, especially after a long lid opening. Repeated peeks can cause dramatic temperature swings, which flies completely in the face of the steady, low-and-slow cook barbecue ribs need to really strut their stuff.
Now, looking isn't completely criminal — a one-minute peek is unlikely to throw off the cook by much. But don't go crazy with the frequency. A good rule of thumb is to restrict yourself to one quick peek every hour and keep those peeks strictly business: rotating, wrapping, saucing, or checking doneness.
Skipping the smoke stage or over-smoking
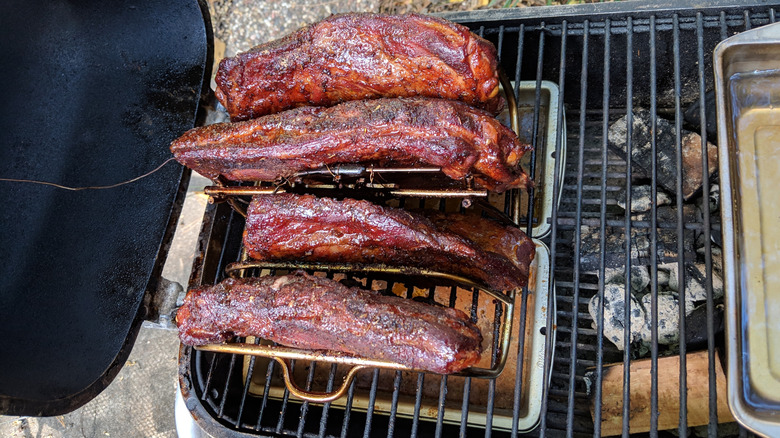
It's a huge red flag for a barbecue joint not to smell, at least faintly, of smoke. Your backyard doesn't get a free pass either. You can get away with not smoking your ribs, but it will rob your them of a lot of the swagger that the perfectly cooked rack brings to the table. Wood smoke carries an astonishing cocktail of compounds, including phenols, nitric oxide, guaiacol, and syringol, which help give well-barbecued ribs their smoky depth and aroma. It also dries out the exterior, teaming up with chemical reactions like the Maillard reaction and Strecker degradation to create a dark crust and distinct flavor.
So when do you smoke, and for how long? A popular starting point is the 3-2-1 approach: Three hours of unwrapped smoking, two hours wrapped, and one final hour unwrapped with sauce. But if you've really come into your own as a backyard pitmaster, you can go hotter and faster, keeping the smoker heat around 275 F to 300 F for roughly an hour. If cooking by the clock is not your thing, don't worry — the ribs will still drop hints. Once the color starts creeping toward reddish brown and a little bone starts peeking through, you're probably ready to start winding down the smoke stage.
The kind of smoke you use matters, too. Depriving the wood of oxygen, for instance, can push out thick white smoke, which might not do much damage for short-smoked meats like burger patties, but can lend a bitter, acrid taste to long-smoked meat. Keep your vents open enough for a clean burn and aim for thin, wispy smoke instead.
Using the wrong type of wood for smoking
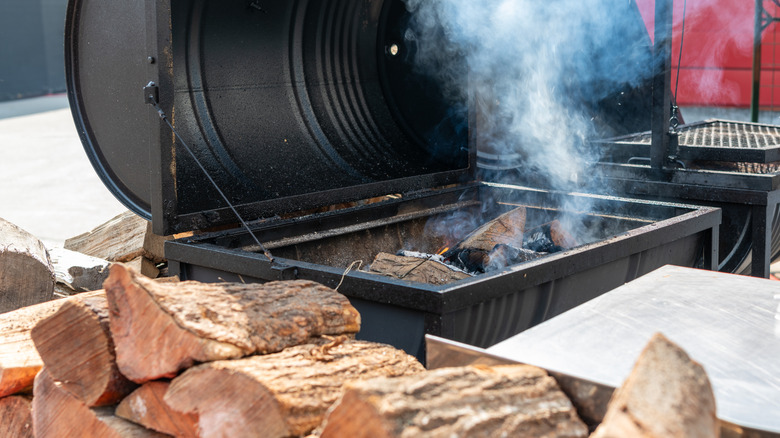
Now that it's been drilled in just how important smoke is to stellar barbecue ribs, the instinct might be to grab random odds and ends from the garage and start smoking. Please don't. Not any old wood will do. You'll want to steer clear of softwoods like pine, cedar, fir, or cypress. These tend to contain sap, which can create heavy, sooty smoke and lend bitter, almost-medicinal notes to the meat. Stick to hardwoods like pecan, hickory, oak, cherry, or apple. These are dense enough to hold up through a long smoke and, when properly seasoned, give enough flavor without smothering the meat with smoke.
Your choice of hardwood depends on how much depth you're in the mood for. Hickory is a classic choice for pork ribs, but it can bring hefty, bacon-y notes, so don't go crazy with it. Be wary of mesquite, too — it burns beautifully, but brings boisterous, earthy flavor, which can quickly become overwhelming with a long cook. Freshly-chopped wood is also out of the question. It carries too much moisture, which can produce heavy, acrid smoke, lending harsh, bitter notes to your meat. Kiln-dried wood is your best bet if you want clean, useful smoke.
As for size, chips are great when you want a quick rush of smoke, but ribs need a longer, steadier smolder, so chunks are usually the better bet. Be careful, though, because too much smoke can nudge your ribs from roasty to ashtray-adjacent. Start with a couple of chunks, then adjust gradually if you want more depth.
Under-seasoning or over-seasoning
Smoke is what puts the barbecue in barbecue ribs, but they still need a little more personality. That's where a good wet or dry rub comes in. A timid sprinkling of salt and black pepper won't do here. You want to build flavor around the meat, and that requires some variety of spices. You can go simple, like Alton Brown, who uses an 8-3-1+1 seasoning formula built around brown sugar, kosher salt, chili powder, and a final "plus one" mix of extra spices. Or you can get a little more adventurous with it and go for a Memphis-style dry rub, which contains a more complex mix of sugar, salt, paprika, garlic powder, onion powder, thyme, oregano, and mustard.
Whichever route you choose, make sure you cover the entire surface area of the rack. A good indicator of success is when the entire rack is coated with seasoning, but you can still see some of the meat's texture peeking through.
That said, don't go overboard with seasoning. Ribs are thin and lean, so they won't forgive a heavy hand the way, say, a pork shoulder might. A pro tip is to use a shaker — it helps you distribute the seasoning evenly and build a nice, adequate layer. Don't forget that the rack has different seasoning needs, too. Be a little more generous with the thicker end and a little more restrained with the thinner end, so the seasoning balances out nicely.
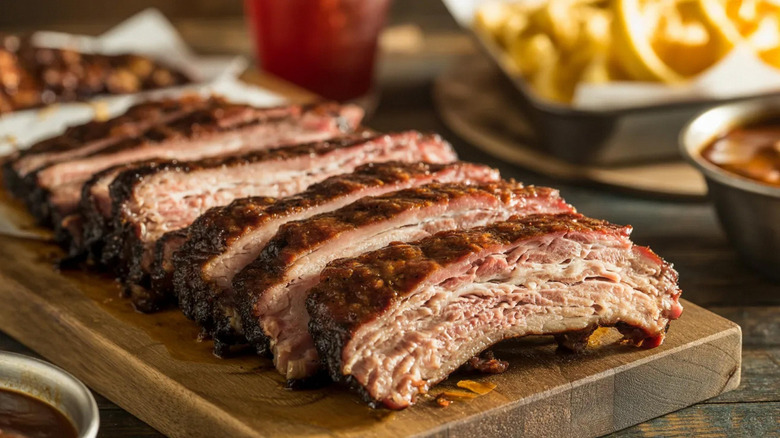
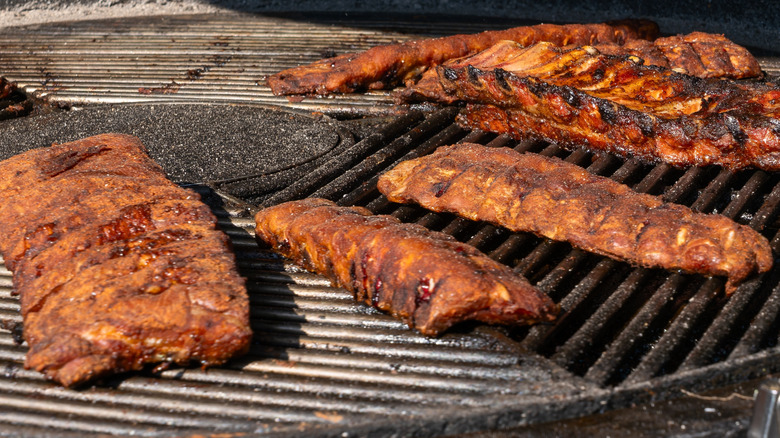
Overcooking your ribs
Low-and-slow cooking is holy writ for barbecue ribs, but there is a threshold of doneness you really shouldn't cross. Your ribs shouldn't, for instance, be cooked so thoroughly that the meat falls off the bone. Well-barbecued ribs should be tender enough to bite cleanly, but sturdy enough to survive being picked up or sliced.
Using a tried-and-tested formula (like the 3-2-1 method) helps, but it doesn't guarantee you won't blow past the doneness window. It's a solid training-wheels approach for spare ribs, which tend to need a little wrangling before they behave. But be careful with more delicate cuts like baby back ribs. They're smaller and leaner, so a full 3-2-1 can nudge them from tender to mushy if you're not paying attention. For those, you may want to shorten the schedule; think closer to 2-2-1 or even 2-1-1.
Don't panic and slash the cooking time by too much, though. You shouldn't, for instance, yank your ribs off the grill the moment they hit the safe internal temperature. Ribs are collagen-rich and need a little extra love from the grill so that tough connective tissue has time to break down into gelatin. If you take them off the heat the moment your thermometer says so, they might end up packing a little more chew than you want. Go by what you see. Your ribs probably need more time if there's very little bone peeking through, the rack doesn't bend when lifted, and a skewer inserted between the bones meets too much pushback.
Skipping the rest period
After hours of prep, cooking, and care, it can feel deeply unfair that the meat now wants a little nap. But giving your ribs a beat before serving is completely worth it. Heat causes proteins in the meat to tighten and squeeze out moisture, which means if you slice into the rack too early, those juices can run straight across the cutting board and leave you with something drier than you deserve after all that babysitting.
Giving your ribs a short rest allows the juices to settle around the proteins, so your slices come out cleaner. The sauce can also be a little weepy right off the smoker. A brief rest helps it tighten around the meat so it gets sticky in just the right way.
You can absolutely leave the ribs resting in open air, but a warm environment usually works best. Professional pitmasters often use custom warmers to rest meat after it comes off the grill, but you don't need to go that far to give your ribs a decent post-smoke nap. You can experiment with wrapping the ribs in foil to keep the juices locked in, bundling them in a few dry kitchen towels, and tucking them into an empty cooler for a short hold after they leave the smoker. This creates an insulated environment around the meat, which can do more for texture and serving quality than letting the ribs sit exposed in open air.