12 Stunning Kitchen Backsplash Ideas On A Budget
We may receive a commission on purchases made from links.
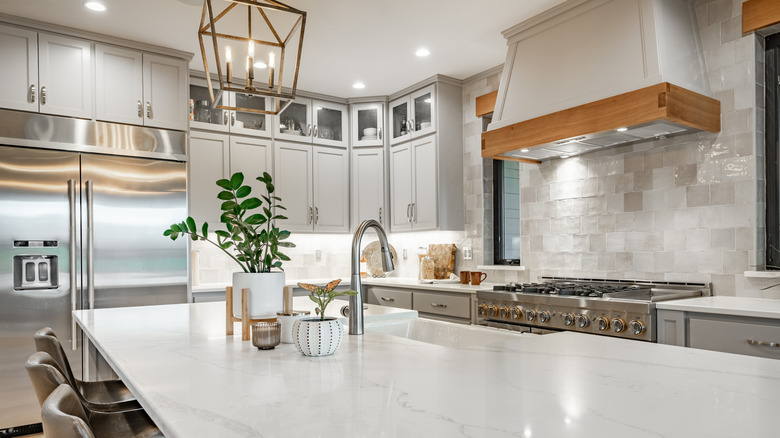
Originally, the kitchen backsplash was developed to be a functional barrier between the walls of your kitchen and any grease, water, or sauce that might come flying from whatever mishaps occur in the kitchen. Oddly, this meant that most backsplashes were quite short — like 4 inches tall. And they tended only to be installed behind sinks and stoves since that was where they were needed. Today, the backsplash is more like kitchen-spanning decor that accents or defines the overall color, tone, and feel of the entire area.
And there are so many choices that homeowners can feel overwhelmed. Should you use ceramic, stone, or glass tiles? Mosaic? Subway-style? The options are just about endless, and any one of them may be a bit heavy on your bank account. Most home improvement projects are going to hit you in the wallet with at least a little force, but fortunately, some options are more affordable than others. Check out these ideas for a kitchen backsplash that is both stunning and economical.
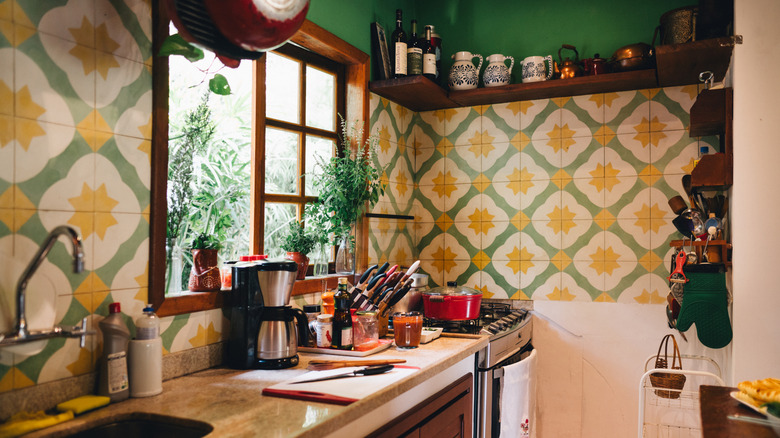
Painted tile
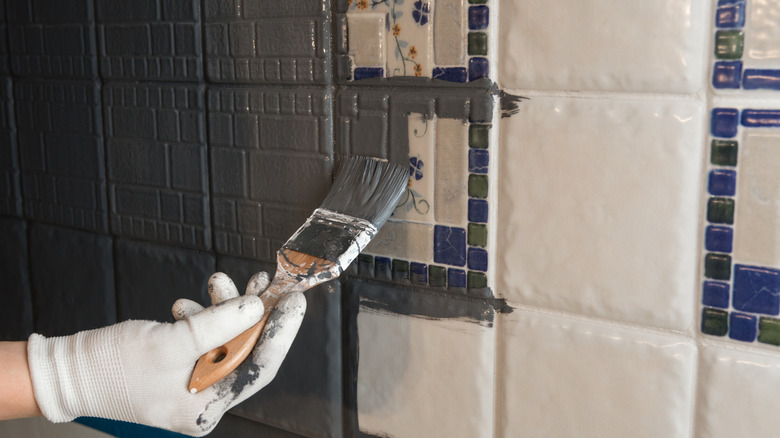
This may be the most budget-friendly option on the list. Painted tile is exactly what it sounds like: Tiles painted using specialty paints that are designed to adhere to tile surfaces. Epoxy paint can work well too, but If you want the paint job to last, you're best off using tile paint specifically. Using a paint roller, try to evenly spread your paint across the tile backsplash. You can paint the grout along with the tile, which will make for faster work, but some folks prefer to take the extra time and leave the grout unpainted.
Once you're all finished, the paint still has to cure. Whereas drying means that the water or solvents in the paint have evaporated, curing means that the paint has completed its chemical bond with your tiles. Be sure to avoid touching the backsplash while it cures, which can take up to 30 days. Once it's cured, you can add a second layer of paint if you like, just for durability. Kitchens are no stranger to food messes, so it might be a good idea to add that second layer to ensure the paint can withstand any scrubbing that needs to be done.
Brick tiles
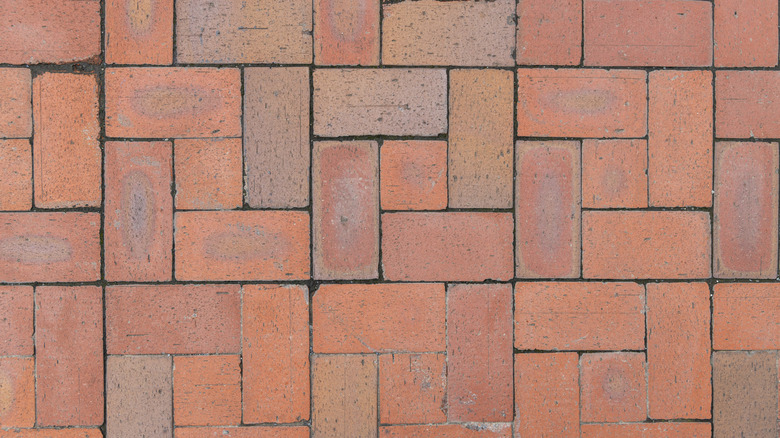
Brick tiles, sometimes also known as "thin bricks," are the optimal combination of classy, cozy, and durable. It's rare to encounter someone who doesn't enjoy the classic brick-and-mortar look, and it pairs just as well with kitchen backsplash as it does a fireplace. There are two broad ways to go about brick tiling. The first is to use full bricks, which is typically the more expensive option. The second way is to use segments of brick (thin brick or brick veneer) in such a way that it looks like a complete brick wall.
The full brick option will be more durable, but both options look about the same in terms of visual quality. There are so many styles, colors, and sizes of brick that you always have a great range of decorative options to match your existing kitchen decor. You can lay it in all kinds of different bonds, like running, Flemish, stack, or herringbone. Due to its innate heat resistance, brick works really well behind a stove, and it's a very durable choice for installing shelves. Wherever you put it, brick tiles can be laid directly over a painted or unpainted wall surface. And as far as supplies, be sure to pick up some tile mortar (or adhesive), and sanded or epoxy grout.
Peel and stick tile
One of the cheapest options in the world of kitchen backsplashes, peel and stick tiles are super easy to establish in your kitchen, requiring one of the smallest time investments of all the options on this list. The tiles themselves can be made from just about any material you might wish to use, including vinyl, metal, stone, or glass. It's versatile too, with the ability to stick to lots of different surfaces like linoleum, concrete, or ceramic. But unlike some other tile options, this one doesn't require a professional to install. Each tile segment has a strong adhesive on its backside, allowing you to peel it off the protective backing and onto your kitchen wall.
But be careful because if the surface isn't prepared properly, or you haven't measured out your backsplash area, you can run into a lot of trouble. To properly prepare for a peel and stick session, the surface of the intended backsplash area needs to be clean and level. Make sure you sand off any stuff like uneven paint coats or old adhesive that might make your tiles look lumpy. And before you peel anything, measure out your total surface area to determine how many tile segments you will need. One final tip is to simply place the tiles where they're going to go before you peel off the protective backing — that way, you get a sneak peek before committing.
Wallpaper
This backsplash idea is the least conventional, yet many homes actually use it — they just don't do it in the kitchen very often. But for some would-be backsplashers, wallpaper is a beautiful, budget-friendly option, and compared to tiles, the hassle is fairly minimal. The one tricky thing about a wallpaper backsplash is that it is best not exposed to anything that will either heat it up or get it wet. Given that heat and liquid are standard fare in the kitchen, you may get best results if you apply wallpaper sufficiently far away from things like sinks and stoves, and stick to tile in those areas.
That said, things happen in the kitchen, and water can still find its way to the wallpaper. Make sure you purchase wallpaper that is intended for use as a kitchen backsplash so that it's durable and water resistant. This may cost more than normal wallpaper, but since this is already one of the cheaper options on the list, it's not such a bad idea to splurge a little. Pre-pasted or peel and stick wallpaper will be the easiest options to work with — and as with peel and stick tiles, it's important to measure everything out before laying the backsplash.
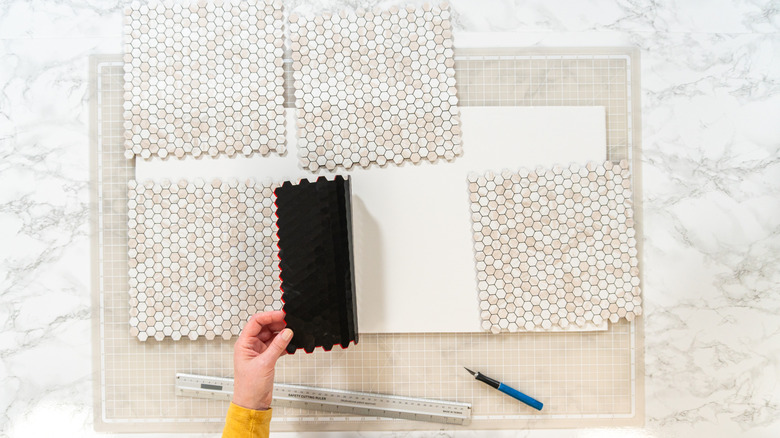
Mosaic tile
Mosaics are actually an ancient human art form consisting of many small pieces that come together to make a larger work of art. Think of a picture of the sun, where each few square inches of the image is made up of smaller tile pieces. Tile art is one of the coolest ways to create a mosaic, and there's no reason it can't be used as a kitchen backsplash. In the world of tile, a mosaic tile backsplash would consist of many small pieces of porcelain, glass, marble, metal, or stone tile mounted on backing so that it can be easily installed onto your wall.
Mosaics can be mesh, face, or dot-mounted. Mesh-mounted mosaic tiles use a mesh of paper, plastic, or rubber adhesive. This assists in creating regular grout joints across the sheet. Face-mounted mosaics are held together on a sheet of sticky plastic or wax paper. These are usually made with smaller tile pieces to create a flexible sheet. Finally, dot-mounted mosaics are built using a few dots on the reverse side of each piece in the grout joints. These are particularly useful for wrapping along rounded sections of wall. As with other tile types, mosaic tile can be arranged in a ton of different shapes and styles like strips, splitface, or hexagon.
Subway tile
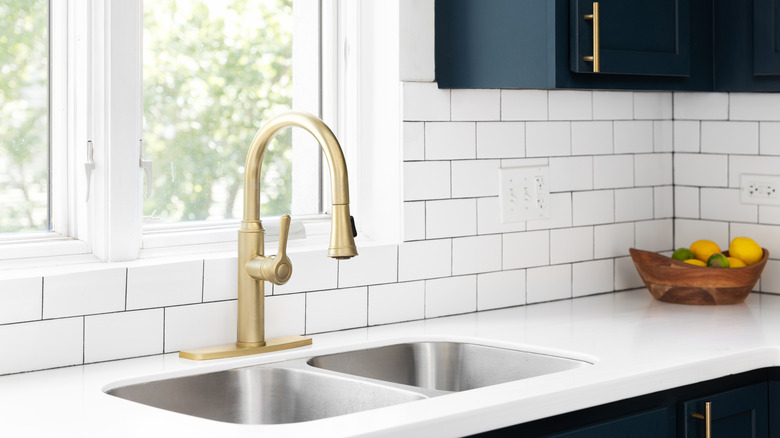
Timeless and clean, ceramic tiles are famed for their durability and simple beauty. The moniker "subway tile" derives from their first appearance in the 1904 New York subways. Architects and engineers wanted something that was both vibrant and easy to clean — thus, subway tile was born. But even though it's more than 100 years old, subway tile remains one of the most popular choices for a kitchen backsplash today. Any tile material can be used here — ceramic, stone, porcelain, etc. Subway is less about material and more about style.
Normally, the tiles are laid in what's called a 50% offset, which means that the middle section of each tile lines up with the edges of two tiles above or beneath it. Subway tiles are normally 3 by 6 inches, but any rectangular tile can be used, so you can go as big or as small as you'd like. As with so many other backsplashes, try to complete a "dry layout" before applying adhesive or grout. Subway tiles don't have to be laid long-side down — they can "run sideways" along the backsplash for an alternate look with the long sides facing left and right. And you can use different colors with subway tiles too. For instance, maybe a few streaks of blue, green, and black in jagged patterns against a backdrop of mostly white tiles.
Glass tile
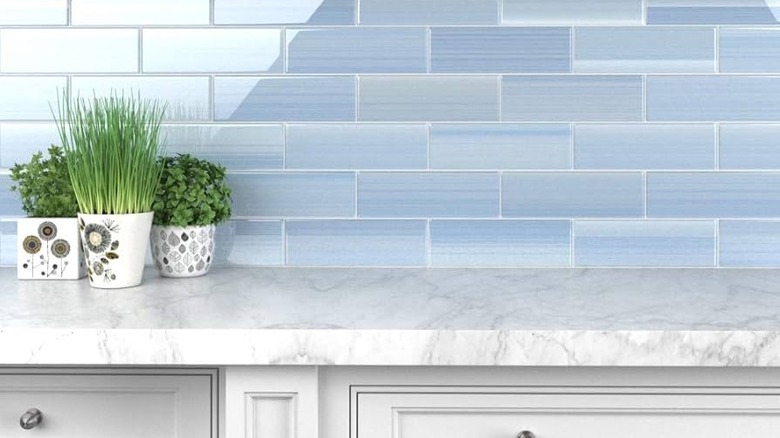
An alternative to the more common ceramic tile, glass is a beast all its own. Glass tiles are typically thin with a transparent glaze fired underneath each piece. That said, there is still a great deal of variability among glass tiles, with some being totally clear and others possessing a thick, colorful haze. The way that the tiles reflect light can give your kitchen a bright, spacious vibe. They're also easier to clean than stone or brick, though glass tile can become permanently scuffed if you're not careful. You'll want to avoid using sanded grout, and it's important to clean your glass tiles with nylon scrubbers or similar options that won't abrade the surface.
Glass also absorbs literally no water, while even other smooth-tile options like ceramic have an absorbency rate of 0.5% to 3%. Glass tiles are also an eco-friendly material, often made up of recycled glass, and less energy-intensive to make compared to ceramic. Glass tiles might need to be installed by a professional though — depending on how translucent they are, the adhesive may be visible through each piece, so expert installation ensures your glass backsplash looks clean and beautiful.
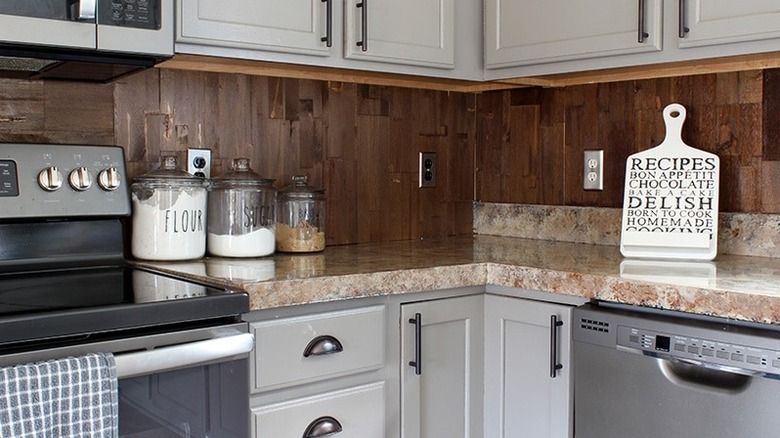
Wood or (or wood-look) panel
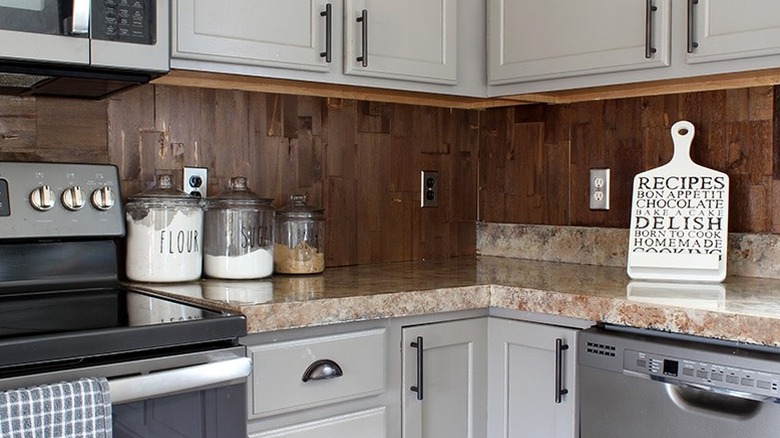
It's not all about tile — wood is a perfectly viable material for your kitchen backsplash, and it's a fun way to cultivate a cozy, quaint kitchen vibe. Unfortunately, brand-new wood might come in at a higher price point than what you'd pay for tiles or wallpaper. And reclaimed wood, though it provides maximum rustic charm, is even more expensive than that. Wood-look paneling can be fairly convincing while also coming in at a lower price point than the genuine material, so that's always worth consideration.
If you opt for authentic wood, there are some pros and cons to mull over. There are quite a few different types of wood to choose from: cedar, oak, cypress, bamboo, and too many others to list. On top of that, you can stain your wood however you choose, and it's a natural insulator, which can help retain warmth during colder seasons. On the other hand, wood takes a beating over the years, especially in areas of the home that see a lot of action. It's also extremely porous, which means it absorbs a whole lot of moisture, grease, and other things that abound in the kitchen. But in terms of character, a wood backsplash is hard to beat.
Chalkboard backsplash
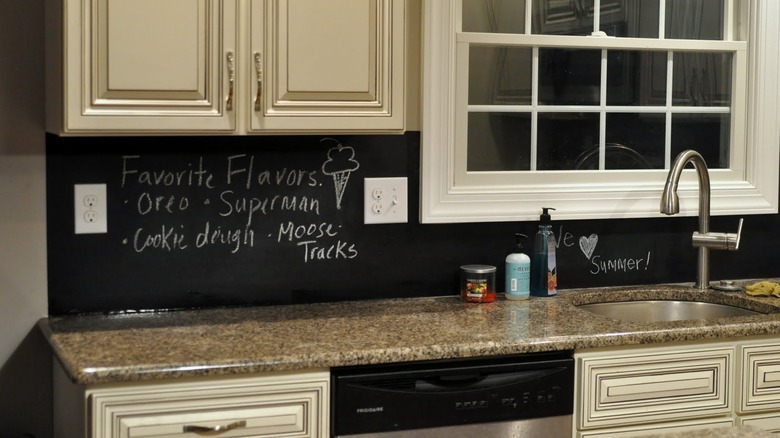
Perhaps the most whimsical item on this list is the chalkboard backsplash. It's a dark, minimalistic choice, and boy is it cheap compared to tile, wood, and stone. The absolute cheapest way to get a chalkboard backsplash is to use chalkboard paint. This is a special paint that will transform just about any wall into a chalkboard thanks to ingredients like talc, titanium dioxide, and silicon dioxide — these come together to hold chalk just like an old-fashioned school board. For approximately $10, you can grab a container of this special paint and layer it onto the walls above your kitchen counters.
Alternatively, you could purchase actual chalkboard and use adhesive to turn it into a backsplash. This will require perfectly sized board cuts, so it might be a good idea to hire the pros for this one. However you decide to do it, a chalkboard backsplash is a fun family choice that allows you to write notes, recipes, and whatever else you can think of. The downside to this would be cleaning the chalkboard so that it doesn't end up looking dirty and worn after months of writing and erasing. But given how easy it is to apply, you can always add another layer of chalkboard paint to restore the cleaner look.
Stone tile
For those who seek a kitchen castle ambience, you can't go wrong with stone tile. In terms of durability, it can't be beat — it's literally rock, so good luck damaging it. But it also tends to come with a very satisfying natural texture that some people prefer over the glossy smoothness of ceramic. For that perfect amalgam of strength and class, stone is a killer option for your kitchen backsplash. Often, you'll find that each stone tile has its own unique pattern, giving your backsplash a natural look of variability.
You don't have to worry about heat or moisture either, which makes it a particularly functional choice for the kitchen. On the other hand, don't expect it to provide good insulation. Stone tile is going to get cold in the winter, so it may not be the best fit for a kitchen that isn't otherwise well insulated. Stone tile tends to be sought-after, which means it can potentially increase the property value of whatever home it furnishes.
Tin tile
A very stylish choice for the bold kitchen owner, tin tiles will bring a gleaming sense of vintage power and mystique to any backsplash. They often come in exciting relief designs of any style you can think of: antique ballroom, animal patterns, art deco, etc. These tiles are a great option for resisting moisture absorption and oil residue because it's non-porous. Tin is an incredibly supple metal that can be stamped with different custom patterns or designs. It often comes in silver or bronze colors, and it comes in around $3 per square foot.
It has to be said, though, that tin is a highly eye-catching surface that tends to go best in a kitchen that is not already visually busy. In the wrong kitchen, tin can end up overwhelming viewers with its brightness and patterns. It works really well in otherwise minimalistic kitchen areas where the counters are not cluttered with too many objects. Tin also has the potential to corrode, but thankfully, there are corrosion resistant finishes that can be applied to the tiles.
Honeycomb tile
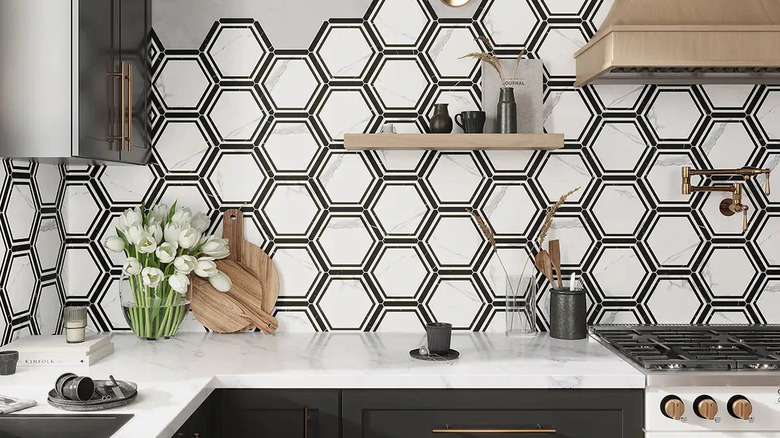
A decidedly modern choice for your backsplash is the honeycomb tile, known also as the hexagonal tile. These six-sided bad boys engender a very clean, almost sci-fi look that can make your kitchen backsplash really pop. Due to its peculiar shape, planning is more important than ever if you're going to install a honeycomb backsplash. The tiles will not align perfectly along corners, edges, and countertops, which means you will need to cut tiles to size in order to fit them at the edges for a smooth, complete backsplash.
No matter what tile material you use, honeycomb tiles often pair best with colorful grout. The grout, if color coordinated, can draw attention to and further emphasize the fun honeycomb pattern. And just because the shape is hexagonal doesn't mean you are stuck with a "standard" hexagon shape. There are long, brick-like hexagon tiles, small ones that can be arranged in zig-zag patterns, or whatever else you can imagine. You can also use smaller, differently colored tiles that combine to form hexagons.