How To Clean A Juicer For The Best Tasting Results
Juicers can be a huge money-saver, allowing you to make your own custom drinks from fresh produce instead of paying a premium at a juice bar or specialty store. However, many home cooks are wary of purchasing one because they falsely believe that cleanup will be a nightmare. In reality, it's not much more difficult than cleaning a coffee maker, as long as you clean your juicer immediately after use. Fruit and vegetable fibers can harden and get stuck easily otherwise, but luckily, it only takes a few minutes to scrub every part of most models.
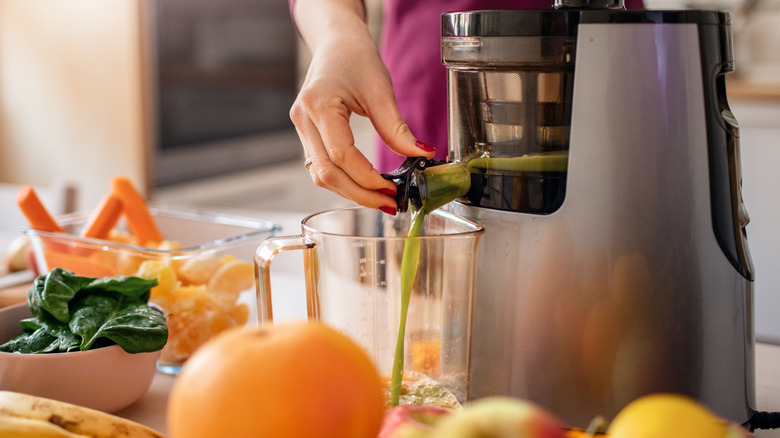
To wash a juicer and eliminate worries about sanitation and off-tasting residue, start by unplugging the appliance and disassembling its parts. The motor base should only be scrubbed clean with a moist kitchen towel, as it contains delicate electronic components that should not be dunked in water. Any other parts, such as the blades or container, can be cleaned with a soapy kitchen brush and then rinsed with warm water.
If your mesh filter is still a bit clogged after a vigorous scrub with a brush, try submerging it in warm water for 10 minutes before attempting to clean it again. And if you're ecologically-minded, carefully remove and save that leftover fruit or veggie pulp before cleaning the machine. You can use juicer pulp in muffins and other dishes to give them a boost of extra fiber and vitamins.
For a deeper clean, soak the parts of your juicer
Even if you never slack on cleaning your juicer, it will still eventually absorb the colors and smells of fresh produce, especially if it has any parts made of plastic. This can negatively impact your beverages if the stains start to go rancid. To combat this issue, just soak all parts (except the motor base!) in soapy water for a few hours, and ideally overnight. You only need to perform a deep clean when you notice an off smell or stained appearance inside the machine, but feel free to do this process once a week if you put your juicer through heavy use.
If you didn't know how often you should be cleaning your juicer, and now it has some particularly stubborn smells or stains, add some distilled white vinegar to the water before soaking the machine's parts. If any caked-on residue remains parts after soaking, you can use a combination of baking soda and citric acid to loosen any hardened bits, then scrub them off.
A great way to prevent fibers and oils from sticking to your juicer is to run some water through the machine after every use. This will essentially "flush" some of the residue out. You'll still have to clean your juicer right after, but doing this step lessens the chance that oils from produce or other ingredients will hang around.
Other tips for using and maintaining your juicer
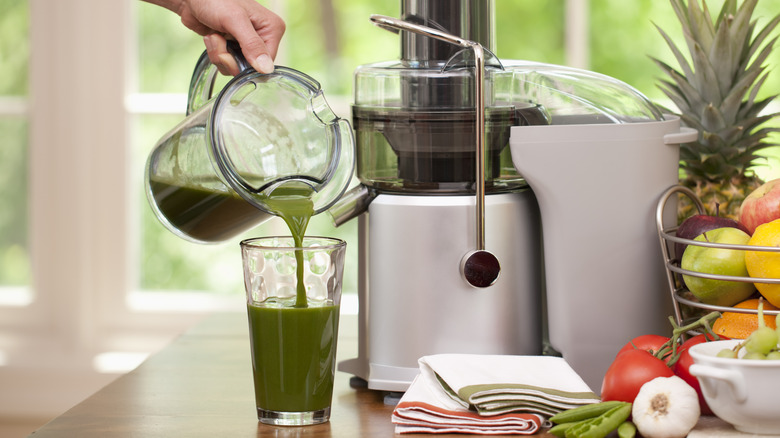
The order that you juice your produce makes a huge difference in how much residue remains in your machine. Generally speaking, you want to start by processing drier, more fibrous items first, as these require more time to extract all the juice. Watery fruits and vegetables such as apples, celery, and oranges should be run through the juicer last, as their plentiful water content will help wash bits of drier ingredients out of your machine. Keep all of this in mind if you're following a recipe like Martha Stewart's favorite green juice, which pairs fruits with fibrous ginger root and leafy herbs like parsley.
To make juicing even more efficient, find out whether your juice uses centrifugal or masticating force. The former works similarly to a blender, has less parts to clean, and does not require you to chop ingredients beforehand. On the other hand, machines that make cold-pressed juice use masticating force to "crush" ingredients, so they take longer to create beverages and have more parts to clean. However, they can process fibrous greens such as kale much better than centrifugal machines. Knowing the capabilities of your machine can help you choose ingredients more wisely and allot the right amount of time for maintenance.