The Kitchen Tool You Need To Make Simple Shaved Ice At Home
For a dessert that beats the heat even better than ice cream can, shaved ice is your summertime savior. Though this deliciously light treat is often found at festivals or the beach, shaved ice machines can be purchased for home use, or you can even use a cheese grater to make a DIY version from frozen fruit. But maybe you would rather not invest in a new appliance, or you want plain shaved ice that you can customize to your heart's content. The best solution is a food processor, which can give you fluffy ice in a flash.
Before you begin, make sure you have a shredding disc installed on your machine. This type of blade works similarly to a cheese grater, and will produce the smallest, fluffiest shreds of ice. You'll want to work in batches: Pulse about two cups of ice cubes in the food processor at a time, to ensure you don't overload the machine. It's wise to pause the processor after a minute or so to check on the ice. Keep pulsing if your ice still looks chunky, but stop the second you achieve that light and snowy finish.
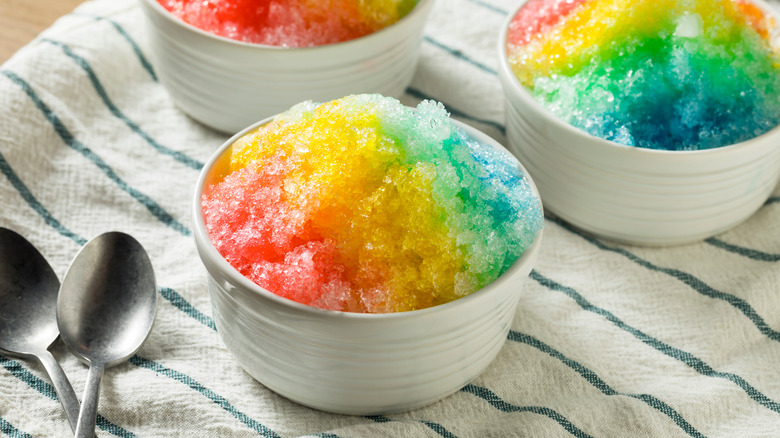
A fluffy, snow-like texture is what sets shaved ice apart from snow cones, which are a little crunchier with bigger ice chunks. The food processor is the best choice for achieving this, but if you don't own one, another appliance that can get the job done: a blender.
Shaved ice in a blender takes a little extra effort
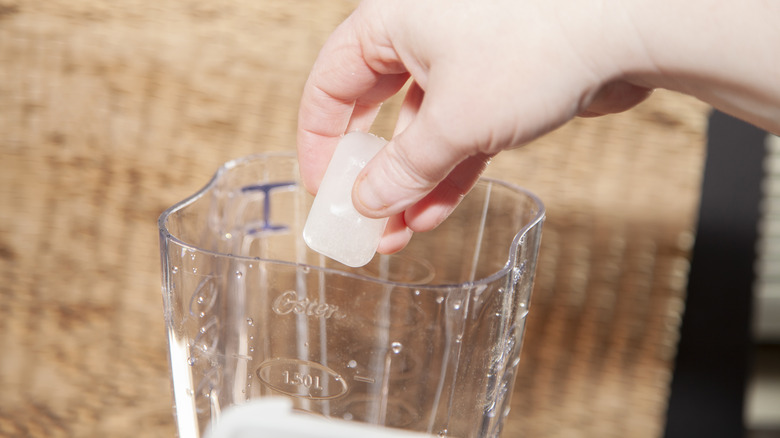
A blender can break down ice in a similar way as a food processor, with a little extra time involved. Just be sure to use a standing blender, since immersion blenders can't crush ice without a lot of help, and even then, the result won't be light and fluffy like shaved ice.
Some blenders have a setting specifically for crushing up ice, which can make for a properly shaved texture. It just might take longer than a food processor would. You can also break the ice by pulsing it in short bursts. If you would prefer to get it done in one fell swoop, start blending ice cubes at a low speed. As the blender's blades slice and break down the ice, gradually increase the speed to high. Blend for a few more minutes, until the ice takes on that characteristically fluffy texture.
The high speed is important because it can incorporate some air into the mixture, making for a more authentic shaved ice texture. It might also help to add a tablespoon or two of water into the blender, which can make the blend more ice smoothly. Water can also make the shaved ice slightly "stickier," so it holds its shape better when scooped into a bowl. Once your ice is doled out into individual servings, it's time to have fun dressing it up.
Shaved ice is served differently around the world
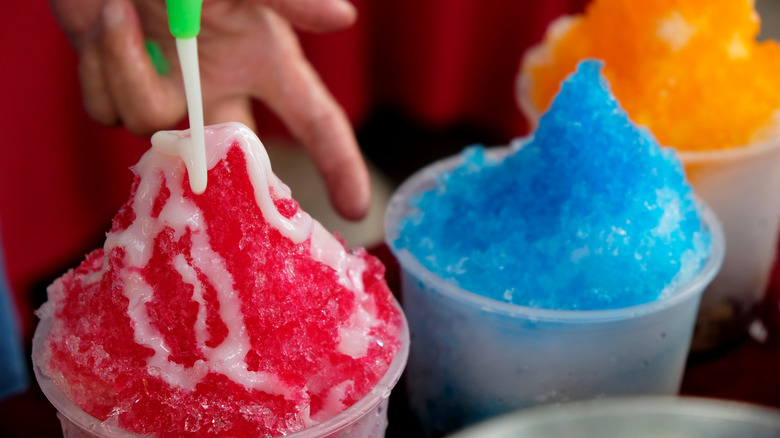
The simplest way to top off your shaved ice is to drizzle some sweet, fruity syrup on top, but there are plenty of other toppings that can make the dessert a little more exciting. This treat is enjoyed all over the world, and borrowing inspiration from different cultures can really wow your guests.
Shaved ice is wildly popular in Hawaii, where it's usually called "shave ice." Japanese immigrants brought the dessert to the islands in the 1900s, so popular toppings take influence from Japanese cuisine. Vendors often top off their bowls with not only colorful syrups, but fresh fruits, mochi, and condensed milk or ice cream. You can even make your own sweetened condensed milk to pour on top, and pair it with green tea syrup for a rich yet slightly bitter icy treat.
In Japan itself, shaved ice is known as kakigori, and has been enjoyed for centuries. At a kakigori stand, you'll see many of the same flavorings found in Hawaii, as well as options like sweetened azuki (red) beans, sweet potato paste, matcha powder, and candied ginger. In South Korea, shaved ice is called bingsu, and is commonly topped with condensed milk, red bean paste, fruits, and sweet, chewy rice cakes. Making your own shaved ice at home can be a great way to recreate these international flavors that may not be so easy to find on a fairground.