11 Ways To Grill Your Corn To Perfection
Who doesn't love corn on the cob? It's that perfect summer side dish to complement steaks, burgers, seafood, or any other food that has summer written all over it. Four words for you: Fire up that grill! But grilling goes beyond just the standards. Grilled corn, for instance, has a smoky flavor that (when combined with seasoning) is a mouthwatering treat. Grilling can heighten the natural flavors of all kinds of foods — and, of course, it means less mess in the kitchen.
When you do grill your corn, it's not one size fits all — different methods produce a variety of flavor profiles. Corn can be husked or non-husked, pre-cooked, seasoned with just salt or with special spices, along with lots of other choices to give you that perfect scrumptious ear.
How do you choose between grilling methods? Mostly, it's trial and error (the plus side is you get to taste-test each trial). Besides different end flavors, some methods require using specific seasonings, and changing prep and cooking times. Let's delve into some delectable ways to grilling that summer side dish: corn on the cob.
Shucking before grilling
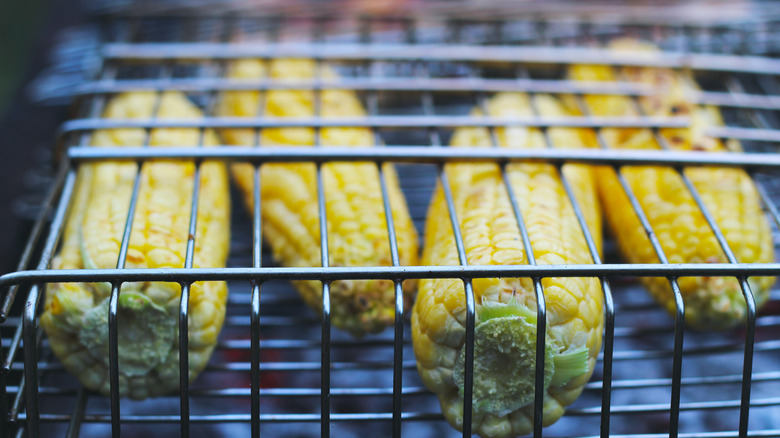
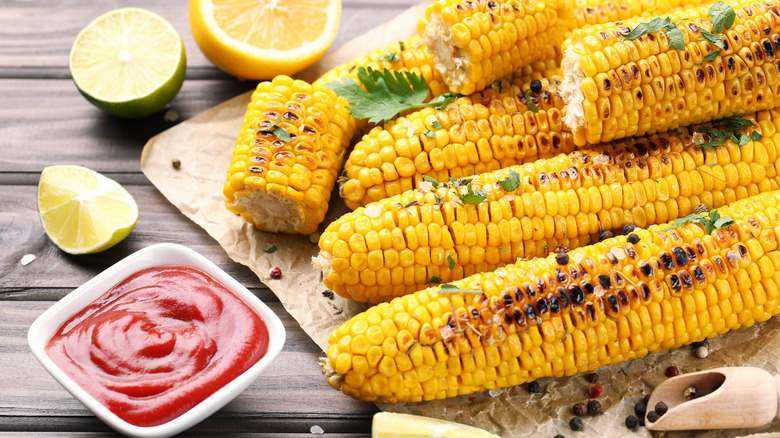
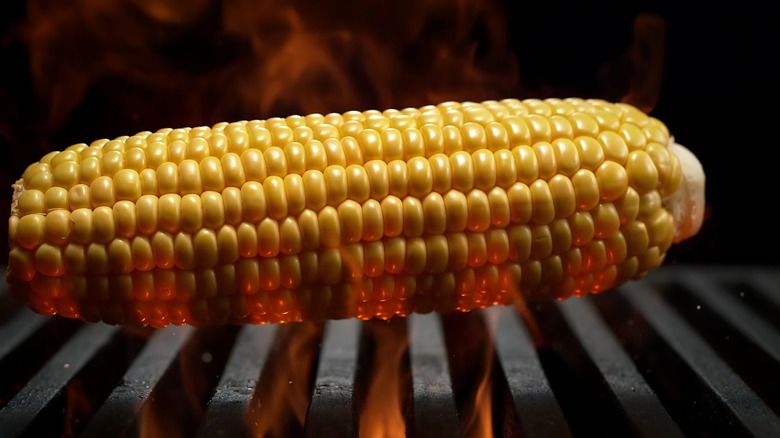
Corn can be shucked before placing directly on the grill. This will give you the char marks that make any food more appealing. It will also get that deep, smokey flavor down deep into the kernels, especially if you use a charcoal grill or smoker.
The only prep needed prior to grilling corn on the cob is to shuck the corn and remove any silks. Lay the ears directly on the grates and grill until hot and tender. The exact time will depend on your grill and how hot the grates get. Turn frequently, paying close attention so it doesn't burn. One of the major advantages to grilling corn after it is shucked is that it can be seasoned while cooking.
On the flip side, grilling naked ears (without husks) has some disadvantages. The char and smoke from the grill can overpower the taste of the corn. The corn can also be drier due to it being cooked over direct heat instead of steamed, as it would be in the shucks.
Un-shucked corn for grilling
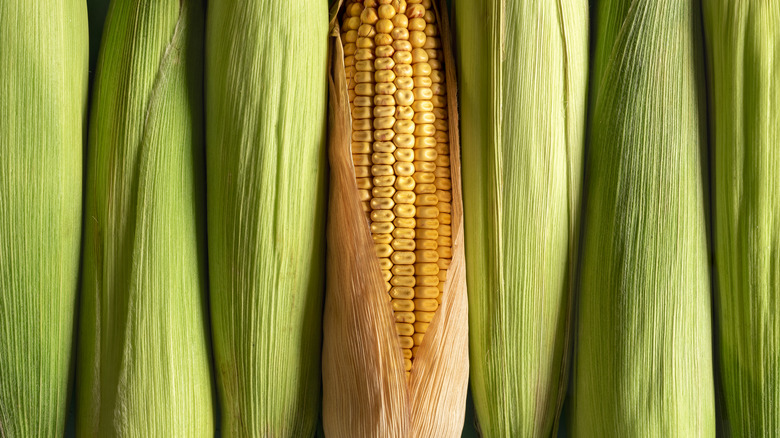
Probably the easiest way to grill corn is to leave it in the husk. Folks who go this route are in one of two camps: They either prefer throwing the ears directly on the grill or soaking them first. The exact time for soaking isn't as important as making sure that all the outside husks are wet. The advantage to soaking is that it makes it far less likely that the husks will catch fire from the direct heat.
However, what is gained in ease by grilling corn in the husks also sacrifices some flavor. Grilling ears in the husks renders corn that is more like steamed corn since the husks block the char marks from the grill and will also make the smokey flavor less intense. It's hard to tell when the corn is properly done since you can't monitor the kernels for tenderness. This method can be messy, too. The husks will be stained with black char, which can easily rub off on your hands and other food on the plate. Avoid this, however, by using a separate plate for the corn.
You can combine these methods for grilling. Either pull the husk back part way or allow it to cook in the husk for only some of the grilling time. This way, the corn still has protection but it is also exposed to more of that amazing smokey flavor — and it can be partially seasoned too.
Corn can be seasoned or not

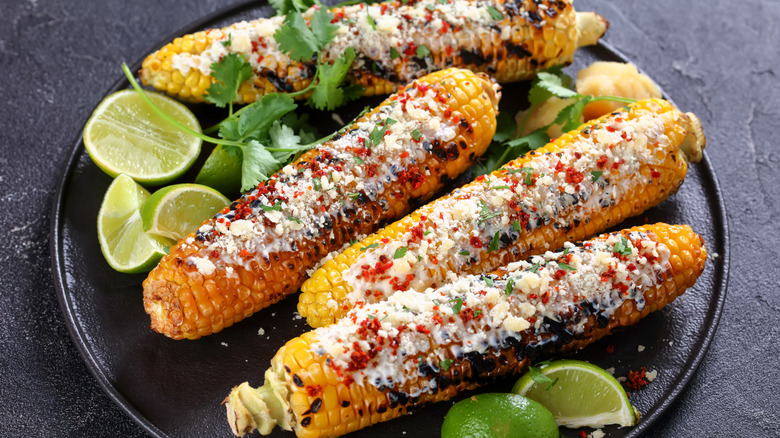
Seasoning corn on the cob usually brings to mind butter, salt, and pepper. There is nothing wrong with these staples, but a little adventure never hurts either. Seasoning lets you do it your way, some folks like a lot and other don't. If the corn is seasoned before grilling, the heat will infuse more of that flavor into your corn as opposed to seasoning it after it is grilled. The smoke and heat will drive the flavor into the kernels for a whole-flavor experience as opposed to seasonings just laying on top of the kernels.
Just about anything is fair game when it comes to enhancing that corn flavor, from sweet and savory to spicy, tangy, and beyond. Try going solo with your favorite herb or spice for a bold flavor or try a combination of complimentary ones.
Of course, you don't want to skimp on the butter (who doesn't love butter!). Think outside the norm; herb butters, butter infused with spices and other compound butters. These will give you that buttery taste with a little extra zing.
Whichever method you choose to grill your corn, your taste buds will thank you for it.
Soaking corn before grilling
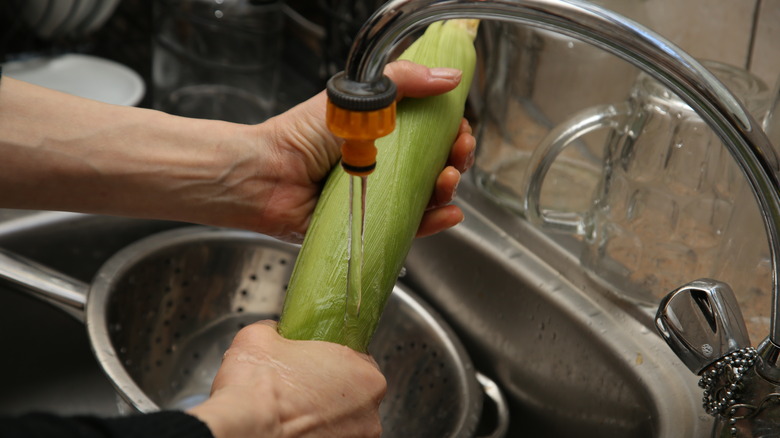
When soaking corn prior to grilling, the big question is how long to leave the corn in water. Really up to personal preference, it can be anywhere from 30 minutes up to eight hours. Besides preventing catching your ears on fire, soaking adds moisture during the cooking process. Pulling back the husks from the top of the ear down toward the stem makes it easier to remove most of the silks before soaking and grilling. After removing silks, pull husks back up and wrap as tightly as possible around the ears.
The ears will probably float until they have soaked up enough water so they are not buoyant. Even then, you may have a few stubborn ones that like to stay at the top of the water. With the idea being to submerge them for your total amount of soaking time, simply add a heavy rack or grate on top of them to keep all the ears totally under water. When ready to grill, remove them, shake off any excess water, and place directly on the hot grill grates.
Brining the ears

Lots of people favor brining their corn in a salt water bath prior to grilling. Those who are in this camp swear that it improves the texture and flavor of the finished ears. Similar to why some brine their Thanksgiving turkey, it plumps up the kernels of corn and makes it more tender. The brine seeps into all the cracks and crevices between the kernels for more even seasoning. Adding a little bit of sugar to the brine will bring a touch of caramelized goodness to the roasted ears.
This is not the same as soaking corn for grilling, however. To brine, ears must be shucked so that the brine has direct access to the kernels. Also, balance is important — too much of a good thing turns bad in a hurry. Don't leave corn in the brine for longer than an hour or it will have the opposite effect, rather than tender and juicy, the ears become tough and dry.
Grilling in foil
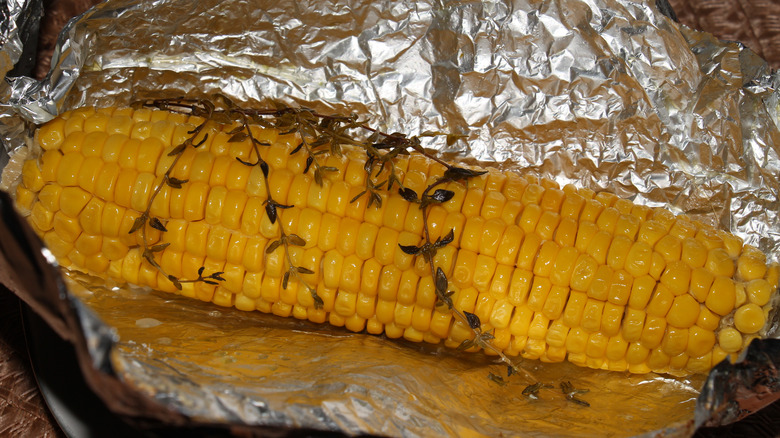
Like the idea of grilling ears in the husk but don't want to fuss with the mess and taking time to soak? In this case, foil may be your best friend. Wrapping ears in foil will yield almost the same results as keeping them in the husk — they will also take up less space on the grill, and are ready to eat as soon as they come off the heat — no worries about what to do with the husks, just dig in and enjoy. However, be careful not to be burned when unwrapping the ears, foil is not porous (like husks are) so more heat and steam are trapped inside.
It's best to use heavy duty foil if available. If not, double-wrap the ears in regular kitchen foil so it doesn't scorch. Generously butter the ears and add any other seasonings you wish, except salt. Besides adding lots of flavor, butter soaks into the kernels to keep them moist. Salt extracts moisture so the ears will be drier. Wrap the ears tightly to keep all the butter and flavor in as well to avoid flare-ups on the grill from butter leaking out and dripping into the open flame.
Grilling corn off the cob
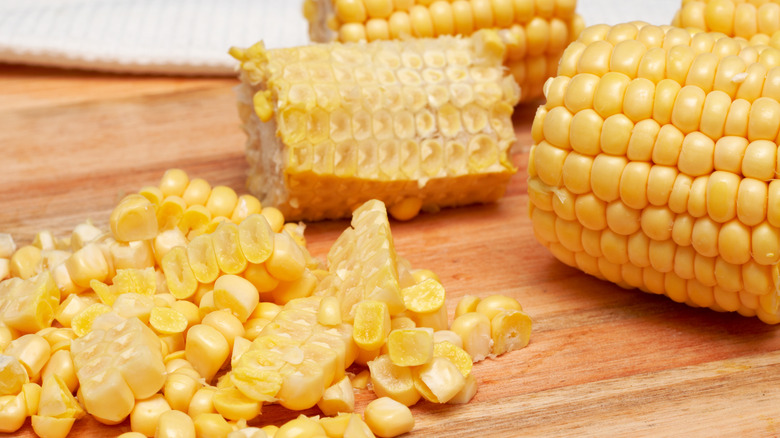
Think outside of the box when grilling corn — it doesn't always have to be on the cob. Don't limit the flavor of your stir fry, corn pudding and other succulent corn dishes by only preparing them on the cooktop or in the oven. Grilled corn, with its extra layers of flavor, can enhance all your favorite corn dishes and is well worth the extra step.
Grilling corn off the cob lets you do the prep and deal with the cobs and husks before grilling. It also gets rid of the mess and there's no need to wait for the ears to cool before handling. After the kernels are cut off, wrap them tightly in foil or place them in a cast iron skillet, add butter and any seasonings and then grill. Grilling in cast iron will give you added crispy texture and caramelization.
Grilled chunks and riblets
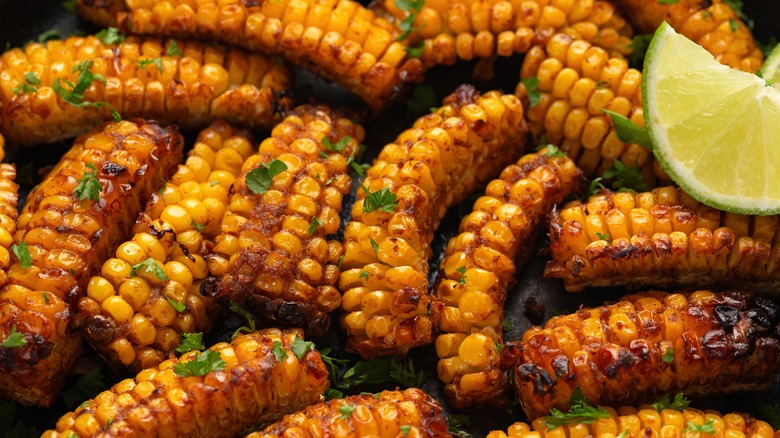
A relatively new kid on the block, corn ribs are a thing. Essentially, they are ears of corn split into four "ribs," seasoned, and grilled. Grilled corn chunks are a great addition to many recipes — think seafood boils, roasted hobo packets, and more. Simply husk the ears, remove silks, cut into chunks, and grill. Seasoned or not, the only thing you will have to do is put them in foil, cast iron, a grill basket, or some other kind of container to keep them from falling through the grates. They can easily be tossed into other dishes or eaten separately. These smaller versions may be especially handy for kids to eat and also for anyone who may not want a complete ear.
Cutting them is the hard part, but worth the extra effort. First, cut both ends off so the ear is "squared up." Then, place the large end on a cloth or non-slip mat and cut down the center of the cob using a sharp knife, taking extra caution to keep hands away from the end of the blade. Next, cut the halves again so that each ear is quartered. Lastly, season, grill, and enjoy — the ribs will curl and the kernels open up more, letting all the seasonings soak all the way to the cob. How do you eat them? Just like you do pork ribs — with the sliver of cob serving as the bone.
Pairing with other vegetables
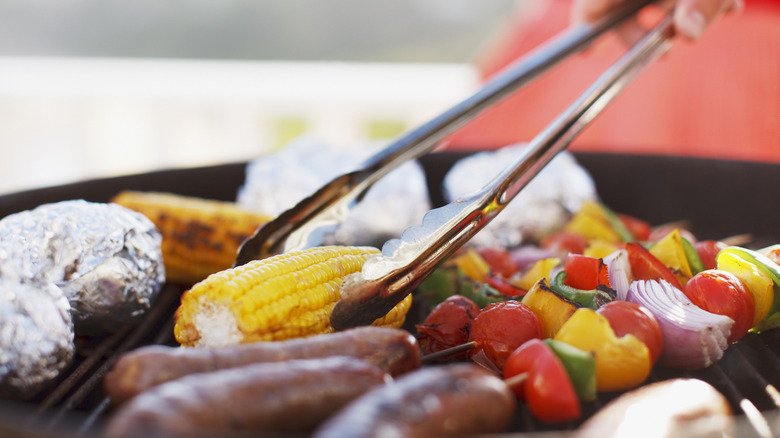
Who doesn't like a meal-in-one? Grilled corn is perfect to pair with other seasonal produce — easy-peasy with no mess afterward. Choose your favorite veggies and grill with your husked corn for a different flavor profile. Try different combinations to see what suits your fancy since each veggie will lean to either sweet or savory when grilled. Corn will lend its own sweetness so be mindful of the ratio of it to other vegetables — you might want to choose veggies that are less sweet when pairing with corn (mushrooms, celery, asparagus, and broccoli come to mind). When seasoning, remember that all the herbs and spices will either complement or overpower each other. Salt and pepper is always a good place to start when combining different foods. With lots of variations, most grilled veggies start with a basic recipe.
Be extra aware when including meat with grilled corn and veggies. Sure, all the flavors will blend but meats such as pork and poultry need to be heated to a certain temperature to be safe — options like bacon and smoked sausage can add bursts of flavor.
Oiling corn before grilling
Sweet corn and butter are just made for each other — but for a different twist for your palette, you may want to change it up a bit and try a neutral oil instead of butter. Neutral oils impart little to no extra flavor to the food you are preparing. They let the true flavor of the food shine through. In the case of grilled sweet corn, try loosening the husks and brushing some oil over the kernels instead of butter, much as you would lifting the skin on a turkey. Corn has a sweet, delicate taste all its own and oil lets you savor more of the natural flavor.
Neutral oils to try include avocado, safflower, sunflower and extra virgin olive oil because they have a high smoke point that can take the high temperatures of the grill. If you want to enhance the flavor without resorting back to butter, infuse your oil of choice with various herbs (garlic powder, oregano, basil, for instance) — just don't go overboard since the corn flavor is still the main attraction.
Microwave before grilling
Microwaving ears of corn before grilling makes for easy-to-shuck corn and is the best way to get those pesky silks off — simply nuke un-shucked ears for a few minutes, then cut off the stem end and pull the husks and silks off in one pull. The exact time for nuking depends on individual microwaves but five to eight minutes is typical (via Savory Sweet Life). After husking, either butter or oil the ears, add seasoning, and grill for a few minutes for that charred flavor.
Corn done this way is most often fully cooked from the microwave so only leave it on the grill for a few minutes — just long enough to give it some color and smokey flavor. It is also extra hot and holds more heat for longer than plain grilled ears. The advantage is that you'll still have warm corn with the rest of the meal, but the downside is it's almost too hot to dig into right away.
Parboil then grill
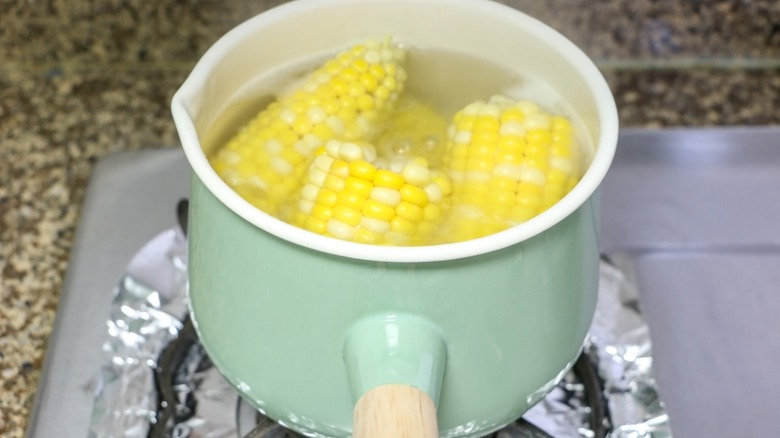
One of the obstacles of grilling is getting the various meats and veggies done at the same time. An easy way to make sure corn is at its best when the other food comes off the grill is to boil the ears before grilling. Parboil your ears in one batch for a few minutes in salted water. Add butter or oil and seasonings, and grill for a few minutes to get the char. Many grills have a side burner which is perfect since it keeps the whole process in one location. Simply boil the ears, drain, and then lay them on the grill.
The idea is that all the corn will be cooked evenly in the boiling water and can be thrown on the grates just as the other food is coming off. You can even keep the ears warm by laying them on the top rack of the grill until your other food is ready to come off. By the time you have plated the other sides, the corn will have its char — don't be afraid to pull it off after a couple minutes since there is nothing worse than over-cooked ears.
Grill then rest in a cooler
Why in the world would you want to grill corn and then let it rest in a cooler before delving into it? To give it even a deeper smoke flavor. Grill in the husks and then bundle all the ears together in a towel, place in a cooler, and let rest for about 30 minutes. The husk and silks will come off easily after steaming in the cooler. Extra flavor soaks into each kernel while the ears are resting on the charred husks.
The added flavor is well worth the extra steps that this method requires — having a cooler handy, taking the ears from the grill, wrapping them, putting them in the cooler, and husking before eating. Another added bonus is that it lets you get the corn done early so you can concentrate on the other food for your cookout, not to mention freeing up grill space for those last minute steaks.
Charcoal versus gas grill for corn
Whether you are a fan of charcoal or gas grills, either can be used to cook perfect ears — although there are distinct advantages and disadvantages to both kinds. Gas grills have more uniform heat than charcoal ones and the heat can be regulated easier. Corn can go from just right to overdone in very little time, so consistent heat makes it easier to regulate cooking time. However, charcoal grills have higher heat which translates into more flavor. When the drippings from your grilled meats and veggies, corn included, drop down onto the hot coals they turn into steam and smoke that is chock full of flavor that goes right back into the corn.
Whichever grill type is your preference, make sure it has a warming rack at the top. These make it so easy to take your corn away from the direct heat right at the peak of its perfection and still keep it warm until you are ready to plate.