How To Make Sure The Cheese Is Adequately Melted In Your Juicy Lucy Burger
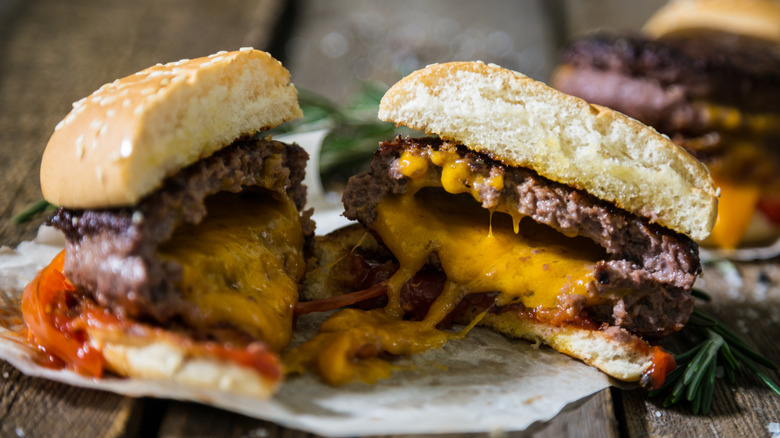
If there's one thing better than a burger, it's a cheeseburger. The combination of rich, savory, well-seasoned beef and oozy melted dairy makes for an unbeatable combination. But to really embrace the combo, it's worth not simply putting the cheese on top of the burger, but inside it — a twist unique to the Juicy Lucy burger.
Two Minneapolis bars — 5-8 Club, and Matt's Bar (which spells it Jucy Lucy) – claim to be the original home of the delicious invention, and its popularity has rightly spread far and wide. If you're looking to make your own, the success of the burger depends on that signature molten, oozing center surrounded by tender, succulent meat. Nobody wants to bite into a lump of cold unmelted cheese, but neither do you want it to become oily, separated, and greasy. And even if the cheese is perfectly melted, you need it to stay within the patties rather than leaking out as it cooks.
To get the best results, timing, temperature, and technique are key. You need to cook the burger lower and slower than you normally would, so the cheese can fully melt without burning the beef. It's also important to use a cheese that melts well, such as a thin slice of classic American. But with a few simple steps, it's possible to create the perfect homemade Juicy Lucy cheeseburger that combines the optimal taste and texture with every gloriously gooey bite.
Use a medium heat and rest the meat
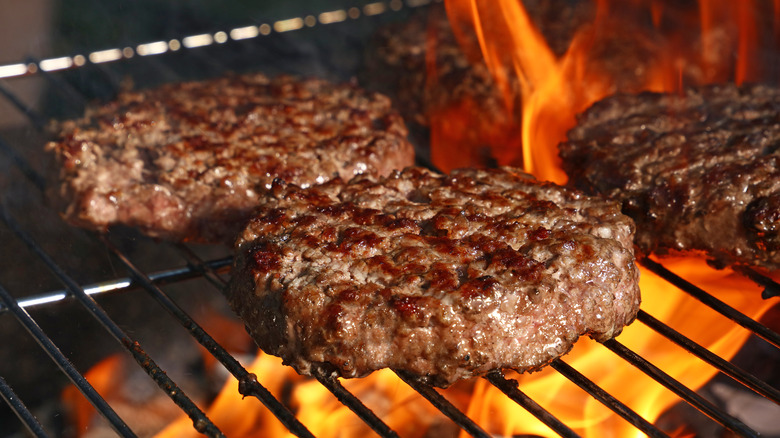
To get a good sear on any burger, as well as making sure the meat cooks evenly, the right temperature is essential. With a Juicy Lucy, that's even more important since there's also the cheesy component to factor in. While medium-high would often be the go-to, you'll actually want to go slightly lower for this stuffed patty.
If you're cooking your Juicy Lucy in a skillet on the stovetop, go for medium heat, which allows the center to melt as the exterior browns without burning. It will take about four minutes for each side. If you're grilling the burgers, you can use medium-high heat to get a good sear. Keeping the lid closed will help them to cook more quickly; they should take around four or five minutes on each side.
While you might usually flip burgers repeatedly, it's best to do so only once (halfway through) with a Juicy Lucy. This means there's less risk of the burger splitting and losing the cheese. Once cooked, you'll want to rest the burger for a few minutes before serving. This will allow the cheese to continue melting, as well as make the meat more juicy and tender. It will also mean there's less chance of burning your mouth from the lava-like cheesy center.
The best cheese to use for a Juicy Lucy burger
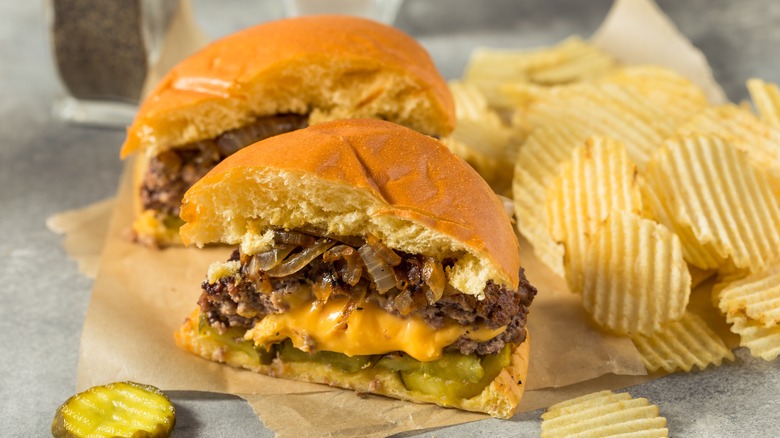
While you might think a fancy artisan cheese makes sense for a burger where the dairy is the star, it's worth sticking with good old American cheese. Its low melting point means it becomes nicely gooey, but doesn't split or go greasy, so you'll get that perfectly oozy center. Plus it adds that classic, nostalgic burger taste, too.
Since a regular slice will be too big to fit within the patties and be fully encased, cut a slice to make smaller squares, and then stack them on top of each other, like a tower. Alternatively, place a few regular slices on top of each other, then cut the stack to produce the same result. Either put each stack in the center of the bottom patty as it is or overlap the squares for a more evenly spread-out distribution.
If you want to upgrade the cheese, you need a good melter, so choose a younger cheese — one that's higher in moisture as well as fat for the best meltability. Try any type of mozzarella, which has a low melting point of around 130 degrees Fahrenheit — or go for cheddar or fontina for more flavor. For extra punch, add some blue cheese, which also tastes great with beef — it's the funky cheese Bobby Flay tops his steaks with. Another Minnesota joint, the Blue Door Pub, uses this cheese for its take on the dish, named the Blucy.