14 Tips You Need When Cooking Poached Eggs
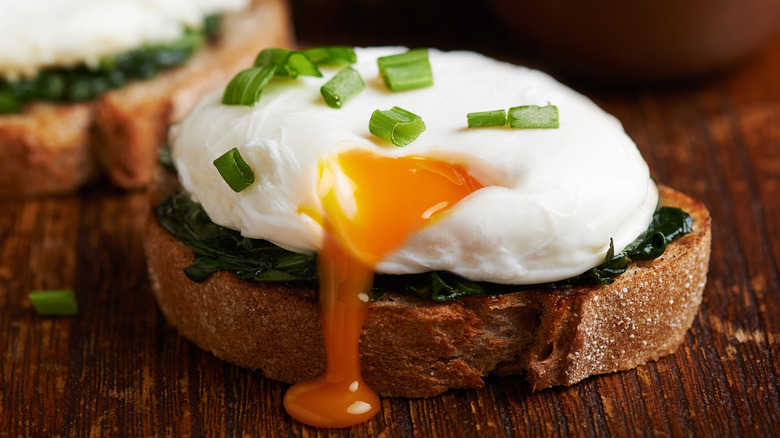
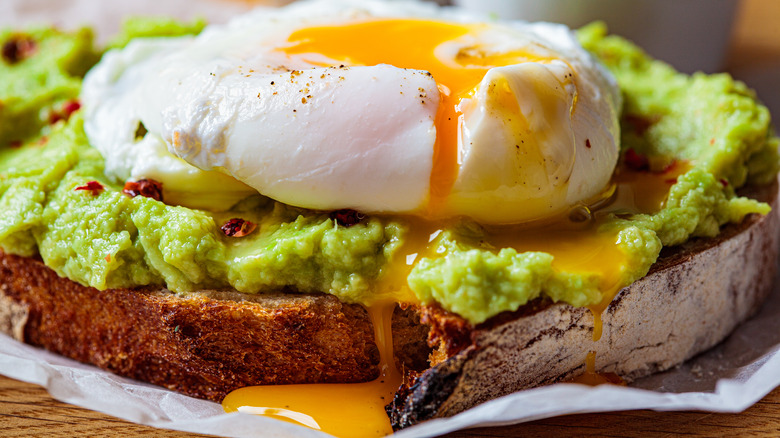
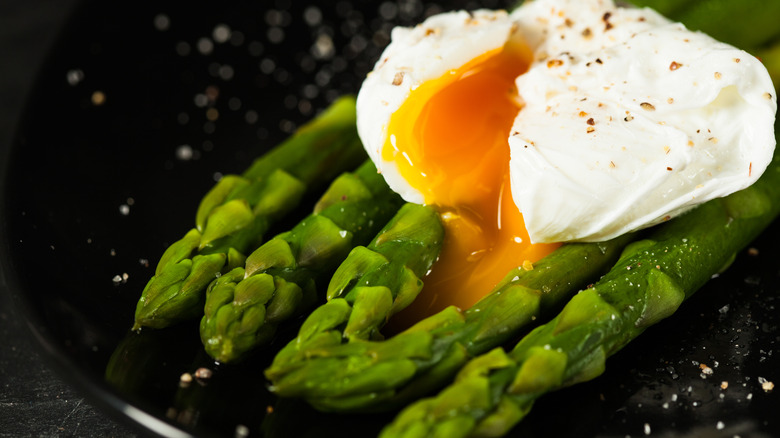
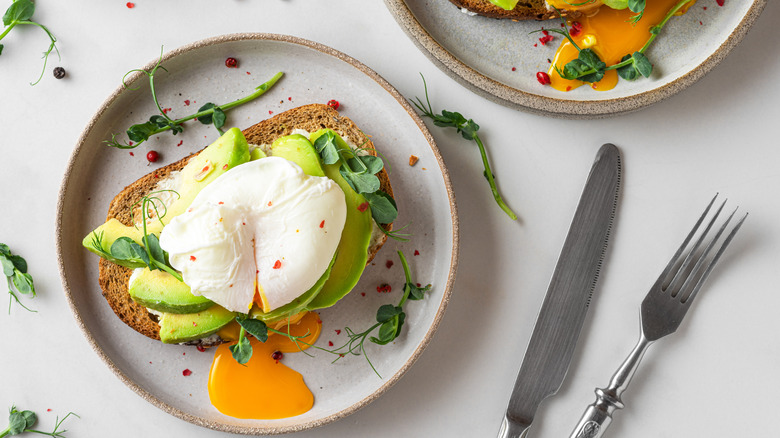
Poached eggs: a luscious, melting center surrounded by smooth, supple egg white. They are the star of eggs Benedict, the perfect finishing touch to a steaming bowl of ramen or plate of pasta, and the saucy solution to a dry, bland risotto. It's amazing what a quick trip in a steamy bath can do to the humble egg; the miracle of hot water and a little bit of time can turn the most inexperienced home cook into someone who might seem right at home in a professional kitchen. Poached eggs are an impressive cooking trick.
But when the recipe is simple, the technique really needs to shine. And nowhere is this more apparent than in poaching eggs. When it's just one ingredient, you, and a pan of water, a single slip-up means a meal is ruined. To head off disaster and get it right every time, here are tips you need when cooking poached eggs.
Use fresh eggs

The best poached eggs start with the freshest product. For a perfect poach, egg whites need to wrap around a silky, warmed liquid center. The tighter protein structure in a fresh egg white means it stays compact when it hits the simmering water. Older egg whites spread out and produce unappetizing, stringy strands.
It's easy to tell the difference once you crack an egg if it's fresh or not — older eggs are runny and have a watery white that spreads out. But to ensure your egg is fresh before it hits the water, you can use the Julian date on the carton (a set of numbers 1 through 365) that tells you the day the egg was packed, or you can try an old-school experiment. Fresh eggs sink in a glass of water because the shell is full to bursting white white and yolk. As eggs age, air enters the semi-permeable shell. If your egg sits on its side or is only beginning to tip up, chances are good it's fine to use. However, if your egg floats or stands all the way up, you won't get the desired results.
Bring eggs to room temperature

Bringing eggs to room temperature is critical when it comes to poaching. This is not an issue in many European countries where eggs are stored on the countertop, but when it comes to the U.S., you'll need to plan ahead and place your eggs on the counter for 30 minutes to bring them up to temperature.
The main reason for poaching room-temperature eggs is to maintain the even temperature of the water. If you are poaching in barely simmering water, adding cold eggs drops the temperature dramatically. If you are poaching more than just a couple of eggs, this can add to the cooking time and affect the final texture of the egg. Room-temperature eggs also have a more consistent cooking time. This helps you get into a rhythm and works better when poaching eggs for more than one person.
Some argue that poaching cold eggs is the superior method. While it's true that the egg whites and yolk are tighter when cold and may help keep the egg together, it's not worth the temperature drop and the potential for inconsistent results. The temperature drop may be a manageable issue if you are only poaching an egg or two, but otherwise, use room-temperature eggs.
Crack eggs into individual ramekins
You may be familiar with dramatic recipes featuring chefs cracking eggs from 12 inches or more above a pot of boiling water. These videos are mainly for show — any egg dropped from that height into furiously boiling water is bound to end up as egg drop soup.
If you want the best chance of success with an intact yoke and a perfectly formed cradle of egg whites, crack eggs into the individual ramekins or small bowls. This allows you to remove any stray eggshell bits and gives you more control when you are easing the egg into the water.
When poaching eggs for a crowd, this is also great for speed and efficiency. Prepping all of your eggs in ramekins to poach means you can have several pots of water going at once, with each egg close at hand when it is time to cook.
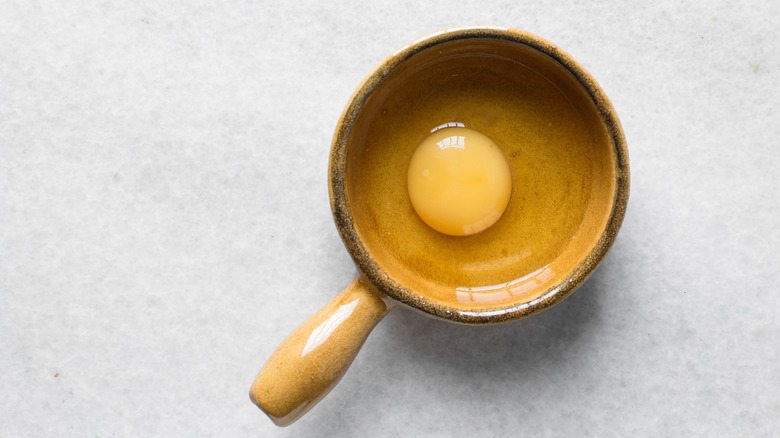
Strain excess water from egg whites
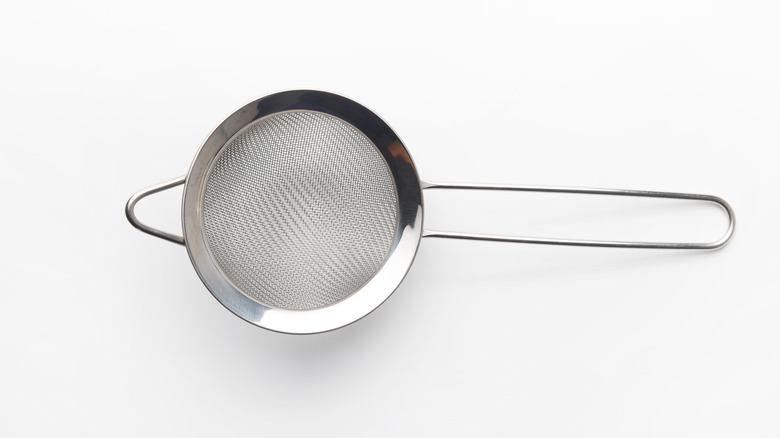
Even the freshest eggs have a little bit of water in the white. For this reason, a fine mesh strainer is your best tool for poached eggs. It catches the tightest part of the white and removes the runny part.
A fine mesh strainer can also be used as a poaching tool. Once your water is ready, crack your egg into the strainer and allow the watery white to run through. You'll know it's done straining when the remaining white looks firm and no more liquid is passing through the strainer.
Slowly ease the strainer with the egg in the water. Let it cook for a few seconds, swirling the strainer gently to ensure the egg is not sticking and to help the whites form around the yolk. Slide the strainer from under the egg and continue poaching until the egg is done. You can remove the egg with the strainer, too.
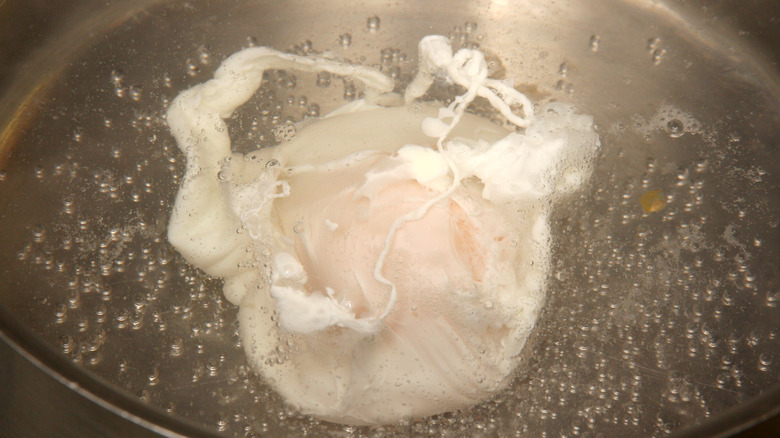
Keep the water simmering
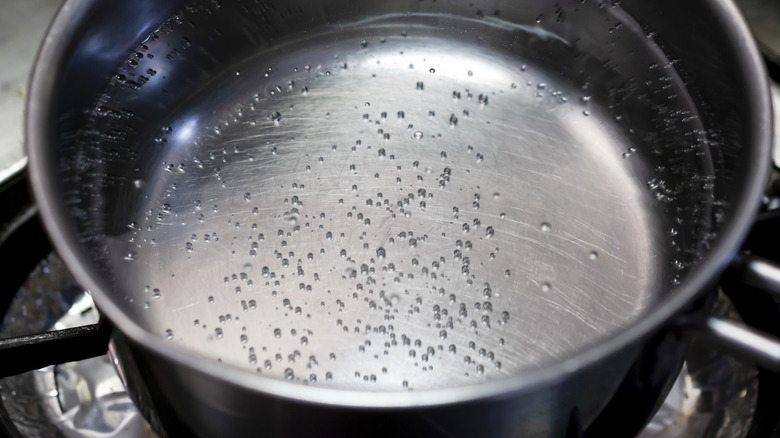
There is a lot of misguided fear over cooking temperatures and raw eggs. While it's true that raw eggs can contain salmonella, you don't need to boil an egg to make it safe to eat. The U.S. Centers for Disease Control says that an egg cooked to 160 F is the minimum benchmark to reduce the chances of salmonella. This is excellent news for egg poaching, as the sweet spot of poaching is between 180 F and 190 F.
While safety is always the first concern when cooking an egg, a poached egg's form also matters. Rapidly boiling water attacks the white and the yolk the second they make contact. This tears the delicate structures apart and can leave you with an eggy mess on your hands. For best results, bring your water to barely a simmer, with a few bubbles forming on the bottom of the pot, and steam gently rising. The egg cooks perfectly in this state, with a luscious, runny center and silky egg white. Any higher, and if your egg survives the assault from boiling, it's likely to be overcooked and tough.
Make sure the water is deep enough
Poaching eggs takes little time, but in the interest of speeding things right along, some cooks opt to use very little water. While this is possible in some cases, novice egg poachers should be wary of shallow water. If your egg is not fully submerged, or part of the white comes in contact with the bottom, the egg could be torn apart or not fully cooked.
If you have not been poaching long, stick to the more traditional method. Fill a pot with at least 2 (or more optimally 3) inches of water. Choose a pot 8 inches in diameter or larger, depending on how many eggs you'll be poaching. You'll need deep water and a wide opening to accommodate your egg retrieval system (a spider or a slotted spoon). Carefully slide the eggs into the water, swirling them gently with a spoon to keep them moving. This can also keep them intact if you misjudge the depth of the water and the eggs accidentally make contact with the bottom of the pan.
Add vinegar and salt to your water
Professional chef 101: Season every element of your dish. When the ingredients are raw eggs and water, this becomes even more important. Adding a pinch of salt to the water brings out the fresh, eggy flavor of the egg. The amount will vary, but as a guideline, salted water should always be salty like the ocean, not the Dead Sea. This means about 1 teaspoon of salt per 2-quart pot.
Adding vinegar is another pro tip. Hot poaching liquids begin to denature the protein in egg whites, which is why they become opaque and solidify. Acid helps speed up this process, capturing any stringy bits more quickly so there is less wispy wasted white and a more solid structure. Technically, any acid would work in this regard, but white vinegar is an easy kitchen staple that doesn't require anything more than removing the cap. You'll need 2 teaspoons of vinegar per teaspoon of salt.
Create a watery swirl

There is considerable argument about the need for a swirl when it comes to poaching eggs. And it does make sense to skip it if you are poaching several eggs at a time. After all, you cannot create four separate whirlpools in the same pan. However, a lot must be said for creating a watery swirl. The circular motion captures any bits of stray egg white that are trying to spread out across the pan. And you can certainly create a swirl every time you drop an egg into the simmering water if your pan is large enough.
The action need not be dramatic. Use a spoon to create a slight circular movement in the simmering water just before you slip the raw egg into it. If stray egg whites escape the vortex, use the spoon to coax them back around the yolk gently. Once the water settles down and the first white starts to set, create another swirl for your next egg. Be careful not to jostle the first egg. This swirl is not a requirement for poaching an egg. But it can help create a neat and tidy poached egg, especially if you use older eggs or skip the addition of vinegar.
Give eggs plenty of room
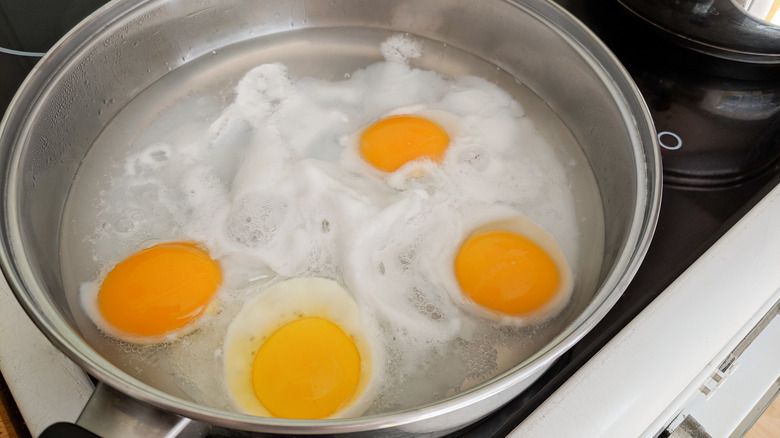
Overcrowding is definitely an issue. You can economize many things when it comes to cooking, but using a too-small pot to poach too many eggs is not one of them. Using a generously sized cooking vessel for properly poached eggs costs nothing but the extra time it takes for the water to heat up.
The depth of the pot matters here, but so does the size of the opening. You need to be able to maneuver a cooking utensil into the water without bumping other eggs that are still poaching. For one or two eggs, a pot with a 6- or 8-inch diameter works well. Any more than that, and you'll need to bump it up to a 10- or 12-inch opening.
Allow for at least 3 inches of water, more if you're cooking more eggs. Not only does this give them plenty of room to roam, but it also accommodates temperature changes when eggs are added. This is important if you don't plan to bring your eggs to room temperature before poaching.
Be gentle
It can be easy to become overwhelmed in the kitchen when many things are happening simultaneously. Consider the breakfast table and your plan to festoon it with a beautifully composed dish of eggs Benedict. In this case, you're poaching eggs and turning out a perfect Hollandaise, toasting English muffins, and preparing crispy bacon or ham. There are many balls to juggle at once, and you may feel rushed.
Don't let this haste destroy your poached eggs. It's important to move slowly and be gentle with your eggs, especially as you place them into the water and remove them from it. These two critical moments can sink your ship if completed roughly and without care. Your eggs should come to the table with the yolk intact, fully encased in white with a silky texture and no rubberiness. One swift slip of the slotted spoon may leave you with yolk dripping all over your breakfast plan.
Don't overcook
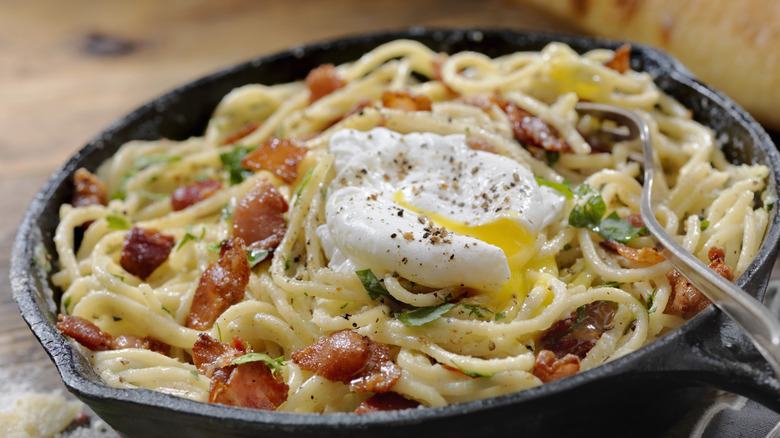
The joy of a poached egg is its perfectly runny yolk and just-set whites. The yolk spills forth in a rich cascade, saucing your noodles, enriching your ramen broth, or adding depth to plain toast. Overcooking ruins this — no one likes to cut into a poached egg to find a pale yellow, immovable center.
How do you know when your egg is ready? While some factors can influence the overall poaching time, a general guideline is that your egg should poach for three to four minutes. This time changes depending on the number of eggs you are approaching, the amount of water you are poaching in, and whether or not your eggs were cold to start with. The best test is touch. After three minutes of poaching, gently lift the egg from the water and give it a soft poke. It should feel like a water balloon, with a squishy give surrounded by a firmer egg white. If the egg white still feels soft, give the egg another 30 seconds and check again.
Use a slotted spoon or spider

Bringing a sopping wet poached egg to the table is definitely not a good idea. Not only does the excess water dilute the flavor of the egg, but it also ruins any toast or other crispy elements in your breakfast and makes sauces slide right off.
To keep your eggs tidy and dry, use a slotted spoon or a spider to retrieve them from the water. A slotted spoon can be perforated with holes or slits, and it cradles the egg gently, allowing excess water to drain. A spider has a woven wire basket that performs the same function. Take care to choose a spider with no wires poking towards the egg. Remove the eggs one at a time from the poaching water and place them on a paper towel. Use another paper towel to blot the top of the egg dry, then serve.
Try other poaching methods
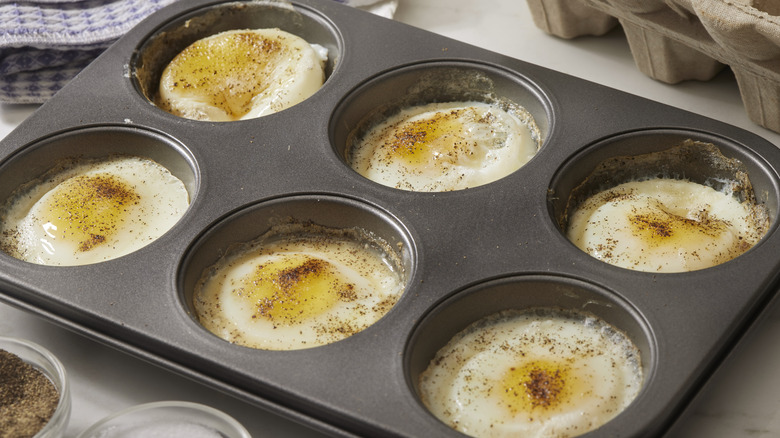
The traditional method of poaching eggs is easy once you have it mastered, but if you have neither the time nor the patience for it, there are other methods you can use. Poaching eggs in a muffin tin is suitable for batch-cooking breakfast. It's easy to add other flavors and seasonings with this method, too, but this turns your poached egg into more of a baked egg.
Sous vide egg poaching is another method that works well for a crowd. Eggs can be poached in the shell or a vacuum-sealed bag at 147 F for about an hour. With this method, eggs can be kept warm at a constant temperature without further cooking for long periods.
Use your microwave if you want a single poached egg with zero fuss. Place ½ cup of water, a splash of vinegar, and a pinch of salt into a microwave-safe bowl, and crack an egg into the bowl. Cover the bowl with plastic wrap, leaving a small space open for venting, and microwave for 60 seconds (or until the white is set). There are also special poaching cups for microwave cooking that cook more than one egg at a time. If you use these, you'll need to grease the cup so the eggs easily release when finished cooking.
Poach eggs ahead of time
Don't be caught on your back foot poaching eggs for many hungry diners. It is possible to poach all the eggs you need ahead of time, reheating them when it's time for the meal. Before you start to poach your eggs, prepare an ice water bath by placing ice cubes and cold water and a large bowl. Poach your eggs using the method of your choice, and when they are finished cooking, place them in the ice water bath. This stops the cooking and sets the egg. Your eggs can be stored for up to five days in the refrigerator. The ice will melt, but the eggs will stay perfectly cooked.
When you are ready to serve, heat a pot of water to simmering and add the eggs a couple at a time to reheat. Each egg takes about a minute, but keep in mind that the more you reheat at once, the longer it takes. The cold eggs reduce the simmering water temperature. You can have several pots of water going at once to remediate this drop in temperature. Remove the warmed eggs from the water with a slotted spoon or a spider, pat dry, and serve.