All Of The Different Ways To Cook Eggs Explained
Eggs are the perfect food, a flavor-bomb packed with nutrition that can be turned into desserts, savory dishes, and even drinks. All on their own, eggs are appropriate for any meal of the day, from hangover brunches to elegant light suppers. Eggs are popular across the globe, with every single person on Earth consuming around 160 eggs annually in baked goods and just on their own.
But cooking an egg isn't always easy. The packaging is fragile, and each part of the egg — yolk and white — has different cooking times and temperatures. Too often, a delicious meal is ruined by a slight slip in temperature or technique.
While it's true that some egg-cooking methods can be intimidating, there are other options that are less technical. When you are ready to perfect what you know and try a few other techniques on for size, grab a couple dozen eggs — you'll need them. Here are 17 egg-cooking methods to get you started.
Scrambled eggs

When it comes to pleasing the widest variety of palates, scrambled is the winning method of preparation. It's a classic breakfast dish that takes less than 5 minutes to pull together. Even better, scrambled eggs can be customized to the desired texture (soft or hard) and finished with everything from a light dusting of cheese to freshly chopped chives.
No matter how you prefer the final product, every scrambled egg dish begins similarly. Whisk the number of eggs you're preparing in a bowl until the yolk and white are fully incorporated. From here, even professional chefs part ways when it comes to cooking. Many prefer a slower cook, gradually heating the cold eggs in a pan, stirring until fluffy curds form. Others blast the heat and cook them quickly, but this requires a deft hand to prevent them from getting any color.
If you like your eggs soft scrambled, the best method is likely Gordon Ramsey's. Eggs are cooked in a saucepan and moved off and on the heat, stirring constantly, until they are cooked but still luscious and soft. Remove the pan from the heat, stir in a dollop of crème fraîche and season before serving.
Sunny-side up fried eggs
Egg eaters are divided on how they like their fried eggs. Those who prefer sunny-side-up eggs are as close to eating a raw egg as they can be without cracking it directly into their mouths. This is considered a very lightly cooked egg, and it is difficult to get exactly right.
Heat a nonstick pan to medium or medium-high heat. Add butter, ghee, or olive oil and let that come to temperature before cracking an egg into the pan and covering the pan with a lid. Pay attention to the heat here. Too hot, and the bottom will burn before the white is set. Too cool, and you'll be left with a pale, greasy egg. The Goldilocks balance is hot enough to get a little color on the bottom while gently cooking egg white.
Once the egg white is set (between two and two-and-a-half minutes), remove the egg carefully and season well. Some people like to finish the whites off the heat with a cooking torch, but this can also quickly overcook both white and yolk.
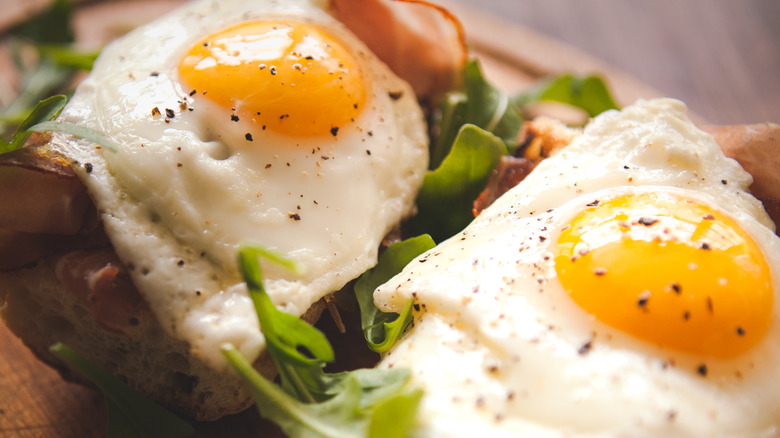
Over-easy fried eggs
Over-easy fried eggs are getting closer to the stereotypical fried egg that many people enjoy with their morning coffee. These eggs begin just as their sunny-side-up brethren, cracked into a pan heated to medium-high (with cooking fat added). But these eggs get flipped for a brief time to their other side. This seals the egg whites and cooks them just a bit longer.
The flip is the key technique here. You want to wait until the egg whites are opaque and nearly set. There should be a slightly liquid quality right where they meet the egg yolk. Flip too soon, and the whites will tear, possibly leading to a broken yolk. Use a wide silicone spatula slid just under the egg yolk for an expert flip. Flip confidently in one smooth motion. Cook on the second side for about 30 seconds, remove the eggs from the pan, season, and serve.
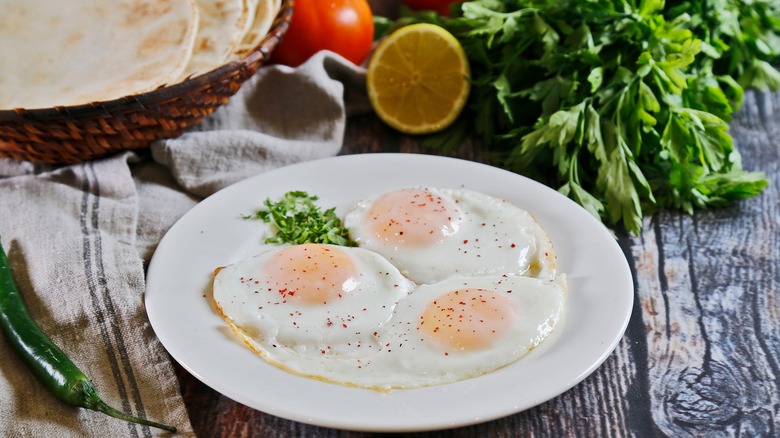
Over-medium fried eggs

Over-medium fried eggs don't get a lot of airtime when it comes to this method of cooking. But there's a lot to love about an egg yolk that is not quite set (but nearly). Over-medium eggs have that delicious, jammy yolk that is the finishing touch on a bowl of ramen, and the whites are fully cooked but not rubbery. They are easy to eat and maintain a beautiful texture that's runny enough to sauce an egg sandwich but not so much that you'll be left with egg on your chin.
The cooking method for over-medium fried eggs is similar to over-easy, but with one notable exception: the pan's temperature. Because you will cook these longer, you don't want the heat to be as high. High heat will rapidly overcook the whites and leave the yolk runny — not the goal. Medium-low heat is the move here. Bring the nonstick pan to temperature and melt your butter, ghee, or olive oil. Add the egg and cook for about 2 minutes or until the white is nearly set. Flip, then cook another couple of minutes. Your over-medium fried egg is finished when you press the yolk gently and find no squishiness (just a very subtle give).
Over-hard fried eggs

Over-hard fried eggs are for those who want the illusion of a fried egg but cannot stand the idea of a runny yolk. More than that, they are also a good choice if you want a fried egg sandwich that doesn't run all over your hands when you bite into it — these are better for kids and for people grabbing a quick bite on the go.
The only real way to mess up an over-hard fried egg is to crank the heat so high that the whites burn before the yolk is cooked. Preheat your pan to medium before adding your oil of choice and the eggs themselves. Crack your egg in the pan, and cook as usual for 2 to 3 minutes on the first side. If the oil is sputtering, your heat is too high. Flip your egg when the white is nearly set, and cook on medium-low heat for another 2 to 3 minutes. If your whites are in danger of overcooking, turn the heat down and add a lid to your skillet. This will slow down the cooking of the white and give the yolk some time to catch up. Remember, though, you are not looking for a rock-hard white or yolk. You want to retain the silkiness of the white and the creaminess of the yolk even though they are fully cooked.
Poached eggs
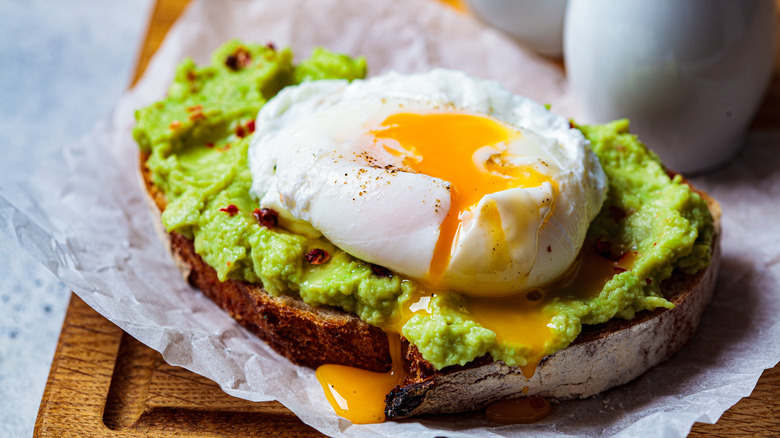
Poached eggs are the dream of brunch, the finishing touch on the plate of grilled asparagus, the perfect food when simplicity and the beauty of the egg are the focus. The ingredients are minimal, so your technique must be on point.
There are many ways to poach eggs, but for the traditional method, you'll need a pan of simmering water about 2 to 3 inches deep. Add a splash of vinegar to the water and season with salt. Crack an egg into a mesh strainer placed over a ramekin (this removes any excess water from the white). With a spoon in one hand, swirl the water to form a gentle mini cyclone, and slip the egg into the center. Use the spoon to coax any trailing egg white back onto the yolk. Keep the water at a simmer, and poach gently for about 3 minutes. Remove the egg with a slotted spoon and pat dry before serving.
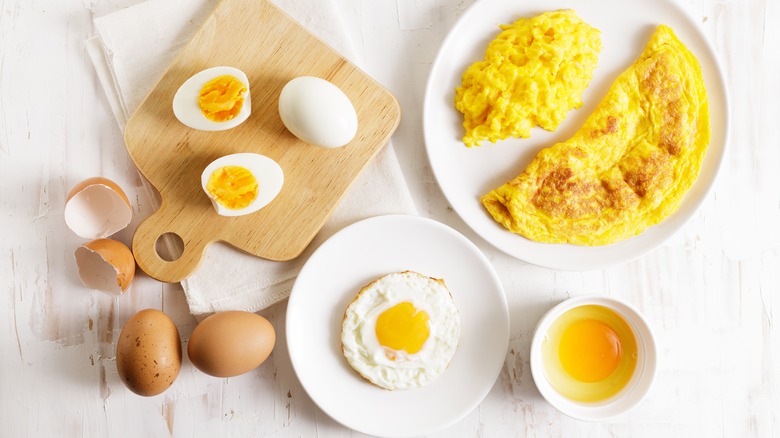
Soft-boiled eggs
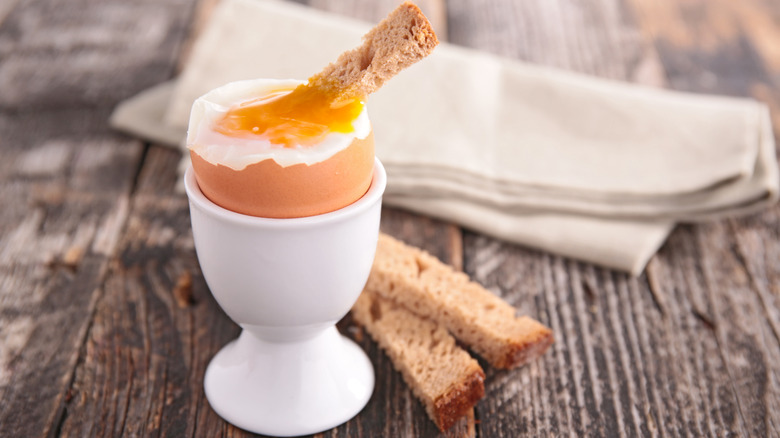
As with fried eggs, boiled eggs of every temperature have their diehard fans. At the less cooked end of the spectrum live soft-boiled eggs. Soft-boiled eggs are designed for the sit-down meal, the leisurely dipping of toast. These are not to-go food, as the just-set white barely contains the warmed yolk.
To make soft-boiled eggs, bring them to room temperature, then cover them in a pot with cold water. Bring the water to a boil, turn off the heat, and cover the pot. Let your eggs sit in the hot water for 4 minutes before draining and rinsing them in cool water. This is just to stop the cooking, not to chill the eggs. To serve, place each egg in an egg cup and use a spoon to slice off the top of the egg, shell and all. Dip toast points into the warmed yolk, and enjoy.
Hard-boiled eggs
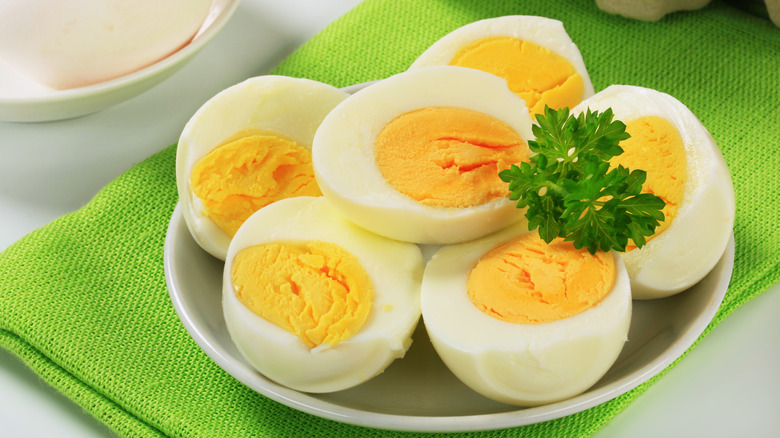
For some, hard-boiled eggs are the antithesis of soft-boiled eggs. While it is true that they are located on the other end of the cooking spectrum, hard-boiled egg enthusiasts know that a completely cooked egg should still be soft and creamy. The white is not meant to be rubbery, and then the telltale greenish ring around the yolk that indicates overcooking is a no-no.
The technique for hard-boiled eggs is the same as for soft-boiled eggs (add room temperature eggs to cold water, bring that to a boil, then turn off the heat and cover), but the cooking time varies. The best way to get the result you want is to experiment. Typically, a fully hard-boiled egg that is not overcooked is ready after 8 minutes of resting in the hot water. For some, this might still be a little wet, and indeed, if you use your hard-boiled eggs in a sauce or another dish, fully cooking the yolk is critical. Give them an extra minute in the water, but no more than 10 minutes.
Omelets
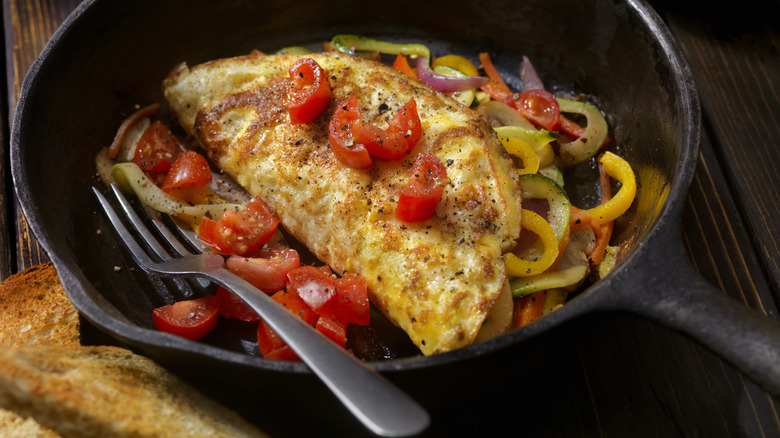
One of the best ways to gauge a chef's skill is to ask them to cook an omelet. Omelets in the French style are simply cooked, just set, and have no color whatsoever. But the good news is that you don't have to be so precious about your omelet. Yes, there is something perfect and elegant about a simple French omelet or Japanese tamago, but rustic is right on when you're cooking at home.
Whisk your eggs together and pour them into a hot nonstick pan. As the bottom begins to set, swirl the pan around so the liquid moves toward the outside and cooks. Add fillings like cheese, vegetables, bacon, and chopped sausage when the liquid is nearly gone. Cook until the edges of the omelet set, then fold over carefully. If you prefer no liquid inside, turn the heat off and cover the skillet for a minute to let carryover cooking firm everything up. Otherwise, serve immediately.
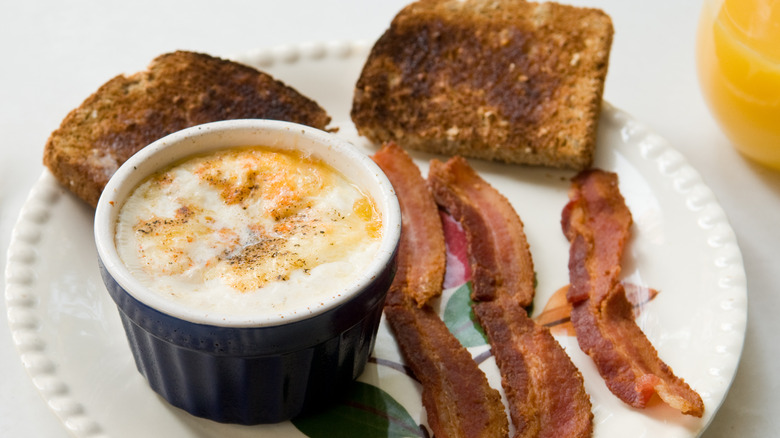
Coddled eggs
Coddled eggs go by a wide variety of names, but they are often mistaken for shirred eggs, another egg variation that has distinct differences in cooking method and final texture. Coddled eggs are also called eggs or oeufs en cocotte, named for the small dish in which they are prepared.
The key to this preparation is slow, gentle cooking in the oven, resulting in a creamy, custard-like texture. A bain marie, or water bath, is used to accomplish this. Crack one or two eggs into a greased ramekin (the number of eggs depends on the size of the cooking vessel). They can be seasoned, and some cooks add other elements (but this is not traditional).
Place the ramekins in an oven-proof baking dish and add hot water to that baking dish just at the level of the egg in the ramekin. Bake at 350 degrees Fahrenheit until the whites are set. Alternatively, these can be prepared on the stove in a skillet with water and a lid to set the whites.
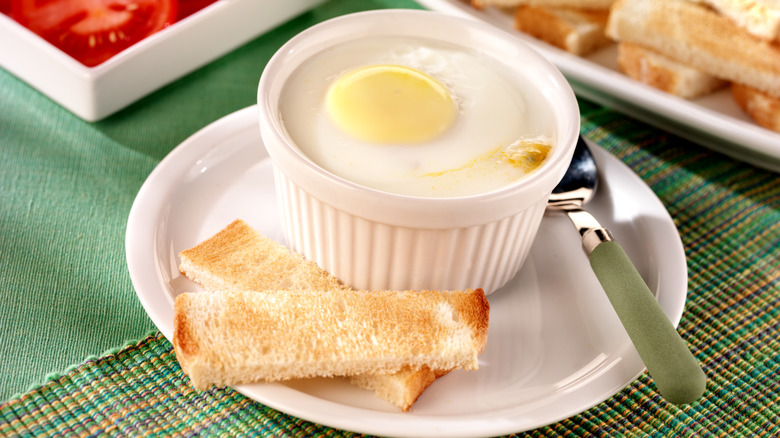
Microwaved eggs
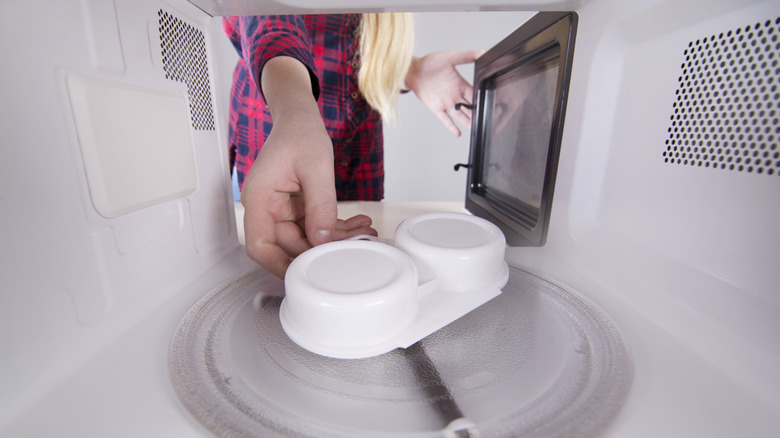
Making eggs in a traditional fashion is speedy quick, but if you are a person who only has a minute or two for a meal, cooking eggs in the microwave might be your best option. The attentive microwave chef can accomplish two types of egg cookery. The first is a simple scrambled egg. Beat or whisk eggs until the yolks and whites are incorporated, then heat in a microwave-safe bowl at 30-second intervals, stirring in between and keeping a careful eye on the curd formation. Remove when the texture suits you, season, and tuck in.
Poached eggs can be cooked in a microwave for a slightly more upscale presentation. You can use a kitchen tool designed for this purpose or poach them in water-filled ramekins. This will not give you the same perfect presentation as a more traditionally poached egg might, but it will do in a pinch. Add half a cup of water to a ramekin and gently crack an egg into the water. Heat in the microwave in 30-second bursts until the white is set but the yolk is runny. Remove the egg from the water and pat it dry before eating or adding it to your Eggs Benedict.
Cloud eggs
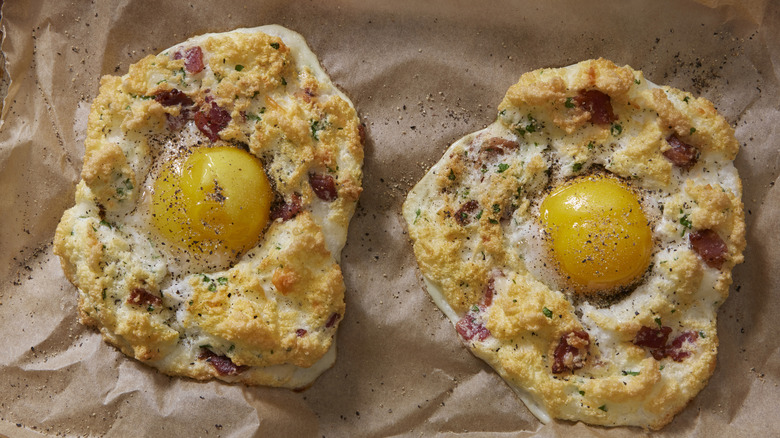
Cloud eggs were born on the internet and moved onto experimental tables IRL across the globe. Puffy cooked egg whites cradle a warmed egg yolk like a cloud holding a star. This fussy cooking started as more of a show, but the result can be quite delicious when perfected.
This egg dish is a two-step process. Start by separating egg whites and yolks, keeping each yolk separate. Whip the egg whites until stiff peaks form, then drop by the spoonful onto a baking dish lined with parchment paper (create a little cup in the center with the back of your spoon). Bake these at 350 degrees Farenheit until the whites are dry and set and just beginning to brown. Remove the egg whites from the oven and nestle a single yolk in each one. Return the tray to the oven and bake another 3 to 4 minutes or until the egg yolk begins to set. Serve these as you would a poached egg, on toast or as part of Eggs Benedict.
Shirred eggs
Shirred eggs is an egg dish related to coddled eggs but more working-class. There is no fussy water bath to contend with, and adding other ingredients means you're more focused on flavor than texture. Eggs are cracked into a ramekin with toppings like cheese, herbs, and cream, then baked until set.
You'll need one ramekin per serving, and the number of eggs in each depends on the size of the ramekin. Butter the dish well, and crack your egg into it. Top with a bit of heavy cream, chopped spinach, crumbled bacon, goat cheese, or diced vegetables. If you add heavier ingredients like potatoes or chopped sausage, put those in the ramekin first so their weight does not break the egg yolk. Bake in a 350-degree Fahrenheit oven until the egg and its white are set. It might be tempting to cook the yolk all the way through but pull them out before that happens. You want a little sauce in the dish.
Sous vide eggs

Sous vide eggs take all the guesswork out of egg cookery. Theoretically, you could place eggs in a temperature-controlled water bath and hold them at that temperature without further cooking for 24 hours. Of course, this is not advisable, but if you make poached or boiled eggs for a crowd, as restaurants do, this is a great solution.
The temperature range for a sous vide egg is 130 to 165 degrees Fahrenheit. At the lower end, the white is barely set, and the yolk is just warm. Higher temperatures produce an egg that can be used anywhere a hard-boiled egg is at home, and the middle temps are all about that silky, jammy center. Consider how you will use the final product, then set your sous vide tool for that temperature. The softest eggs will take around 45 minutes to an hour to cook, but hard-boiled eggs must be simmered for at least 2 hours.
Frittata
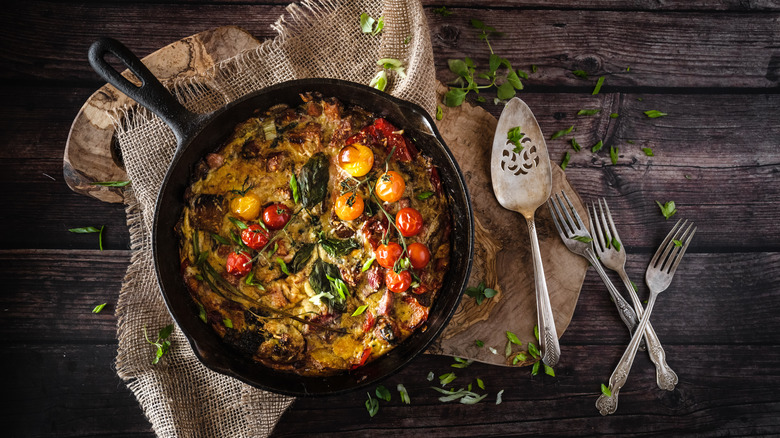
Frittata is a fridge-clearing dish tailored to your family's taste. It's not entirely hands-off, but using leftovers or pre-chopped veggies makes it easier to prepare quickly.
Preheat your oven to 350 degrees Fahrenheit. Whisk your eggs in a bowl and chop up anything you'd like to include in your frittata. Leftover potatoes, roasted vegetables, leafy greens, and cold meats are all good additions. In an oven-proof skillet, sauté your additions until they are cooked or warmed through. Add your whisked eggs and cook on the stovetop, undisturbed, until the edges of the egg begin to set. Transfer the skillet to the oven and cook for 10 to 12 minutes or until the top of the frittata is set.
Let the frittata rest on the counter for a couple of minutes while you set the table and pull together a last-minute salad to complete the meal. Bring the whole skillet to the table and serve like a pie. Pass fresh chopped chives, sour cream, and hot sauce.
Marinated eggs
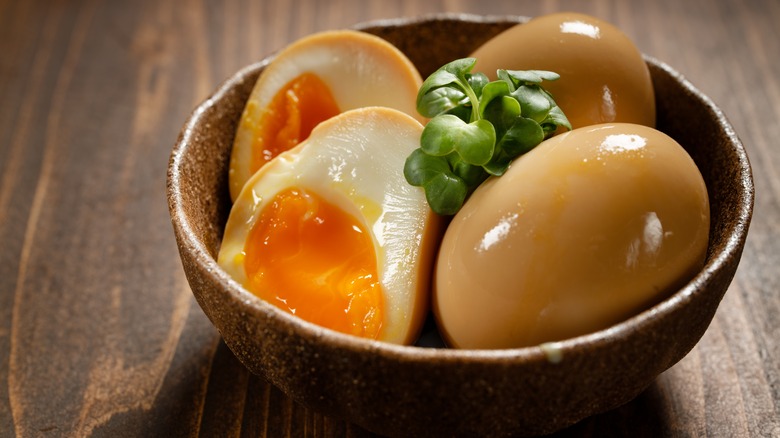
It might sound like a simple gimmick — marinating hard-boiled eggs — but this subtle technique imparts a big flavor bump into any dish where a regular old egg just won't do. The flavors of Asia are well-represented in this style of egg cookery, and it's all about the marinade.
Prepare your hard-boiled eggs as usual, then choose your marinade. Taiwanese tea eggs use Chinese black tea and many traditional spices found in Chinese five spice. With their soy sauce, sugar, and spicy pepper marinade, Mayak eggs from Korea appear in banchan, the traditional dishes served before a meal. Japanese ramen eggs swim in a little soy sauce and mirin before topping hot noodles, and Filipino adobo eggs harness the powers of soy sauce and black pepper for their salty, spicy flavor. Peeled, hard-boiled eggs should rest in these marinades overnight and be consumed within five days of their preparation.
One-eyed jacks
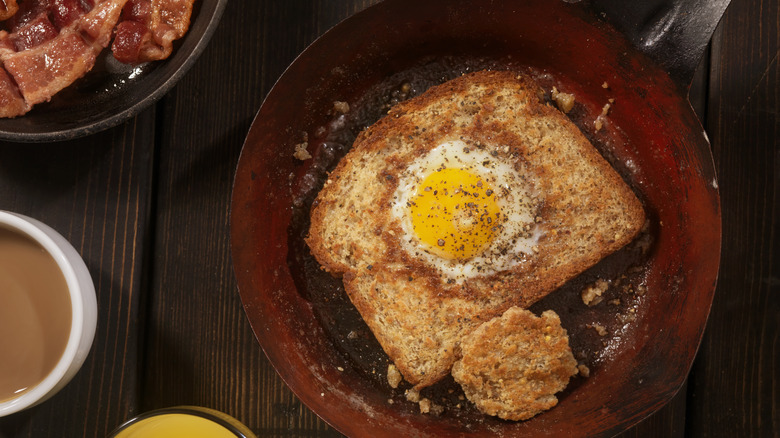
This all-in-one breakfast goes by many names — egg in a hole, one-eyed Jack, egg in a nest, or bullseye egg, for starters — but no matter what you call it, it's delicious. You'll need only breakfast staples and a little technique.
Start by toasting one slice of bread for each egg you'll cook. When your toast is done, use a 2-inch cookie cutter (or a shot glass) to remove a circle from the center of the bread, and set the circle aside. Butter both sides of the bread, and add to a nonstick skillet heated over medium heat. When the bread begins to sizzle, crack your egg into the hole. Fry to your desired doneness, using the same guide you used for over-easy, over-medium, or over-hard eggs. Flip and finish cooking on the other side. If you like your yolk runny, use the circle of toast you removed to dip.
Pro tip: If you'd like to skip the bread, slice a circle of green pepper about the same thickness and use that to contain your egg. Or double down by first making a grilled cheese sandwich, letting it cool slightly to set the cheese, then cutting out a circle for the egg.