11 Tips For Perfectly Smoked Meat On An Electric Smoker
Although evidence of slowly cooking meat in an earth oven over hot coal (aka smoking) can be traced back to central Europe about 30,000 years ago, imparting a smoky aroma on meat is credited to Native Americans who smoked meat over an open fire using wood as a source of fuel (per Literary Hub).
Smoked meat's tender, succulent texture is unmatched, particularly the smoky flavor that has been the trademark of smoked meat since ancient times. And so it's no wonder meat smokers have evolved to the most recent electric ones, hoping to balance rich smoky flavor, ease of use, and convenience.
While electric smokers are excellent for beginners and expert grillers, it's a hurdle for many to end up with the coveted crisp bark, tender interior, and unique savory taste. So, how do you get this easy yet elusive combo? Stay with us as we break down the nuances of making the perfect smoked meat on an electric smoker.
Preheat the electric smoker for a shorter cook time

Preheating an electric smoker sets the stage for the main agenda — smoking the meat. It allows the meat to start cooking immediately, eliminating the risk of it staying in the danger zone, which are temperatures between 40 and 140 degrees Fahrenheit. Some bacteria thrive in low temperatures and drastically multiply in the danger zone. Further, since the meat will find the interior of the electric smoker at an even temperature, there's no way some parts will start cooking ahead of others. It will cook evenly, which is exactly what you are looking for.
How long you should preheat the smoker differs from one electric smoker to the next. But a majority will require between 20 and 45 minutes, depending on the type and size of meat — and also the weather. To be on the safe side, check your manual to determine the recommended preheating time.
Now, this is important: Straight off the bat, set the preheating temperature at the recommended degree for the meat you're smoking. Even better, set the temperature slightly higher and wait for the smoker's interior to reach the required internal temperature. Monitor the temp once the meat is inside, as it sometimes fluctuates.
Set the temperature depending on the type of meat
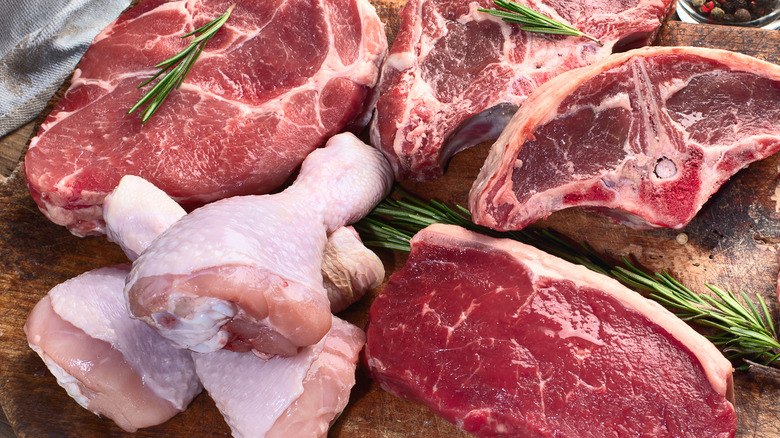
How long it takes to smoke chicken differs from the time it takes to smoke turkey or pork ribs. Factors such as the weather and the size of the meat also play a crucial role. For those reasons, the Food Safety and Inspection Service recommends using two thermometers, one to measure the temperature of the electric smoker and another for the interior of the meat. According to the organization, the electric smoker temperature should be between 225 and 300 degrees Fahrenheit for all meat and poultry products.
As for the meat's internal temperature, 145 degrees Fahrenheit is perfect for beef, lamb, pork, and veal. On the other hand, poultry is ready when your food temperature reads 165 degrees Fahrenheit. But if you want tender smoked meat that melts in the mouth, 180 degrees Fahrenheit internal temperature or slightly higher is excellent.
The one thing that surprises many novice smokers is temperature swings, where the temperature fluctuates considerably below or above the set temperature. This is a common phenomenon in electric smokers. The smoker's temperature tends to fluctuate when the wood burns to emit flavorful smoke, and the meat's internal temperature rises. You'll also discover a temperature swing after opening the door to replenish the water in the pan or check the meat — minimize how often you do that.
Use a water pan for moist smoked meat
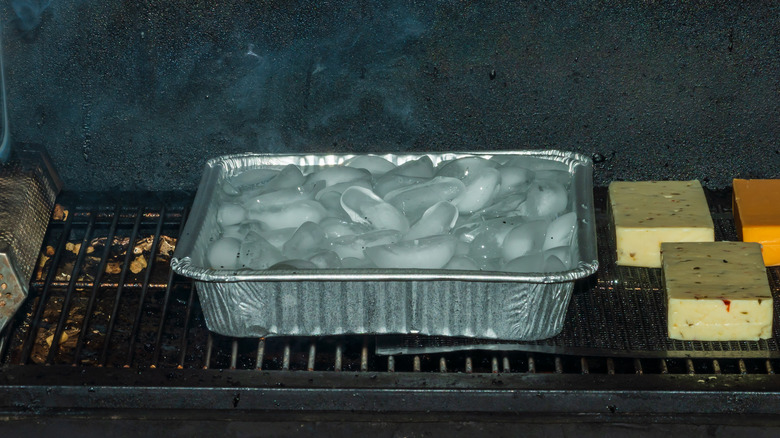
Most (if not all) electric smokers come with a water pan. The steam from the water pan maintains a humid environment that tenderizes the meat so it doesn't come out chewy. You can fill the water pan with water only or spice it for a unique flavor. Herbs like thyme, oregano, sage, rosemary, or even lavender can impart unique flavors as the aromatic steam infuses into the meat. Your options are not limited to herbs. Other additives that have been tried and tasted include apple juice, wine, beer, apple cider vinegar, and broth. The key is determining and sticking to the aromas that give your desired taste.
Apart from ensuring a juicy barbecue, the water pan plays another crucial role in maintaining the temperature of the smoker. In cases of temperature swings, say when you open the smoker door to check the meat, the steam balances out the internal temperature by replenishing the lost heat. Conversely, when the temperature rises, the water absorbs the heat. Now, for the best results when using the water pan, fill it up from the get-go so that you don't have to keep filling it up unless you are smoking for long hours.
Allow for enough smoking time
Unlike grilling, where the meat is directly exposed to heat, making it cook faster, smoking relies on low temperatures, hence slow cooking. It takes considerably longer. The good news, however, is that electric smokers come with a control panel. You can set the time and go about your business. But wait, if it were that easy, wouldn't we all be smoke masters?
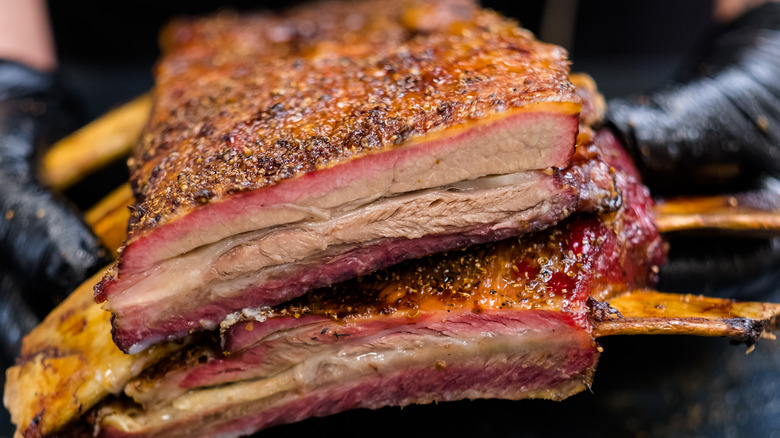
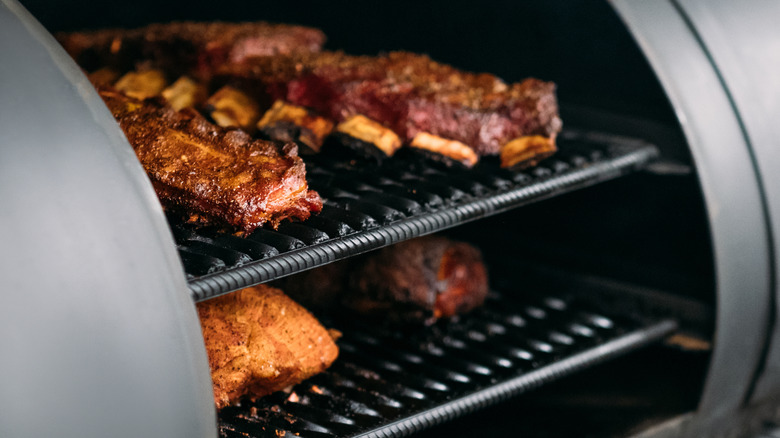
When it comes to smoking time, achieving a perfect crisp bark while the interior remains tender and juicy requires getting the smoking duration for the particular meat right — and knowing what to do at different intervals. Let's explain this further. Smoking time can range between two and 20 hours. For example, given that brisket is thick, it lends itself to a long cooking time of up to 22 hours. In contrast, a pork rib may only take six hours.
Regarding what to do at different intervals, many pit masters swear by the 3-2-1 smoking rule. For the first three hours, the meat cooks while simultaneously getting smoked. In the fourth hour, you take the meat out, wrap it in aluminum foil or butcher paper, and return it to the electric smoker for another two hours. And in the last hour, you remove the foil and let it cook for an hour for a crusty bark.
Choose the right wood size for depth in taste
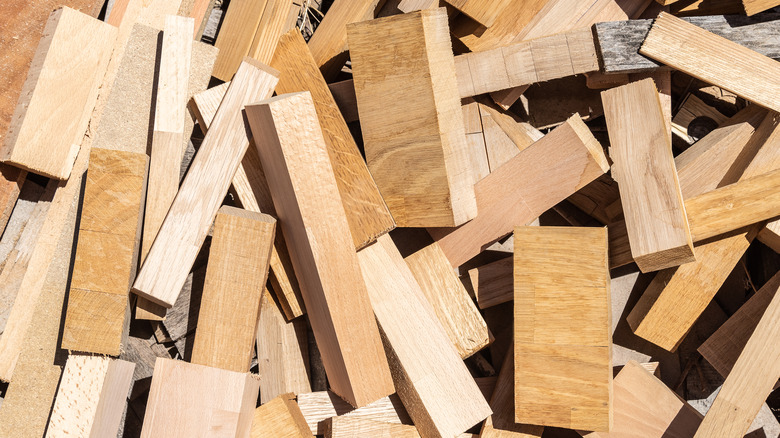
The star of smoked meat is the smoky flavor. If you don't get it right here, you can bid goodbye to a flavorful finger-licking smoked meat. Unknowingly using chunks of wood for smoking fish that take 30 minutes to 1 hour to cook can result in a choking, bitter flavor, making the fish unpalatable.
So, what's the solution? Well, let's break down what sets wood chunks and chips apart.
Wood chunks are bigger than chips, burning longer and producing more smoke. They are perfect for long smoking hours as you don't have to refill. The ideal scenario to use wood chunks will be when smoking a brisket. Chips burn faster, meaning they emit smoke for a short time. Foods like fish will get just enough smoky flavor without being overpowering. Equally important is choosing a high-quality wood that emits clean smoke.
Additionally, confirm whether your electric smoker uses wood chunks or chips. Whichever the case, you can always improvise. If the only option is wood chunks and you feel chips will do a better job, wrap a handful of wood chips in aluminum foil and poke the foil for the smoke to come out. Place the foil on the grill and set the temperature.
Pick a wood flavor that pairs well with the type of meat
Wood flavors are not mandatory, but pairing your meat with just any wood flavor won't cut if you want delectable smoked meat. With the many options available, understanding what wood flavor pairs well with certain meat can be daunting. But here's what you should know: Wood flavors are categorized into mild, medium, and strong. Depending on the type of meat, you'd want to settle for a flavor that's not overpowering or underwhelming. The key is striking a balance.
Fruit trees like cherry and apple are mild and have a gentle, sweet smell. They can be used for foods like salmon or pork. The mild wood chips are excellent at neutralizing strong flavors (think: mesquite) – or producing rich ones when mixed with medium flavored wood chips (think: pecan, hickory, and oak). Hickory is perfect for meat. But the savory taste can quickly turn bitter if it burns for a long time. For best results, mix it with pecan to blend in the nutty, sweet flavor. If you are more of a smoke than a flavor griller, then oak is your go-to flavor.
Mesquite has a strong aroma, so tread carefully! Use it for foods with short smoking times, like wings. Better still, combine it with pecan or oak to neutralize the bold flavor and create a robust, rich flavor.
Control the smoker's vent

Regulating an electric smoker's vent is crucial to get just the right amount of smoke. The flex is to ensure a consistent stream of fresh air while letting the stale air escape to prevent creosote from accumulating on the meat's exterior.
There are two vents in an electric smoker: the back and exhaust vents. As the name suggests, the back vent is on the lower back of an electric smoker, allowing air to get in and combust the wood chips. Further, the air allows the smoke to rise, continuously penetrating the meat before leaving through the exhaust vent on top of the smoker. And so, getting perfectly smoked meat boils down to when to open or close the vents.
If you are like us, a well-browned bark that's crispy with an alluring smoky aroma is what makes you go gaga for smoked meat. To achieve this, completely open the vents throughout the smoking process. Because you might completely forget to do so once the smoking begins. Also, opening the vents during the smoking process could lead to temperature fluctuation.
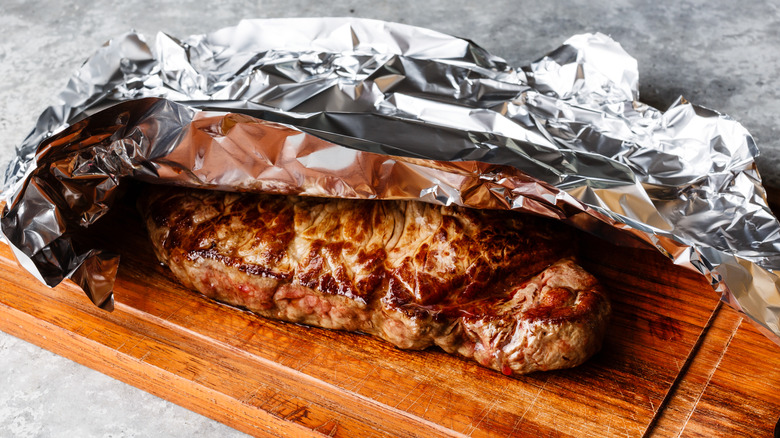
Butter the meat before wrapping it in foil
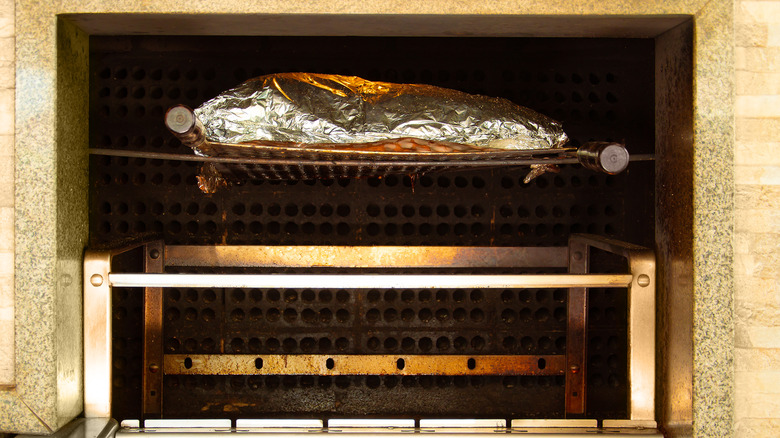
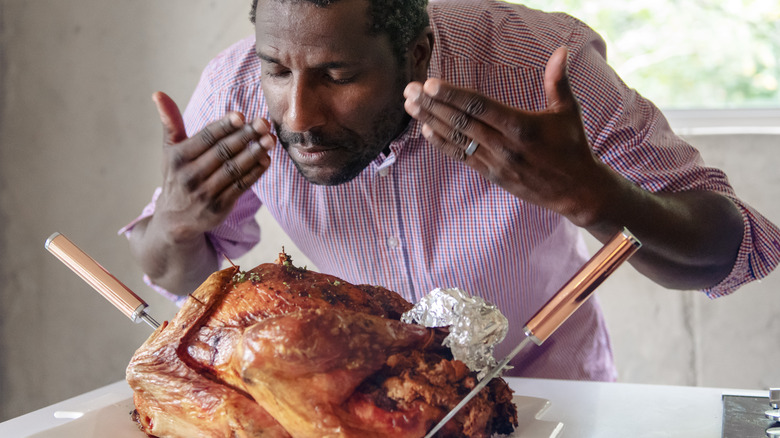
Most pit masters wrap their meat with aluminum foil or butcher paper in the last hour of cooking to lock in moisture — preventing the crust from drying out. But that's not all there is to it: Applying butter before wrapping up the meat is a life-changing trick that will take your smoking skills to the next level. World champ BBQ pit master and challenge ambassador Loren Hill revealed that he learned to use butter on ribs and chicken in his competition BBQ classes. Later, he tried the same with pork and brisket and got "more consistent and better results" (via Challenge Butter)
Halfway through smoking, the meat is wrapped in two heavy-duty foils to prevent the crisp bark from getting excess smoke, maintaining a brownish bark. The aluminum foil also traps moisture and allows the meat's interior to cook evenly and faster. For even better results, a stick of butter (the size varies depending on the size of the meat) is placed on top of the meat before being tightly wrapped in foil and placed back in the electric smoker. Butter not only helps maintain moisture but also injects an additional layer of flavor. The final result is the most luscious smoked meat ever!
Use a sauce in the last 30 minutes
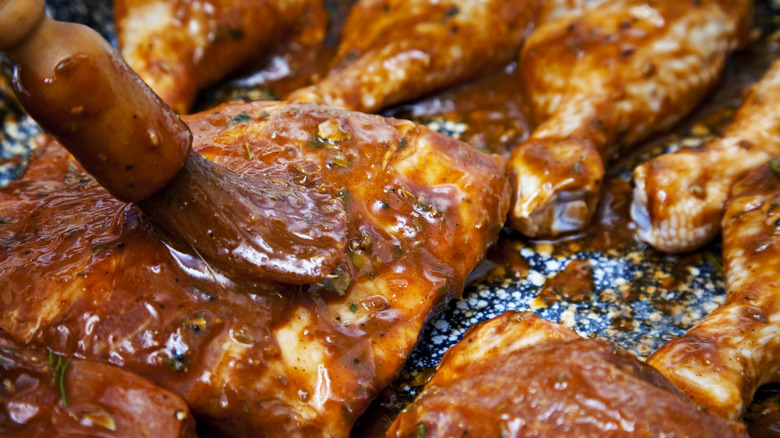
The Food Safety and Inspection Service recommends using a sauce in the last 15 to 30 minutes to ensure enough time for the sauce to caramelize the bark without burning. The tricky part here is balancing the sauce's sweet flavor with the smoky taste of smoked meat. So, the solution is to apply two layers of sauce. This way, the sweet taste of the sauce can complement the smoky flavor without being overpowering.
Don't do yourself the injustice of using cold sauce straight from the fridge and onto the smoked meat. It will lower the meat's temperature. Instead, let the sauce rest at room temperature before using it. If you are short on time, warm it up in a microwave. This process reduces its viscosity, making it easy to apply. You can pour the sauce directly onto the meat and then use a barbecue sauce brush to spread it evenly on both sides of the smoked meat. However, it's best to pour the sauce into a dish and then use a brush to apply — this way, you'll have more control over application.
Make the most of dry rubs
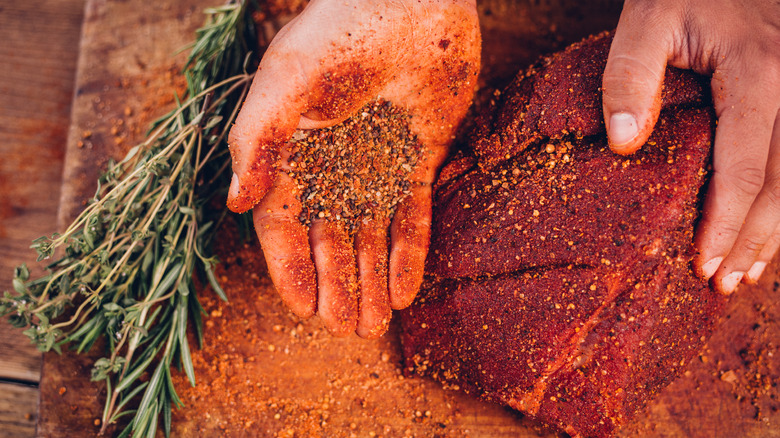
A well-formed bark is what most (if not all) smokers crave. And dry rubs are excellent for creating a crunchy exterior packed with flavors. Dry rubs stick onto the wet exterior of the meat. During smoking, the moisture from the meat dissolves the soluble spices, which infuse into the meat, creating depth of flavor. The insoluble spices dry on the surface of the meat, helping form a brownish bark.
There are diverse dry rubs. All you need to do is get a spice rub of your choice and sprinkle it on every spot of your meat before smoking. You can rub the spices and smoke the meat immediately or let the meat sit in the fridge for some hours for the spices to produce intense flavors. If you choose the latter, remember to thaw the meat before cooking.
You can use ready-made dry rubs or get creative and make one yourself. The base ingredient in making a dry rub is salt and sugar. From there, add ground pepper. Then, sprinkle in a transition spice (think: cumin, chili powder, or paprika), and finally blend in your signature flavor (think: ginger, coriander, garlic powder, onion powder, oregano, thyme, rosemary, or mustard powder). And voilà! You have your homemade dry rub. Now don't let this list limit you. Go wild if you must. Find a unique, flavor-packed dry rub that matches your taste.
Let the meat rest
Opinions abound on just how long you should let your meat rest once it's out of the smoker. Let's clear the air once and for all. According to the Food Safety and Inspection Service, three minutes is okay. When smoking meat, the heat makes the connective tissues contract, releasing moisture, which is drawn in the center of the meat. This is why when you cut the meat immediately, juices ooze out. However, letting it sit for three minutes allows the temperature to decrease, the muscles to relax, and the juices trapped in the center to be redistributed into the muscles.
Jeff Savell, a professor of meat science at Texas A&M University (via NPR), asserts that all meats benefit from resting because cooking interferes with the protein found in meat. Thus, resting allows the moisture — cooked meat contains 55% water — to redistribute in the muscles and "remain somewhat bound back to the proteins, resulting in the product we all desire."