Brunch Better: Bacon And Scrambled Egg Onigiri
We may receive a commission on purchases made from links.
If you've never savored a Japanese rice ball, known as onigiri, you're about to enter a world of delicious simplicity. These easy-to-craft, portable and healthy little pouches can be made vegetarian, vegan, pescatarian or fully carnivorous, and they're an attractive and crowd-pleasing way to get your lunch on. Join Japanese writer, author and TV host Sonoko Sakai and discover onigiri her way.
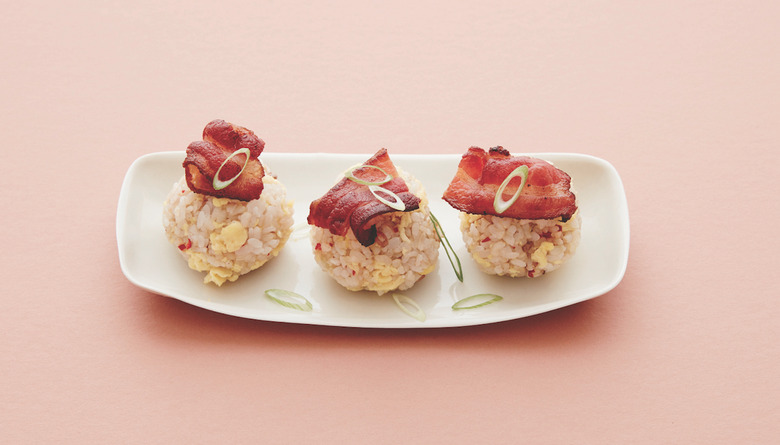
This onigiri is a little fatty from the eggs scrambled in butter and the bacon. If you like, you can hold it all together by wrapping it like an envelope.
Brunch Better: Bacon And Scrambled Egg Onigiri
Prep Time
10
minutes
Cook Time
30
minutes
servings
12
ball onigiri
Total time: 40 minutes
Ingredients
- 3 eggs
- 2 1/4 teaspoon sea salt
- 1/4 teaspoon freshly ground black pepper
- 1 tablespoon butter
- 1 green onion
- About 5 cups short-grain rice
- 6 ounces cooked bacon
Directions
- In a medium bowl, beat together the eggs, 1/4 tsp of the salt, and the pepper.
- In a nonstick or cast-iron frying pan over medium-low heat, melt the butter. Pour in the eggs and cook, stirring with a spatula, until soft lumps of eggs begin to form, about 30 seconds.
- Sprinkle the chopped green onion across the eggs, turn the heat to low, and shift from stirring to folding the lumps. As soon as the egg sets, about 1 minute, remove from the heat and transfer to a plate.
- Have ready a large plate or cutting board to hold the finished onigiri. Prepare a small bowl of water for wetting your hands and a small bowl containing the remaining 2 teaspoons of salt. Arrange near the plate.
- Cut out a large piece of plastic wrap and drape over a small teacup or bowl.
- Fold the scrambled eggs into the rice, combining gently, without mashing the grains.
- Moisten your hands with the water to keep the rice from sticking to them. Lightly dip the tips of the index, middle, and ring fingers of one hand into the bowl of water, then into the bowl of salt. Rub the salt onto your palms. You should have a light coating on your palms.
- Gather the plastic wrap and lift the onigiri out of the teacup with your hands. Twist the ends of the plastic wrap and mold the rice into a ball. Unwrap the plastic, remove the onigiri, and give it a gentle final press with your slightly wet hands. Don’t press too hard; the onigiri should be firm on the outside but soft and airy on the inside. Place the finished onigiri on the prepared plate. Top with a slice of bacon. Repeat with the remaining ingredients. Garnish with the sliced green onion.
- Eat immediately.