This hands-on project is sure to make Halloween sweeter.
Tiffany Do
We may receive a commission on purchases made from links.
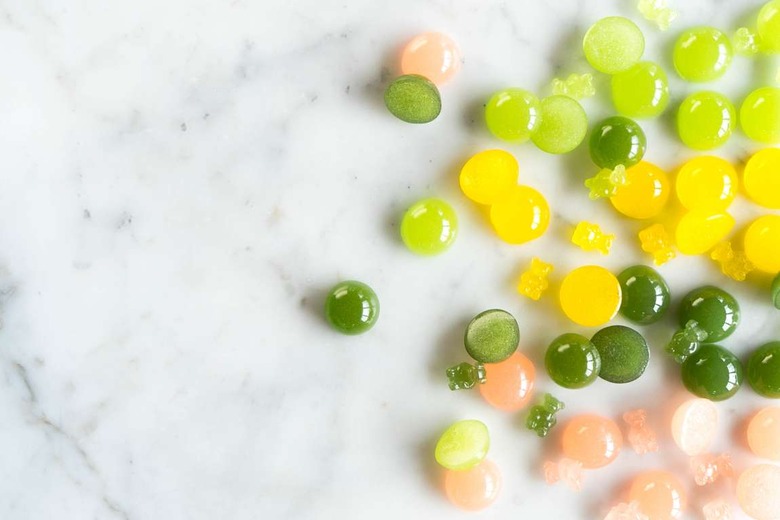
It's time to entice your inner mad scientist! Sure, buying gummy candy at the store is much easier and less labor intensive than making your own, but what's the fun in that? Our friends at ChefSteps wrote in this week with a recipe that's perfect for all your Halloween needs. Thanks to the sous vide method, you won't have to worry about toiling away over a bubbling cauldron of sugar and gelatin. Pick out some spooky molds and get started on these gummies!
Sous Vide Gummies
20 minutes active, 6-12 hours total; makes about 35 gummiesIngredients
21 grams knox gelatin
42 grams water, cold
130 grams fructose
130 grams corn syrup
3.6 grams tartaric acid, plus 20 grams for optional coating
0.4 grams essential oil, any flavor
Food color, liquid or powdered, as needed
75 grams cornstarch, for coating, optional
25 grams powdered sugar, for coating, optional
Equipment
Sous vide
Digital scale
Fine-mesh sieve
Pint-sized mason jar
Jar lifter (optional)
Digital instant-read thermometer
Wide-tipped squeeze bottle
Hemisphere silicone mold (optional)
Baking sheets (2)
Blender (optional)
Pastry brush (optional)
Directions
Heat Joule, or sous vide, to 167°F/75°C. Use a pot big enough to allow you to completely cover a pint-sized mason jar with water.
Bloom gelatin. Put the water in a bowl and sprinkle the powdered gelatin over it. Quickly mix to ensure all of the gelatin is dissolved. We recommend sprinkling the gelatin on top of the liquid rather than the other way around. Adding the powdered gelatin to the water will allow it to disperse and absorb liquid more evenly. Conversely, pouring the water over the gelatin will most likely result in lumps of dry granules. This happens because some of the gelatin swells in size as it absorbs the liquid, preventing it from reaching the rest of the gelatin. Allow the mixture to rest for one minute to make sure it has fully bloomed.
Combine fructose and corn syrup. We want to end up with a total of 247 g of fructose and corn syrup, so we are going to weigh out a bit extra to make up for any potential loss. Sift the fructose into a bowl to get rid of any lumps. Add corn syrup to the same bowl, and mix with a rubber spatula to thoroughly combine. Place the mason jar on a scale, tare it, and add 247 g of the mixture to the jar.
Pour the bloomed gelatin on top of the fructose and corn syrup in the mason jar.
Close jar lid fingertip tight. Place a lid on the mason jar and twist the lid until it's closed but still possible to open with your fingertips. This allows air to escape from the jars when they're submerged in water. If the jars are closed too tightly, the trapped air will press against the glass and could crack or break the jars. Here's our foolproof way to master the art of closing jars "fingertip tight." Place the lid on top of the jar, then twist the band to tighten using just your fingertips. When you begin to feel resistance, twist once in the opposite direction to loosen, then once more in the original direction to tighten.
Place the jar carefully into the water, making sure the jar is completely covered, and cover the pot with plastic wrap. Cook for one hour. It's okay if you leave the jar in for a few minutes longer.
Remove jar from the water and give the mixture a quick stir to make sure everything is fully combined. Then let the mixture rest at room temperature with the lid off for about 10 minutes. You will notice a white, bubbly film on the surface of your mixture. Carefully remove this film with a spoon to prevent your gummies from looking cloudy. Continue cooling at room temperature until the mixture reaches 122 °F / 50 °C.
Add the tartaric acid and essential oil to the mixture, and stir. Now's the time to color your candy! Start with a few drops of liquid coloring—if you're using powdered coloring, just mix a little bit with water to prevent the coloring from clumping up. Keep mixing in a few drops at a time until you reach your desired hue. Transfer the mixture to a squeeze bottle, if you have one—this is an easy and mess-free way to fill the molds. If you don't have a squeeze bottle on hand, you can buy some on the cheap and use them a hundred different ways in the kitchen.
Place your molds on a flat baking tray, and fill with the gummy mixture. Cover the baking tray with another flipped-over baking tray, wrap both in plastic, and place in the fridge to chill. The gummies will gel in as little as four hours under the right conditions, but they can take a lot longer. We suggest allowing them to set overnight.
Take your gummies out of the fridge and remove them from the mold. This will be easier when they are still very cold.
Coat your gummies. This is totally optional, but we love to coat our gummies in a mixture of cornstarch, powdered sugar, and tartaric acid for added texture, sour-yet-sweet flavor, and easier handling. Blend the tartaric acid in a blender or spice grinder until it's a fine powder. Sift together the cornstarch, powdered sugar, and tartaric acid, and toss the gummies in the mixture until they are completely coated. If you have a pastry brush, use it to remove any excess coating.
Let these little sweets come to room temperature before eating them—they're much more fun when they're stretchy and sticky. Enjoy!
ChefSteps comprises a team of award-winning chefs, filmmakers, scientists, designers and engineers focused on revolutionizing the way people cook by inspiring creativity and encouraging expertise in the kitchen. You can also get access to all of ChefSteps' Premium content — including paid classes and dozens of recipes available only to Premium members for a onetime fee of $39. Classes include Sous Vide: Beyond the Basics, Fluid Gels, French Macarons and more!