Adventures In DIY Cider Fermentation: Everything You Need To Know
We may receive a commission on purchases made from links.
Hard cider is one of the last things I'll reach for when I'm in the adult beverage section of the grocery store. In my head, it tastes like alcoholic Martinelli's apple juice. Not that there's anything wrong with Martinelli's. It's just that I'm a beer guy, and most days aren't Thanksgiving when I've already had too much to drink and — oh look, some Martinelli's! Maybe that's why I only began to appreciate cider (and for the record, "cider" has traditionally referred to the fermented, alcoholic version, no "hard" disclaimer necessary) when I tasted the ultimate craft version: the one I made myself.
Let's rewind a bit: This all started with my Polish neighbor. I'd mentioned to her that I'd been using my sourdough starter to make rye bread, and she told me about a fermented drink called kvass, a memory from her childhood in Poland. It was made, she said, from old, stale bread, and she suggested I try making it. I saved bits of stale bread, mixed them up in a plastic tub, threw in a glob of my sourdough starter to kick things off and stuck it on top of my refrigerator. Kvass, I learned, is a sort of toast infusion: toasted wheat or rye bread steeped in hot water, sweetened and fermented. It actually seems fairly closely related to prison wine, which is made of white bread and whatever sugar is on hand in one's correctional facility, fermented in a plastic bag and hidden where the guards won't find it. I boldly let my kvass froth in plain sight for a week or so before I ladled a bit into a mason jar, chilled it and had a sip. It tasted like weak, toast-flavored kombucha. It was decent, but — hold on — what was this warm wooziness slipping ever so subtly over my brain?
When I enjoy an alcoholic beverage, the effects, though pleasant in moderation, are ultimately secondary. If beer and wine tasted like pruno, or, for that matter, like Boone's Farm, I'd be a teetotaler. This kvass stuff was not great, but I'd made it and was proud, and as I drank more I began to feel like Peter Parker, newly bitten by that radioactive spider. It was like producing booze in a home kitchen was a kind of superpower, the discovery of which was making me excited and confused and even kind of drunk! Was I Kvass Man? Why hadn't I ever heard of kvass before? Would my kitchen now always be filled with stale bread? I needed to make booze again, but this time something better, yet just as easy as kvass had been. There must be other options. What about wine? I like wine, but I had never seen raw Cabernet juice on sale at Whole Foods. What about beer? I Googled it. I saw pictures of massive pots on enormous propane burners, guys on ladders and tubes going every which way. (I live in an apartment.)
What about cider? That's just apple juice, right? I know about apple juice. They sell it at the grocery store. I bought a one-gallon glass jug of Mrs. Gooch's Apple Juice, took it home, dropped in another glob of sourdough starter and shook it up.

In a day or two, the yeast's invisible magic had taken hold. The juice bubbled and frothed, and I noticed thousands of tiny bubbles ascending rapidly from the bottom of the jug like a fleet of hot air balloons. Fearing the jug might explode, I loosened the cap, releasing a satisfying hiss. I repeated this daily until, a little more than a week into my experiment, I opened the bottle and noticed an aroma reminiscent of rotten eggs. This, unfortunately, was no surprise. Sourdough starter is, after all, a colony of yeast and bacteria living in a medium of flour and water. It makes delicious bread, but I'd never heard of anyone using it to ferment cider. Judging by the odor coming from the jug, it seemed that the reason I hadn't heard of it was that it didn't work. "Ah, well," I thought. "Good try, sport!"
Before pouring the whole thing down the drain, I bravely decided, in the name of science, to have a little taste. I poured a dram into a tumbler and took a slurp, paused and swished. It was no longer sweet. It was tart but not vinegary. And apart from the hint of sulfur, it had a subtle apple bouquet. I allowed myself to swallow it. I noticed then that I wanted another sip, but thought I'd better not push it. Rather than dumping, I decided to wait and see. I put the cap back on the jug, and, vaguely recalling something about the destructive capacity of UV light, I encased the jug in a pillowcase and put it in the closet.
A week or two later, the juice had been transformed. In its earlier stages, the liquid was tan-colored, hazy and churning with fermentation activity. Now, a layer of white and brownish sediment had accumulated on the bottom of the jug. The fluid above was semitransparent and pale gold. Slowly, to avoid disturbing the dregs, I poured myself a nip. The cider was now bone-dry with a bright, fruity tartness and a subtle floral quality. I tried to imagine it chilled, with a bit of carbonation, and decided to bottle it.
I ordered gear: half a pound of dextrose from a local homebrew supply joint and a priming sugar calculator. Priming, which I'll explain in more detail further on, is where you add a little sugar at bottling time so the yeast still living in the cider can make a bit more CO2 to carbonate your drink. In the end, the gallon of juice yielded only a humble six-pack. I put the bottles in a cabinet and waited. After a week, I opened one. It was fizzy, but only slightly. I waited another week. The next bottle was bubblier. I waited more. Weeks later, I opened the last bottle. It was the best: a lovely pale golden color, crystal-clear, light-bodied, refreshingly tart, aromatic and perfectly carbonated.
For comparison, I picked up a bottle of Aspall Dry English Cider. I haven't tasted many ciders, but I enjoyed this one. My cider, fermented with a blob of sourdough starter, which I'd disturbed several times in the fermenting process by opening and sampling it, now tasted almost exactly like Aspall, and (maybe!) even a little better. What I learned is that making cider IS just easy. If you want to try crafting your own, what follows are a few things I've learned in my short life as a brewer. It's more "Important Info" than "How-To."
Yeast, Part I: Sourdough Starter
Since my first cider experiment, I have done a lot of brewing — cider and beer — using my sourdough starter. My process now begins by adding a small amount of starter (about 6-8 grams) to about eight ounces of whatever I plan on making. For cider, that means a cup of apple juice, plus ½ teaspoon of a yeast nutrient formulated for fermenting fruit juice. I let this mini-brew ferment for about 48 hours to propagate a larger yeast population before adding it back to the gallon jug that contains the rest of the juice. Doing it this way will kick off fermentation with plenty of yeast, but without adding lots of wheat flour from the starter. Wheat flour, for the record, makes for more sediment and can possibly contribute bready flavors you don't want.
Yeast, Part II: Commercial Yeasts and Nutrients
I'm delighted that my sourdough starter works for brewing; I bake bread three or four times a week so I already maintain it and have it available. But there are many other yeast options. My local homebrew supply shop has a wide variety of yeasts for sale, strains that have been grown for specific application to the style of brew, whether you're making beer, wine, cider, mead or even sake. Even more choices are available online. The downside of these yeasts, for me, is they cost money, whereas maintaining my starter costs next to nothing. The upside of trying different yeast strains is that they produce different flavors in the final brew. This is an aspect of the craft I've yet to explore. Because of the cost, plus the fact that most yeasts are sold in larger quantities than a one-gallon brewer needs, I'd rather spend my time and resources learning about the effects of other ingredients.
One ingredient I mentioned earlier is yeast nutrient. After my first cider experiment, I shared the bit about the sulfur smell with the owner of my local brew shop. He informed me that yeast cannot thrive on sugar alone; they also require minerals, vitamins, amino acids and whatnot. Fruit juices, he said, are low in these substances. The odor in my cider, he explained, was probably a consequence of failing to add these nutrients. Even though my first cider turned out great, I have added a bit of various nutrients to subsequent batches. You can find yeast nutrient for fruit juice at brew supply shops.
Finally, yeast needs oxygen. The easiest way to get oxygen into a gallon of juice is shake, shake, shake!
Yeast, Part III: Temperature
If you are yeast, the most important thing to you, besides a supply of yummy and nutritious sugar, is the temperature of your environment. Commercial yeast — particularly yeasts bred for brewing applications — will come with a recommended temperature range for fermentation, usually somewhere between 50 and 80 degrees Fahrenheit. There are two important things to understand about yeast and temperature. First, if it's too cold, fermentation will proceed with agonizing slowness or simply will not take place at all. Conversely, if the environment is too warm (120°F or so and the yeast will die), fermentation will take place too vigorously and produce unwanted compounds that taste like paint thinner or acetone (Nail Salon Ale, anyone?). Therefore, unless you have a basement that stays at 65 degrees all year, you might have to do some active temperature control.
I recently bought a used refrigerator for $50, stuck it (with my landlord's permission) in a storage area, and hooked it up to a temperature controller ($90). This setup keeps my brews fermenting at whatever temperature I set. It's fantastic, and if you have the space for it, is a great way to go. If you don't, you can do what I was doing before I got the brewing fridge: Put your jug in a closet with a thermometer and try your best to create a microclimate. In the Los Angeles summertime, I hacked the situation by keeping a frozen gallon of water in my coat closet, swapping it for a fresh one when the ice melted, in order to maintain a temperature of around 65 degrees. If you don't have a suitable closet, you could use a cooler, or even your bathtub since a large volume of water does not change temperature very quickly.
Fermentation, Your Closet Floor and Blow-Off Tubes
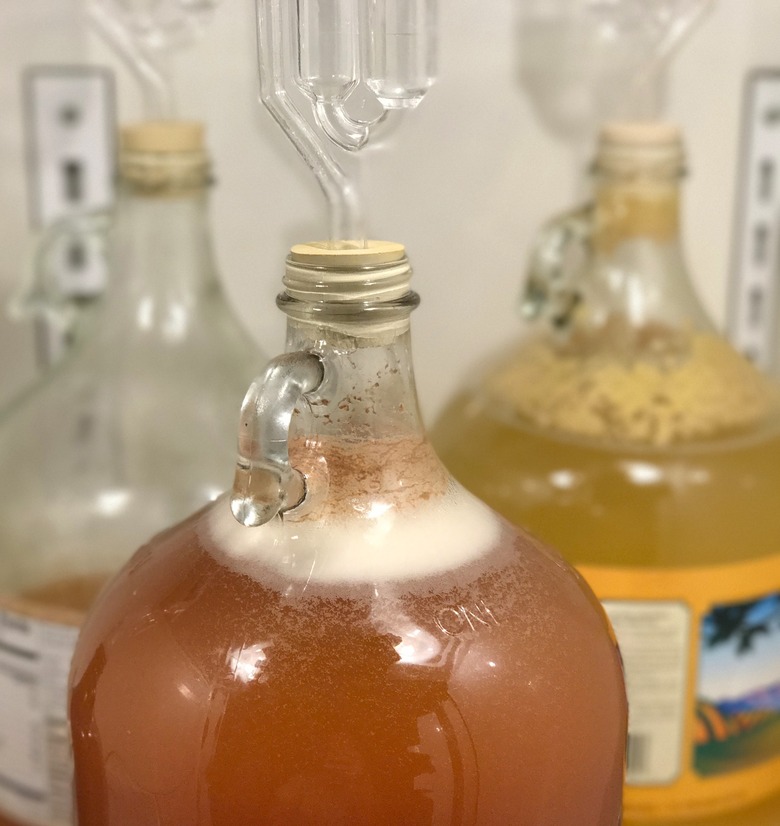
The other important aspect of fermentation, besides temperature, is that fermentation produces a lot of carbon dioxide gas, and this gas needs a way to get out of your vessel. The best way to do this is NOT to periodically open your jug, as I did, but rather to use a device called an airlock.

An airlock will allow the CO2 to escape while also keeping your brew sealed off from the environment outside the jug, where contaminants like unwanted bacteria may be lurking. The one-gallon glass jugs you buy apple juice in are compatible with a size #6 rubber stopper. Drilled #6 stoppers have a hole in the middle, and that hole will accept an airlock or any kind of ¼-inch tubing.

Sometimes when your vessel is very full and fermentation is highly active, the bubbling and pressure inside can cause liquid to fill the airlock and escape. In this situation, you can employ another apparatus, more or less topologically equivalent to the airlock, called a blow-off tube. To make a blow-off tube, get a couple feet of quarter-inch tubing, insert one end of the tubing into the #6 stopper, and submerge the other end in a container of water. I like to use a quart glass Mason jar that's about half full. If your brew jug is at capacity and your cider is really churning, the blow-off tube will carry any liquid that escapes into the mason jar, rather than allowing it to spill onto your closet floor, soaking your shoes and making everything sticky and smelling like apple cider vinegar. Yay!
Bottling
Your brew is frothing away. Your airlock is bubbling. Then it stops. Is it done? My answer is: Has it been three weeks? Sure, you could use fancy tools (hydrometer, brix refractometer) to determine the precise sugar content of your juice before fermentation and again after it's stopped bubbling to see exactly how much sugar has been converted into alcohol, and whether there's any left — but I'm not going to do that. I'm just going to wait for three weeks (and so can you!). After that, it's time to bottle.
Bottling is where you will require a minimal amount of gear. Save your beer bottles, and buy caps and a capper. (I don't know anything about corks or kegging; sorry if I've let you down.) You will also need an auto-siphon, another vessel that can hold a gallon of liquid (I like to use a second one-gallon glass jug) and a bottle-filler attachment for the auto-siphon. Pro tip: If the valve of your bottle filler is spring-loaded, pop the end off and remove the spring. For my friendless readers, this will make it much easier to bottle single-handedly. Otherwise, enlist yourself a helper and offer a bottle or two of homemade cider as a reward.

Get yourself some Star San sanitizer and, following the directions on the bottle, mix up a gallon batch using distilled water. Star San works well because it's very acidic, so mixing it with water that contains any minerals can neutralize the acid over time and render your sanitizer ineffective. Distilled water eliminates that problem. The sanitizing power will last forever, and you will get the most mileage out of your Star San. Fill a spray bottle and aggressively sanitize anything that's going to touch your cider.
Brewer's Friend has a great online sugar priming calculator you can use. Priming is kind of another word for carbonating, when you add a touch of sugar to your cider just before bottling. This will not sweeten your cider; it will carbonate it. Or rather, the yeast will carbonate your cider by fermenting, in the bottle, that last little bit of sugar that you add. This method of carbonation is called bottle-conditioning. Because you want your beverage to be perfect, and because you don't want any bottles exploding in your closet or anywhere else (again), measuring your sugar calls for precision. A kitchen scale, graduated in one-gram increments, will aid you.

I'll leave the detailed, step-by-step bottling instructions to the fine experts online, but I will tell you three things that are important at bottling time. First, there is the matter of oxidation. Oxygen is good at the beginning of fermentation, but it's bad at the end. So while it's great to shake and splash your juice around before fermentation, you need to do the opposite at bottling time and not jostle it around. Second is the issue of sediment. There will be a layer of sediment at the bottom of the jug that you must try to leave behind. You can accomplish this by transferring the cider from the fermentation jug into a second jug by means of the auto-siphon device I mentioned.


This process, in brew-geek parlance, is known as racking. Finally, there is the priming sugar. You've got to distribute it evenly so that every bottle ends up with the same level of fizziness. One reason I like to use dextrose (which is corn sugar) for priming is that it's powder-fine and it dissolves very quickly. However you mix in the sugar, do so gently to avoid introducing oxygen, and makes sure to mix it in after the cider has been racked.
Drinking and Beyond the Basics
You've bottled your cider, and now you want to drink it. But hold on! I recommend waiting a while before you crack one open. At least a month is best, and two is better. You likely won't wait, though, and that's okay — you crafted it, so you decide. Whenever you choose to open one, chill it for a couple of days first. And when you pour, pour slowly. There will be a small layer of sediment at the bottom of the bottle that will cloud your beverage if you pour too aggressively. A slow pour, leaving the last half-inch in the bottle, will yield a beautifully clear drink.
These are the basics, and basics are fun, but beyond them is where the real fun starts. After my first batch, I took closer look at all the ciders in the refrigerated section. This time, my eyes were wide open to the awesome possibilities presented by the array of craft offerings on display. There were fruit-accented ciders: lemon, pear, prickly pear cactus, quince, cherry, and pomegranate. There were ciders made with specific apples, like Granny Smith and Gravenstein. There were hopped ciders, smoked ciders, bourbon barrel–aged ciders, ginger ciders, and on and on.

Since my first batch, I've made a cider infused with an herbal tea blend called Fireberry by Tiesta. I've produced an apricot cider, a cider made from three quarters Mrs. Gooch and one quarter Gravenstein apple juice, a cider made with apples from a friend's tree and, my personal favorite, a dry-hopped cider that will delight any craft beer lover. The Mosaic hops I used imparted a juicy quality that tastes like fruity jelly beans without the sweetness, if you can imagine that. It is outrageously good.
If you have a juicer, you can make your own juice. If you live near any orchards, you can try fermenting their juice. Above all, my advice is: Go for it, experiment, have fun and share.
Okay! That's it. Thanks for...
"Wait, you idiot, I like sweet cider! I want Martinelli's, but with ALCOHOL! How do I make that?"
It's too complicated. Just splash a little vodka in your juice and enjoy.