The Dough Poke Test To Tell If Your Bread Is Perfectly Proofed
Baking may not be widely considered a contact sport, but it does often require that you throw your whole body into it, especially when it comes to making bread. First, there's the mixing, then the kneading, followed by the stretching of the dough for the windowpane test (to tell when it's ready to rest) and, lastly — when your arms are good and sore — it's time to stretch out your fingers for the poking part of the process. It may sound silly, but the poke test is a useful trick for telling when your bread is ready to finally pass from the proofing phase into the oven to be baked.
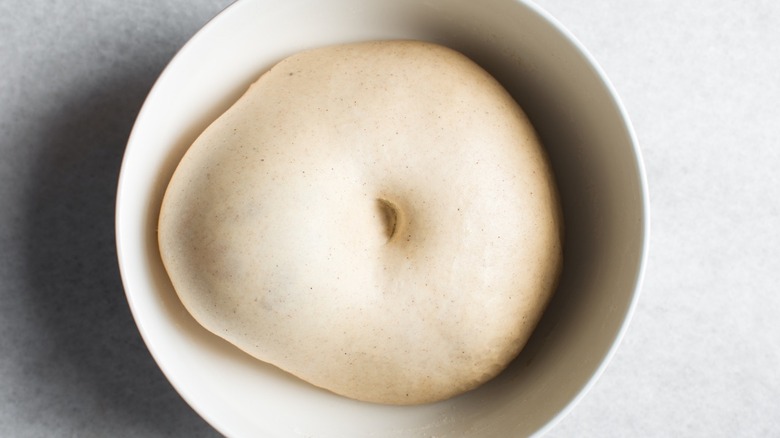
No need to worry if you're new to poking, proofing, and baking in general. Simply put, proofing refers to the period when freshly made bread dough is left to rise, creating that airy texture we all love. The poke test helps you check the consistency of the dough at a critical point before baking. All you need to do is lightly coat one of your fingers with flour, then press it about an inch into the dough. When you pull back, a shallow concave space should remain where your finger was for a few seconds before the dough smooths over again.
Why and when to use the poke test
How long proofing takes varies depending on the recipe, ingredients, and baking environment. While most bread recipes call for more or less the same few ingredients — flour, yeast, water, and salt — a pizza dough may need only an hour to proof while a quintessential sourdough farm loaf may call for 12 hours of proofing. Written instructions are a great starting point for guiding your bread-making, but using all of your senses is key to achieving the perfect consistency. The poke test enables you to employ your sense of touch to directly gauge just how springy and soft the dough is, which is a good indicator of how fluffy your finished bread will be after a trip to the oven.
Do the poke test once your dough has completed the suggested proofing time or has visibly grown to about twice its original size. Give the dough a good poke — not too aggressive, but not too gentle — and be mindful of the feeling of the dough's resistance against your finger, as well as how fast it resumes its shape as you watch. It should move slowly by this point, so if the dough recovers quickly, give it some more time and try the poke test again later. Err on the early side when first trying the poke test. If the indentation sticks stubbornly in the dough, it means your dough has overproofed, leading to a dense texture.
The perfect proofing environment to pass the poke test

You can follow the recipe perfectly and prepare yourself thoroughly for the poke test, only to be hours into the baking process and find that your dough isn't proofing as it should. If you want to achieve the Goldilocks level of springiness that means you're ready to pop your bread in the oven, you need to make sure your baking environment is well-suited to the finicky preferences of yeast.
When it comes down to it, the poke test is a way of checking the happiness level of your yeast. This living organism (a fungus) becomes active when it is mixed with warm water and fed with flour. It releases carbon dioxide, adding air to your dough. Temperature, humidity, and airflow impact the liveliness of your yeast, so you need to make sure your dough rises in a space that is warm (not too hot — around 70 degrees Fahrenheit or so), somewhat moist, and protected from drafts (usually with a tea towel or stored in an oven proofer). Under these conditions, your yeast will thrive, and your dough will soon be on track to pass the poke test.