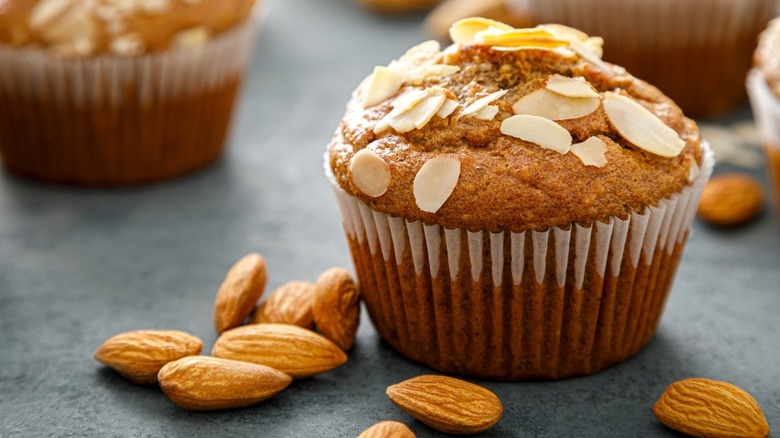
19 Tips You Need To Bake Better Muffins
In the wide and wonderful world of baking, few treats are as versatile as the muffin. If you're craving a decadent dessert, you can succumb to indulgence and experiment with ingredients like chocolate fondant or maple syrup. If you're feeling like a nutritious snack, you can always whip up a batch of something more wholesome, such as healthy rye muffins. However, while we can agree all day that muffins are delicious and everyone should make them more often, baking to perfection can be a little trickier.
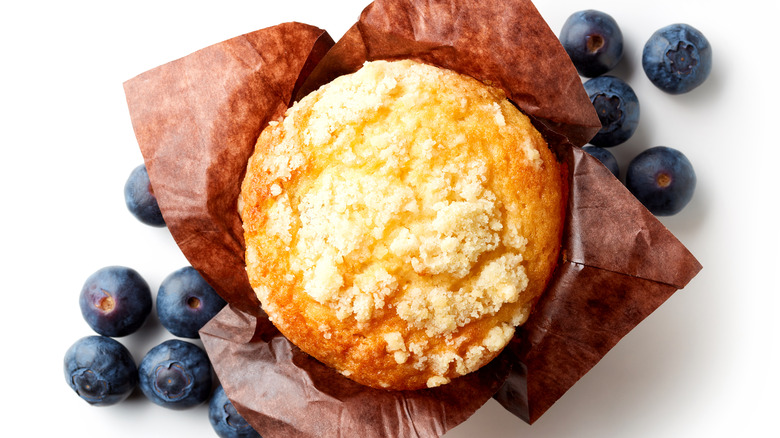
The ideal muffin should have a moist crumb that's light and fluffy while not being as light and fluffy as a cupcake. You want a texture with a bit of chew to it, yet not as chewy as bread. The top should be a glorious dome rising up beautifully, gently spilling over the rim of the muffin casing. Some of these characteristics may vary a little depending on the type of muffin you're baking, but the point is, getting it just right is a delicate balancing act.
Fortunately, baking perfect muffins is more about knowledge than skill. Whether you're a baking beginner preparing to make your first batch or a muffin maestro looking to up your game, these tips have you covered.
Know your measurements
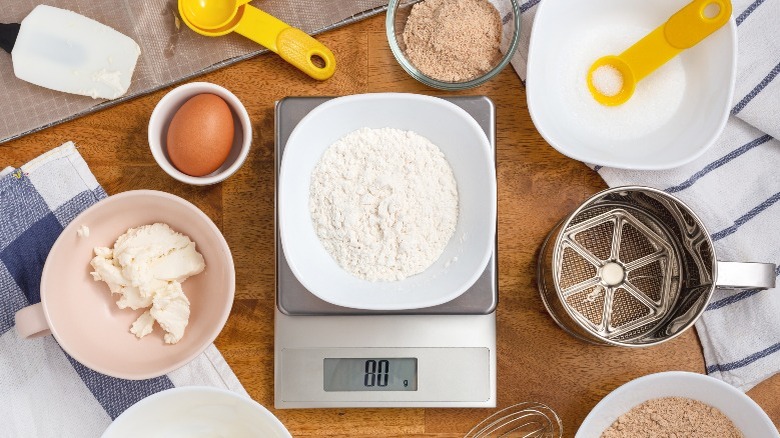
Now, unofficial baking article rules state that the writer must somewhere include a variant of the phrase, "Cooking is an art, baking is a science," so let's get that out of the way first. We know plenty of chefs and bakers that would argue their crafts are a blend of the two; however, what it means is baking requires a higher degree of precision. Arguably the easiest and most important way to achieve precision when baking muffins is by measuring your ingredients as accurately as possible in the first place.
Before you touch a mixing bowl, re-read your recipe. If you're used to using imperial measurements and the ingredients listed are in metric (or vice versa), study it again. When using the imperial system, check the recipe origin, as imperial volumes aren't standardized.
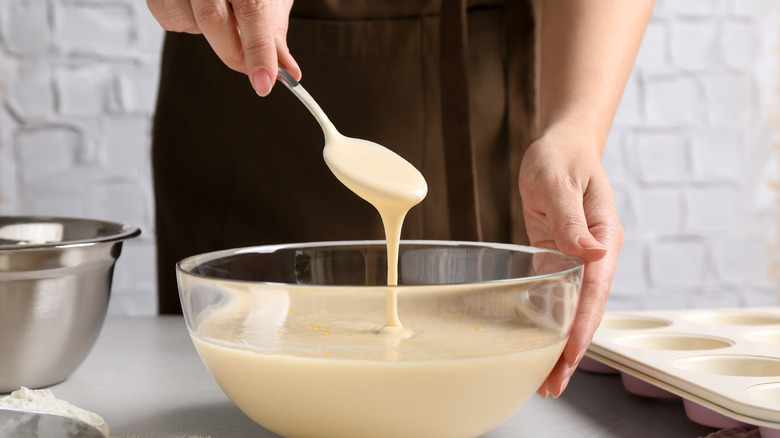
For measuring wet ingredients, use a marked, tempered glass measuring cup, preferably one with a spout, so you don't end up spilling any of your perfectly measured liquid all over the kitchen countertop. For dry ingredients, there's no better alternative than kitchen scales. If you've only got access to dry measuring cups, make sure you're using them correctly. Almost all dry ingredients should be spooned into the cup from their container and then gently leveled off, the most common exception being brown sugar which you'll usually need to pack down. Getting your measurements right the first time will prevent you from ending up with muffins that are too dry, dense, or even rubbery.
Use room temperature ingredients
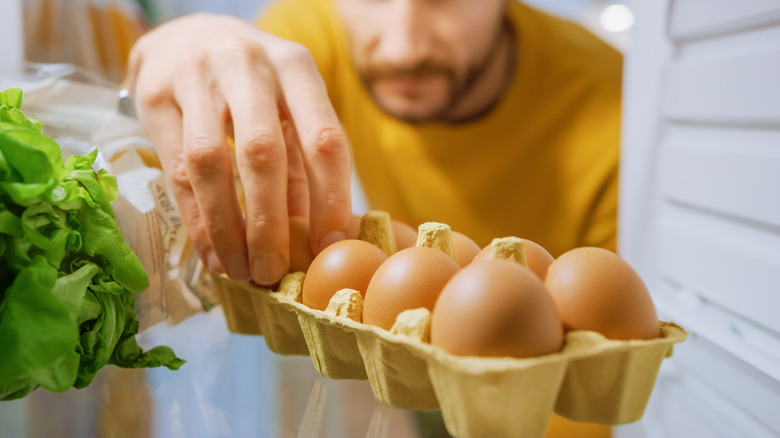
Alongside inaccurate measuring, another common muffin-making mistake is using ingredients that aren't the correct temperature. We've all been there. You get that burning desire to bake with just enough time to put something together, and then realize you haven't taken your eggs or butter out of the fridge yet. It's fine — it shouldn't matter if the eggs are slightly cold, and you can always microwave the butter for a few seconds to soften it up, right?
Absolutely not. First, chilled ingredients will reduce the temperature of your entire muffin batter mix, which will have negative knock-on effects. As Baker Bettie says, "Furthermore, you want eggs and dairy products to be at room temperature when they are being added into a mixture that contains creamed butter and sugar. Cold ingredients could also break this emulsion." Lumpy batter will cook unevenly and give you an inconsistent batch. Heating the butter up in a pan or microwave will also cause problems; butter that's too soft won't hold air, and you'll lose that fluffiness you're looking for.
Honestly, the best way to ensure your muffin ingredients are at the right temperature is to remember to take them out of the fridge in the first place. Failing that — we're only human after all – you can expedite the process by placing chilled eggs in a bowl of slightly warm water for five minutes. For butter, chop it into smaller pieces and you'll find it softens up much more quickly.
Don't over-mix the batter

You've got your perfectly measured, room-temperature muffin ingredients laid out on the counter, and now comes the fiddly part. Whether you mix by hand or use an electric mixer is up to you; Betty Crocker suggest the manual approach, saying, "Don't use an electric mixer, [as] this can result in a really tough texture." Their reasoning is that you risk over-mixing your batter and destroying the air bubbles required for that fluffy texture. CCC's Curious Kitchen's controlled experiment goes even further, demonstrating, "The more we mix muffins, the more homogenized we make the batter and the more we develop the gluten network. This results in smooth muffin surfaces, tunneling, tall and pointy muffin tops, and a chewy texture."
While creaming by hand is more of a workout, you'll have better control over the consistency of your muffin batter. Start by using a regular fork to mash the sugar and butter together until they're well incorporated, then switch over to a spatula or mixing spoon and give it some elbow grease.
After about five minutes, you should end up with a fluffy, light-colored butter mixture you can beat your eggs into, one at a time. Next, incorporate the rest of your wet ingredients before gently folding in the rest of your dry ingredients. Ultimately, you want a batter that will slowly slide off your mixing spoon — not as runny as cake batter, but not as thick as cookie dough.
Substitute your butter with oil
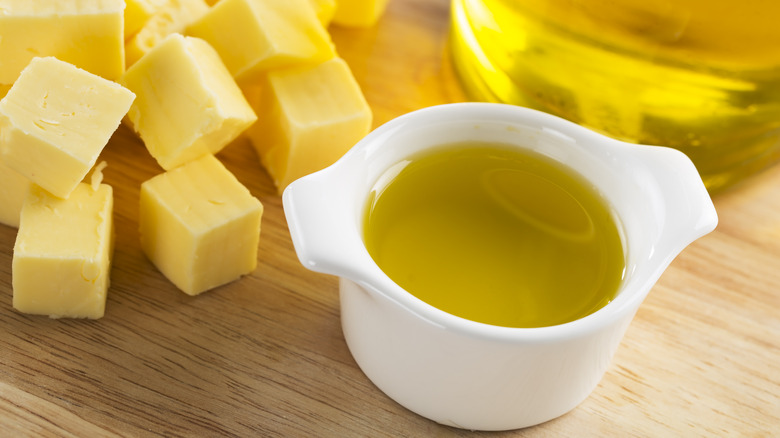
You use butter in muffins as both a shortening and a leavening agent. When the fat of the butter combines with the flour, it creates a more tender product by slowing down the growth of gluten strands. The butter's water content becomes steam in the oven and helps the muffins rise, and you can't overlook the flavor boost it gives your baked goods. So what happens if you swap it for oil instead?
Interestingly enough, experiments like the one conducted by Modern Crumb show that muffins made with oil instead of butter come out lighter and softer, which is perfect for those who want a more delicate result. Truthfully, you should keep both options in your culinary arsenal. Butter is great for less intensely flavored muffins because it's allowed to shine through. With oils, you can choose between vegetable or olive oil. Vegetable oil has a neutral taste, so you can use it for muffins with flavors that you don't want to be overpowered by butter, like chocolate. Olive oil, on the other hand, has a more noticeable taste that works extremely well with savory muffins, and it's also the more nutritious of the two.
Don't forget your ratios — as a rule of thumb, you only need 3/4 of the amount of oil as you would butter, so a recipe calling for 4 ounces of butter would only require 3 ounces of oil.
Double-check your oven temperature
The "baking is a science" line gets thrown about so often because baking is effectively just one big chemical reaction. In any chemical reaction, the temperature of the process has just as much impact on the final result as the ingredients themselves.
First, you've got the Maillard Reaction, the chemical reaction between heated proteins and sugars responsible for the deliciousness of pretty much every baked good. You also need heat to boost the solvency of the batter's water content to better absorb the rising agents and the sugar and salt. However, if your oven's too hot — aside from the obvious risk of burning your muffins — the water will steam, rapidly giving you overgrown, uneven peaks.
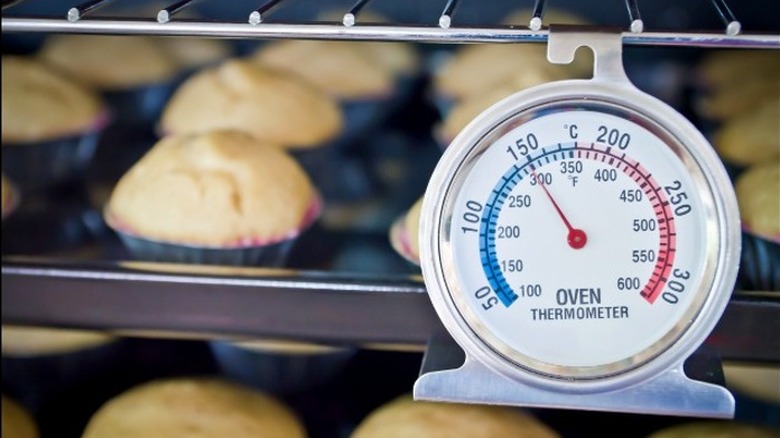
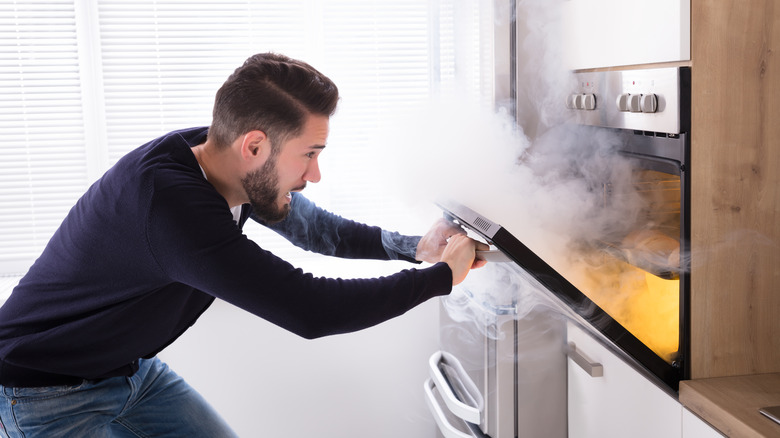
Most folks know how to set their oven's temperature, so the problem is rarely an inability to follow instructions — in fact, one of the most common issues is failing to preheat. If you skip this step and let your batter heat up with the oven, the outside will bake before the core reaches the correct temperature, leaving you with a dry, overcooked crust and potentially a soggy middle. Another issue is that ovens are fickle objects, and the temperature on your dial or display may not be completely accurate. They can also have "hotspots" where different areas get hotter than others, causing an uneven bake. Invest in an accurate oven thermometer, and never again will you have to worry whether your oven might be lying to you. That traitor!
Don't open the oven door too soon
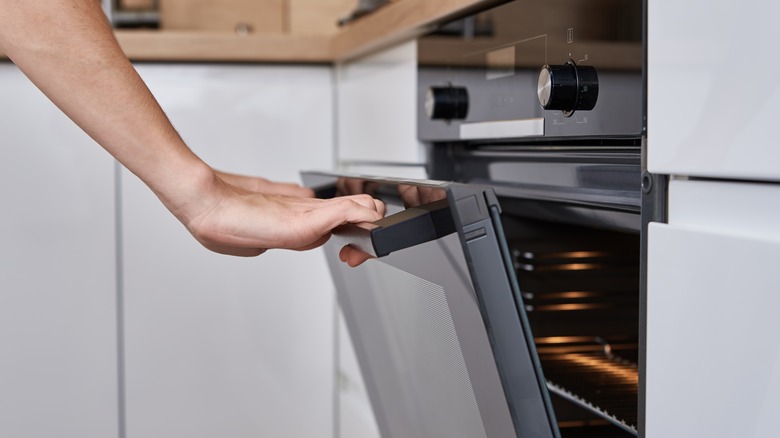
Let's say you've already got yourself an oven thermometer and know precisely how hot your oven is. You remembered to preheat it and according to your recipe, your muffins are done. Peaking through the tinted glass, you notice the tops aren't as high as you expected and as you strain to see the coloring of the ones at the back, the temptation to crack open the oven door hits.
Opening the door enough for a quick glance causes the temperature of the oven to drop quicker than you'd think. For the reasons covered previously, you want to avoid fluctuations in temperature if you're hoping for perfect muffins. However, there are times you might be forced to get that door open. If you're baking two trays of muffins, it's best practice to swap them around halfway through baking. You could need to adjust the positioning to counter a hotspot or you genuinely can't see how close they are to being done.
If you're preheating your oven, the interior sides will hold more heat which will buy you a little time if you must open the door. Be swift, but don't rush or forget to use protection if you're handling trays, and keep your face well back from the oven door when you open it to avoid being burnt by the hot air rushing out. You should also add a few more minutes to your bake time to compensate for the temperature drop.
Lightly coat your filling ingredients in flour
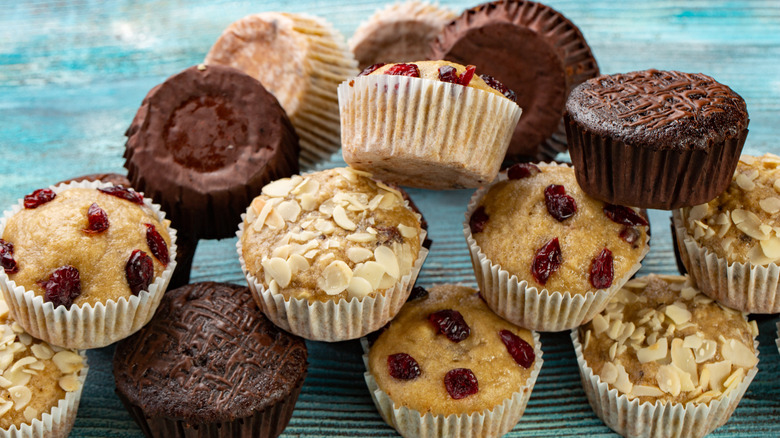
As mentioned earlier, one of the best things about muffins is their versatility. There are countless possible iterations at your flour-covered fingertips, ranging from classics like chocolate chip to more unique creations, such as vegan cornbread-style muffins. However, the most common method for changing up flavors is adding solid components to the batter, the favorites being chocolate chips, nuts, or fruit. However, simply tossing a handful of your chosen ingredients into the batter and giving it a good mix won't result in world-class muffins.
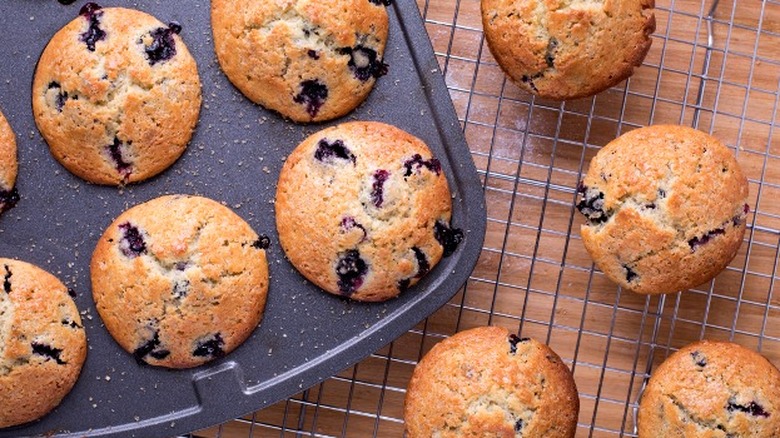
The issue is that while muffin batter is generally thicker than pancake or cupcake batter, it's still light enough that most solid ingredients start to sink to the bottom of the batter as your muffins bake. When you bite into a delicious, fresh chocolate chip muffin, you want to taste balanced chocolatey goodness from start to finish, not as an overwhelming reward for making it through an otherwise flavorless experience. Also, if your ingredients have a high water content, like blueberries, your muffins might end up with soggy bottoms.
The Food Network recommend "tossing your berries with a tablespoon or two of flour before adding them to the batter," because the extra flour will absorb some of the liquid released during baking. This works with ingredients like chocolate chips and nuts too — and the flour also creates a barrier of thicker batter that helps them remain suspended, guaranteeing a consistently tasty muffin from the first bite to the last.
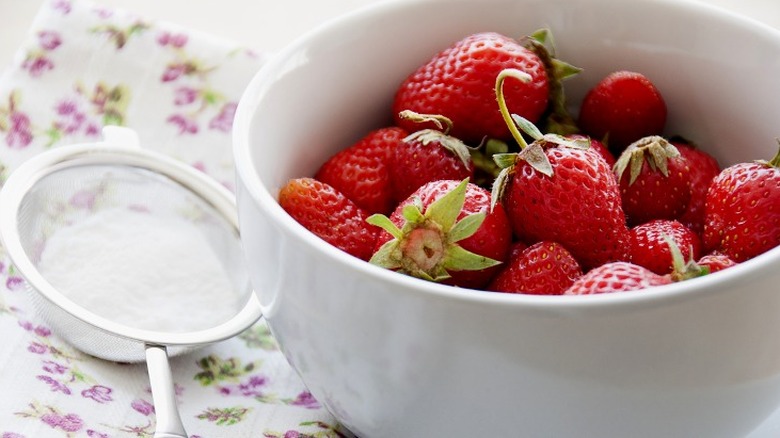
Rinse your fruit off to avoid staining
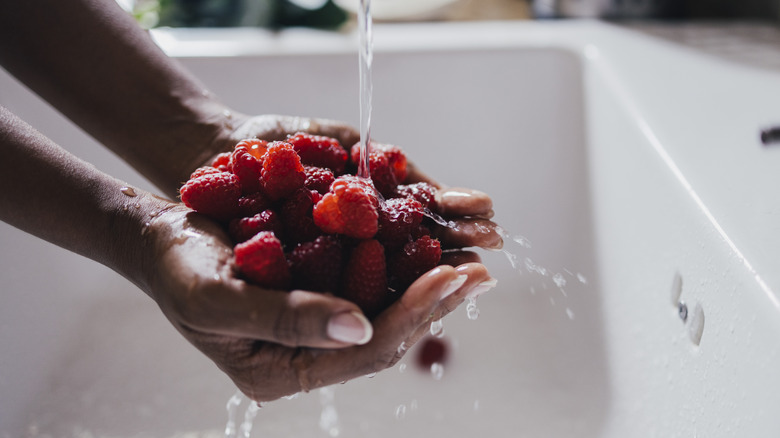
While we're on the subject of adding fruit to muffins, another common mistake many bakers make is letting their ingredients stain their batter. You've probably seen blueberry muffins where this has happened and instead of a light interior, the inside of the muffin has turned an unappealing shade of indigo.
This is more likely to happen if you're using frozen fruit as it starts to bleed its color as it thaws, whereas fresh fruit has tougher skin that prevents heavy staining. Fortunately, if frozen fruit is all you have access to, you can still take steps to avoid dyeing your batter.
First, you'll want to rinse your fruit off under cold water to remove any excess juices that can discolor your muffin mix. Next, gently dry your fruit using a paper towel. Lastly, use the flour trick above to absorb as much of that juice as you can and keep it contained to the fruit piece.
Add extra texture to your muffins
When it comes to talking about food, the importance texture plays in our eating experiences is frequently overlooked, with flavor taking center stage. Humans have a predisposition to both chewy and crispy textures – the jury is still out on why we evolved this way but it's impossible to deny that a perfect texture enhances our perception of certain foods. At the same time, our brains know which textures to expect when we eat familiar foods. If something doesn't feel the way it should when we stick it in our mouths, we could just as easily be pleasantly surprised as we could be revolted. In this case, we're obviously aiming for the first one.
The best way to boost the textural properties of your muffins is to add something nice and crunchy to the top that will complement the existing flavors and texture. The nice-and-easy option is a sprinkling of raw sugar before they go in the oven to add a slight crunch with a sweet tingle. For chocolate muffins and caramel flavors, coarse sea salt will give you the crunch while also boosting the sweetness and cutting down the bitterness, ideal for darker chocolates. While it takes a little more effort, you only need butter, sugar, and flour to create a delicate crumble that works perfectly with fruitier muffins, particularly those with a juicy jam filling.
Grease your muffin cups
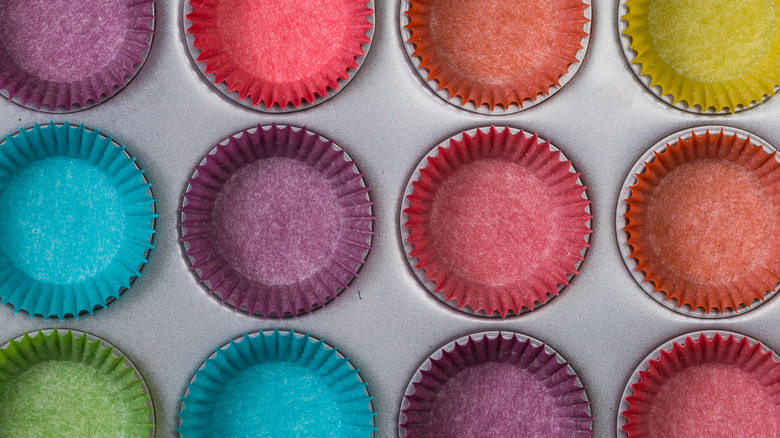
For starters, we always recommend using paper muffin cups when you're baking because it makes life that much easier when it's time to take them out of the tin. If you do skip out on the liners, you'll need to make sure you heavily grease the muffin tin which can have unintended effects on the final flavor and on how the outsides turn out.
Although muffin cups will help prevent your muffins from sticking to the pan (they also look nice and make muffins easier to store due to a bit of extra protection) that doesn't mean your muffin won't stick to the paper and come apart when it's time to tuck in. To remedy this, give the inside of your muffin cups a little spray with vegetable oil to stop the batter from baking onto the paper. If you don't have oil in a spray-type bottle, you can dab a paper towel with oil instead and gently brush a layer around the inside of each muffin cup. If for whatever reason you want to present your muffins without the papers, it'll now be easier to remove them either way, whether they're still warm or they've cooled down.
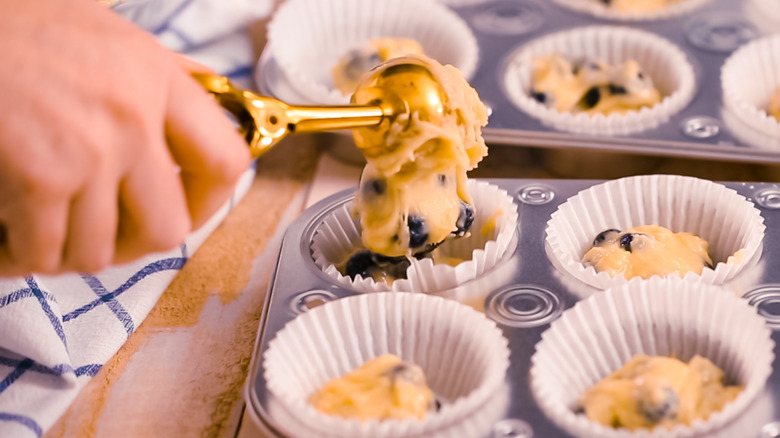
Scoop out your portions
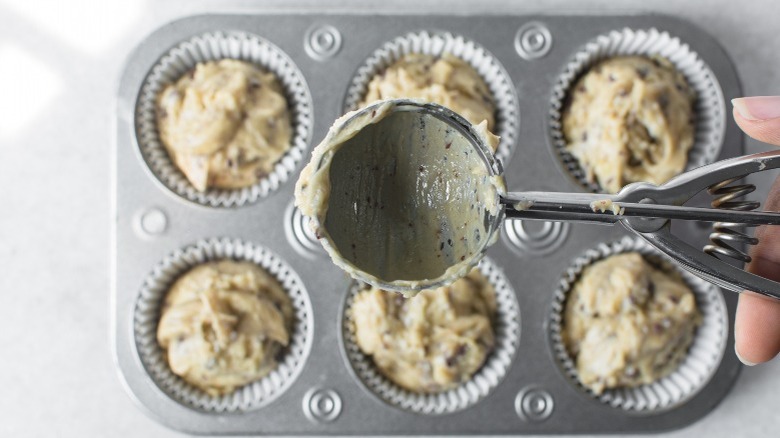
Hands up who hates portioning out batter? It's messy — the batter always sticks to the spoon, and you generally end up eyeballing your portion sizes which means you might finish with some perfect muffins, but not a whole batch. Enter the humble ice cream scoop.
Ice cream scoops are amazing for portioning out muffins (and cookies) because you can guarantee you're getting the same amount of batter in each muffin cup. Plus, the majority of ice cream scoops either have a form of non-stick coating, or come with a trigger that helps release the batter, so you don't have to worry about dripping batter across your kitchen counter when you're trying to shake it off a spoon.
Either type of scoop should work fine, so it really just comes down to your personal preference or what you already have at home. In terms of size, a regular muffin usually requires about 3 tablespoons of batter to fill 2/3 of the case and, handily, you can buy scoops that are exactly that size.
Layer batter if it contains dry ingredients
Here's one last tip for muffins with dry ingredients, specifically those with fillings like berries. While the flour-tossing method is highly effective at stopping your ingredients from sinking in the batter, sometimes you might find the flour is absorbing a little too much juice and suppressing your muffins' flavor potential. Luckily, we have a fix for that.
When your batter is ready to portion out, you'll want to set aside just enough to cover the bottom of each one of your muffin cups before you add your fruit to the rest of your mix. Once you've added the plain batter to each cup, top them off with the batter that contains your yummy additions. This technique provides a batter buffer that will stop your berries from sinking to the bottom just as effectively as the flour-tossing method, while retaining the maximum juiciness of each one. Ultimately, it's up to you whether you want to trade off some of that juiciness for a more aesthetically pleasing muffin. We suggest experimenting with a combination of all the techniques to see what works best for you, there's no right or wrong approach here, just personal preference.
Proof your muffin batter
Proofing muffin batter is a technique that many home bakers avoid due to its time-consuming nature. For the uninitiated, proofing is a baking process that involves letting your dough or batter rest for an extended period of time before baking, often overnight. By covering your batter and letting it rest overnight in the fridge, you're giving the flour more time to hydrate and for the gluten strands to start developing, while the cool temperature prevents the gluten from over-developing. Your rising agents will start to do their job as well, and ultimately you'll end up with a batter that has more structure by the time it goes in the oven. The result is a muffin with wonderfully high tops that wouldn't look out of place in a professional bakery. In fact, this is exactly how the pros make their muffins, creating the batter a day before they bake.
If you can't afford to wait overnight, try and at least give your batter an hour or so before portioning it out into your muffin cups as this will still give you a better outcome than if you started baking immediately.
Test for doneness
We've already put emphasis on the need to get your temperatures and timings spot-on because they'll dictate how well your muffins turn out. However, before you take them out of the oven, take a look at the tops of the muffins to make sure they're a nice golden brown — if they appear underbaked, leave them in for a couple more minutes but keep a close eye on them.
While checking the tops is a good start, this won't tell you if your muffins are perfectly cooked in the middle. Also, some batters make it harder to use the muffin tops to check for doneness; if your chocolate muffins are turning a light golden brown, you've gone wrong somewhere.
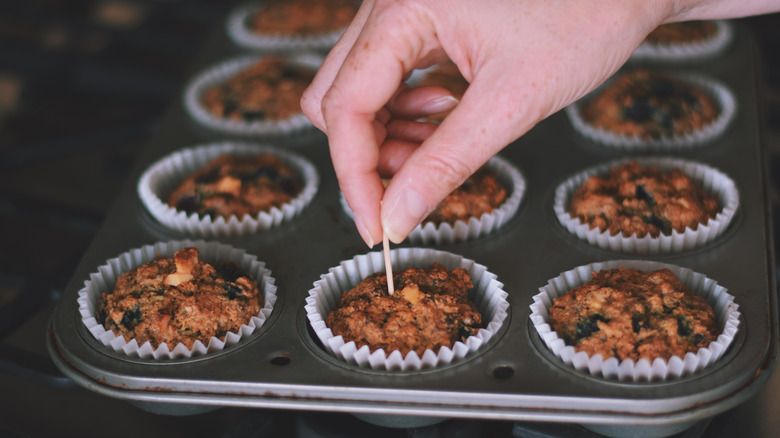
To check your muffins are truly done, remove them from the oven when you're confident they're ready. Take a cocktail stick and poke it all the way through the top of one of your muffins. When you slide the stick out, if it appears damp or you see crumbs sticking to it, the muffins aren't fully baked — you're looking for a clean stick to show they're done. While you can buy metal cake testing sticks, wooden sticks are more accurate. According to baking expert Alice Medrich, "Moisture shows, and batter and moist crumbs are more likely to cling to a straw or wooden tester. Metal testers are too slippery — they don't reveal as much of what is really going on inside the cake as a toothpick."
Use foil to prevent burned tops
Sometimes we have to react on the fly when we're baking, especially if we're using an unfamiliar oven or trying a recipe for the first time. You might have had to crank the heat or increase your bake time to compensate for opening the oven door, or it could just be that things aren't turning out as expected. One of the most common issues bakers can face is a muffin that's not done in the center while the tops are already reaching their optimum coloring and texture. Fortunately, you're not forced to choose between muffins with a perfect center beneath a burned shell or a picture perfect batch that's underbaked.
If you know your muffins need longer in the oven but you're sure the tops are pretty much done, you can cover the whole tray with a piece of aluminum foil. The shiny foil will reflect back some of the oven's heat away from the muffin tops, creating a protective barrier. Simultaneously, the foil will trap in the core of the muffins and help the centers cook. Bear in mind that there can be too much of a good thing, and if you add foil too early in the baking process, you might overbake the inside of your muffins as well, and there's not much you can do to save them at that point.
Let your muffins cool down
Every baker knows the intense temptation to bite in as soon as the treats are ready to come out of the oven — but the best muffins ask for a little patience first.
When you take them out, it's crucial to let your muffins set for a few minutes before you transfer them to a cooling rack so they're less likely to stick to the pan. However, five minutes is about the maximum time you should wait before moving them to the rack. Wait too long, and condensation will begin to form as the pan cools, resulting in soggy muffins. If they're sticking to the sides of the pan when it's time to transfer, carefully use a sharp, thin knife around the edges to free them.
How long you let your muffins rest on the cooling rack depends on a few factors. If they're going to be eaten immediately, roughly five to 10 minutes should be enough. Ingredients like fruit or jam cool slower than the rest of the muffin, so technically you're waiting until those won't scorch your mouth when you take a bite. If you're saving your muffins for later, cover them with a clean dish towel and let them cool completely to avoid condensation in your storage container which again can make them soggy (via Sheri Silver). You'll also need to let your muffins cool if you plan on frosting them so the topping doesn't melt off before it sets.
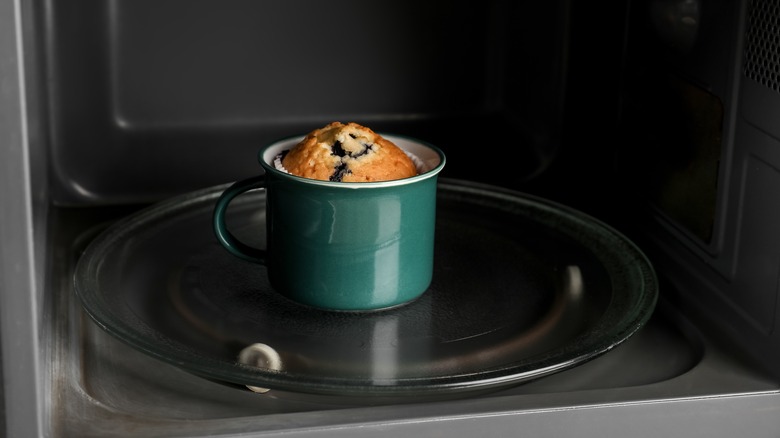
If you can't eat them, freeze them
One reason people avoid baking is the worry they won't have enough people to share their goodies with and end up wasting the treats they worked hard to make. As excuses go, we aren't buying it. Not when it's so easy to store muffins for as long as three months. For short-term storage, once your muffins have cooled you can keep them at room temperature in a sealed container for around four days. You can extend this for a few extra days by keeping them in the fridge, but we don't recommend it. The cold air in your refrigerator might prevent baked goods from spoiling quickly, but it also speeds up the processes that dry them out and cause staleness. However, your freezer is cold enough to stop this process entirely.
To store muffins for the long term, wait for them to cool, then wrap each one in aluminum foil before putting them in a ziplock freezer bag. To revive your muffins from their cryogenic stasis, you've got a few options. You can let them defrost in the fridge overnight or at room temperature for about an hour. You can give your muffin a couple of 15-second blasts in the microwave until it's warm enough, although you need to be careful with filled muffins as the filling can get especially hot this way. Alternatively, you can leave the foil on and pop them in the oven at 350 degrees Fahrenheit for 10 to 15 minutes.
Experiment as much as possible
It doesn't take more than a cursory search for muffin recipes to start seeing the amazing potential for creativity. Ever fancied a croque madame breakfast muffin? There's a recipe for that. If you really want to up your muffin game, there are no shortcuts — make as many varieties as you can and you'll see your baking skills improve dramatically. You'll get a better instinct for baking based on your experience, and you'll gain the confidence to get truly creative with your muffins.
If you don't feel like you're ready to come up with your own recipes from scratch, you can always look to other bakers' recipes for inspiration. Phil Ward of Death & Co., one of the biggest names in the cocktail industry, has a term called "potato-heading," which is the art of replacing parts of an existing recipe with different ingredients to create an entirely new concoction, and it can just as easily be applied to baking. Once you've found a recipe you love, have a go at swapping out some ingredients to see what you can come up with, and you'll be crafting your own unique muffin recipes in no time.
Patience makes perfect

You might have noticed that quite a few of our tips have something in common: The need for patience. Waiting for your ingredients to reach the right temperature, taking the time to weigh them out properly, holding off eating your muffins before they cool — these all require self-restraint. Patience is crucial because you shouldn't rush baking if you want a perfect result.
However, patience doesn't just mean not rushing. It also means going easy on yourself if things aren't turning out your way. We all make errors when we're practicing new skills or trying to improve old ones, and it's easy to get disheartened when things go wrong. If at first you don't succeed, take a breath, take a break, and look at where things went awry so you can do better next time around.