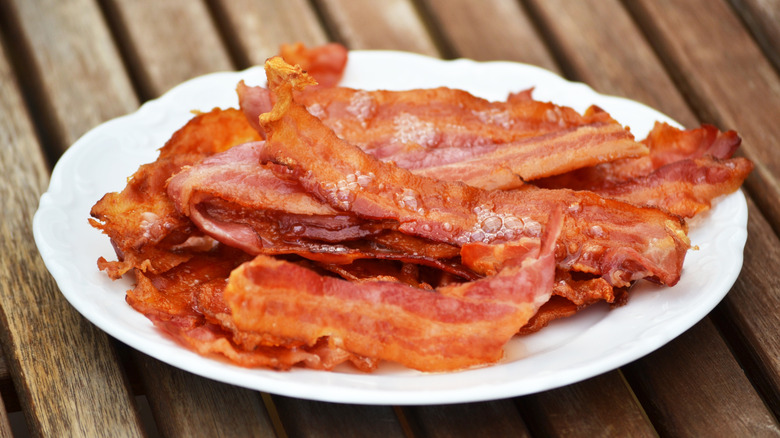
Food Republic’s column Ask Your Butcher seeks to answer FAQs in the world of butchery. Ethically minded butcher Bryan Mayer has opened butcher shops and restaurants and has trained butchers in the U.S. and abroad. He helped develop the renowned butcher-training program at Fleisher’s. Today, he consults with farmers, butchers, chefs and anyone else who will listen. In each column, Mayer tackles a pressing issue facing both meat buyers and home cooks. This week, he shines a light on cooking with tails.
It was recently suggested following my column on eating feet that we might be scraping the bottom of the barrel over here at Ask Your Butcher headquarters. But to me, a column devoted to the culinary splendor that is feet isn’t a sign of dwindling ideas, but rather an acceptance, as a culture, for things outside our trusted culinary norms. Ten years ago, the state of whole-animal butchery — and the shops that champion local and regional agriculture in the U.S. — was in a sorry state. Five years ago, you’d probably still have a hard time finding anything beyond your standard American butcher fare in those cases.
Today, we’ve got trays of ears, tongues and snouts. Bowls of liver, hearts and kidneys are all jockeying for precious case space and are sometimes selling better than cuts like my beloved London broil. So no, we’ve got plenty of ideas over here in the meat locker. We’ve got plenty of cuts to talk about, cooking methods to test, butcher demos and farmers to promote. Besides, I haven’t even gotten a chance to talk about cooking animal penis yet! But for now, let’s continue our anatomical journey with something that might be a bit easier to swallow, for some: tails.
It’s not my intention to turn this into an all-out offal-fest. However, it is my full intention to raise the profile of lesser-eaten parts of the animal and to give as much space as I can to something that’s not a skirt steak. And if in doing so, some of you are persuaded to head to a local butcher shop, purchase something outside of your norm, or order something “unusual” off the menu the next time you eat out, then I’ve succeeded. Just don’t stop ordering burgers. Because, well, why would you ever do that?
Oxtails

Every slaughterhouse I’ve worked with sends along an offal box with every beef carcass. Included in that box of liver, kidney, heart and tongue is always the tail. While not technically offal, tails are regarded as a nontraditional cut, so you’ll most likely find them difficult to get your hands on. I’ve seen months-long waiting lists to get ahold of these, which used to be reserved for a cut like tenderloin. Traditionally, this cut was from actual oxen. These heavily worked animals produced richer, deeper, more complex flavors, and their tails were no exception. With a combination of muscle, bone and marrow, they made for perfect stews or stocks.
Now, you’ll see oxtail from steers, heifers, cows and veal. I prefer saving the latter for a stock as opposed to a standalone dish, due to the age at slaughter and its relatively mild flavor when compared to the richness of the tail of an older animal. You should be able to purchase the tail already segmented and trimmed of some of the fat. However, if you’d like to practice your butchery skills, they’re fairly easy to break down. The spaces between each vertebrae are equal, which should make segmenting fairly easy. Start with the tip, which should be the boniest, least meaty section and find the space between the vertebrae. You should be able to easily cut through. Once you have one piece removed, continue up the tail segment, using the tip as a rough guide as to where you should cut. The circumference will change, but the distance between each vertebrae will remain roughly the same. Trim away any excess fat and save for rendering. You’re ready to cook.
Oxtail soups and stews are prevalent in many cultures. But up until I had my partner’s mother’s oxtail stew, I don’t think I’ve ever really had something that combined two loves: meat and peanuts! Kare-kare differentiates itself by being relatively plain in comparison to other Filipino dishes, with meat often taking a backseat to the vegetables added. It’s a meal of economy, using whatever may be available. And like most stews, it’s easy to prepare. Oxtail, peanuts or peanut butter, veggies and maybe some traditional bagoong (fish paste).
Kare-Kare Stew
Ingredients
2 oxtails from fully pastured, grass-fed cattle. If you can get more, get them! You’ll want some of the fat removed.
1 tablespoon oil
4 small bok choy
4 Chinese eggplant, sliced (if you can’t find Chinese eggplant, you can use Italian, but you’ll only need one)
Roughly 20 string beans, cut
1 cup ground peanuts
½ cup peanut butter
½ cup shrimp paste (bagoong)
½ cup rice (to be toasted)
1 tablespoon garlic, minced
1 large onion, chopped
Directions:
- In a large stockpot, heat oil over medium heat. Once shimmering, add your onions and garlic and brown for roughly eight minutes.
- Add your oxtail and mix with onion and garlic until coated for about 2 minutes. Add just enough water to cover the oxtails and bring to a boil. Salt and pepper to taste, reduce heat and simmer for roughly 2 to 2 1/2 hours, until tender.
- Next up, toast your rice over medium-high heat in a skillet, being careful not to burn. At about the one-hour mark you can go ahead and add your toasted rice to the pot.
- Now it’s time to create the peanut base. In a separate bowl, combine peanut butter, ground peanuts, and roughly three cups of water that has been ladled from the pot, to melt the peanut butter. (At this point you can ladle out more water from your pot, depending how thick you want your kare-kare to be.)
- Add the peanut base to your pot and stir to incorporate. When 30 minutes remain, add in your remaining vegetables. We want them to have some bite to offset the tenderness of the oxtail. That’s it. Plate or bowl over some rice and add a bit of bagoong.
Pig Tails

Take all the wonderful things we said about oxtail above, and add to that a layer of collagen-rich skin, and you can see why pig tails are a favorite among the atypical meat buyer. But as scarce as oxtail may be, pig tails are even scarcer for different reasons: tail docking. While this does occur in the cattle industry, mainly with dairy cattle, it is common practice on hog farms, specifically CAFOs (confined animal feeding operations.) Disease prevention is cited as the main reason tail docking is performed, and they aren’t exactly incorrect in saying so.
However, it bears mentioning that the infections they are so concerned with, caused by tail biting, can mostly be avoided if their hogs were allowed to do what hogs do, which is root and forage on pasture and in woodlots. This is not to say that tail biting never occurs in pastured/woodlot hogs, but given an environment in which they are free to express what they are biologically designed to do, the impulse to bite is greatly reduced if not removed. You can be fairly sure if your local butcher shop is selling pastured/woodlot pigs, they’ll have tails…tails that are perfect for frying! Call me a hypocrite for wanting to save the pig tail, only to remove it, fry it, and, yes, bite it, but as anyone who’s had a fried pig tail can attest, you’ll find very few parts of any animals that encompass so many different textures.
Fried Pig Tails
Ingredients
Roughly 2 pounds of pig tails (8-10 tails) from fully pastured/woodlot pigs
4-5 cloves of garlic, smashed
1 small onion, chopped
1 cup chicken stock
1 teaspoon salt
½ cup flour
oil (for frying)
Directions:
- Over high heat, add two tablespoons of oil to your stockpot and give the tails a good sear, turning after five minutes so as not to burn.
- Remove the tails from the pot and reduce the heat to medium (give it a minute or two to cool). Add in your onions and garlic and allow to cook for about 8 minutes.
- Add back the tails and cook, making sure to coat, for about 2 minutes. Add in your braising liquid and allow to simmer for roughly 1½ hours, or until the skin is tender. Once tender, remove from pot and allow to cool and dry. I cannot express how important this step is. You’re not going to like what happens if you add the tails to hot oil without drying them first.
- You can either place the tails, after they’ve cooled, in the fridge for a couple of hours and up to overnight. Additionally, adding some flour will also help to dry them out faster.
- Once the tails have cooled and dried, heat enough oil (about a quart) that the tails are submerged in a deep skillet or pot to roughly 350°F. If you don’t have a thermometer, you can test by sticking a wooden spoon into the oil — if it starts to bubble consistently, you’re good to go. If there’s smoke, it’s too hot — let it cool!
- After a quick coating of flour, and using tongs, carefully place the tails into the oil, making sure to work in batches, so as not to overcrowd and significantly reduce the temperature of the oil. Three to 4 minutes is all you need to get a perfectly crispy, golden brown skin. Carefully remove from oil to a cooling rock and give them a sprinkle of coarse salt, or whatever spice you’d like.
Lobster Tails

While you’re not technically eating its tail (it’s actually the abdomen), you’re either a fan of lobster or you’re not. I’m a fan. For this preparation, I chose the spiny lobster (unclawed), more affectionately known as the rock lobster. For starters, the tail is all you’re pretty much going to get out of this guy. Unlike its more northern family member, the traditional Maine lobster (clawed), the spiny lobster — found off the southern Atlantic and California coasts, as well as in Florida — has a mild flavor, compared to the richer flavor of the Maine lobster.
My main reason for choosing the spiny lobster, however, is purely environmental and sustainable. Most lobsters are caught in traps that are designed to reduce by-catch and habitat damage: all things we like. And while Maine lobster fisheries have started to show signs of improvements, their numbers have been in decline for several years. That’s not to say that spiny lobster is the absolute correct choice. But your best bet for well-managed fisheries comes from those that catch spiny lobster. As with all fish, freshness is what counts. Other than that, some herbed butter, maybe a dash of Old Bay and you’re good to go. And yes, I’m fully aware that you now probably have the B-52’s stuck in your brain. You’re welcome.
Butter and Herb Fresh Lobster Tails
Ingredients
4 (1½ pound) spiny lobster tails. They should be cleaned (deveined) and most probably will be frozen unless you’re lucky enough to live where you can get them fresh. And in that case, I totally envy you!
1 stick grass-fed butter
1 teaspoon fresh parsley
1 teaspoon fresh chives
1 teaspoon fresh basil
1 teaspoon lemon juice
Old Bay
Directions:
- Over high heat, cook lobsters tails in seasoned water (Old Bay) until just cooked through. This should take roughly 10 minutes.
- While your lobster is cooking, melt your butter in a saucepan over medium heat (don’t burn it). Add your spices and lemon juice and season with salt and pepper. Maybe a slice or two of lemon.
- Alternatively, you can broil the tails. Set your broiler to high. Make sure the tails are deveined. This time, with a sharp pair of kitchen shears, cut down the shell to the tail (yes, the actual tail), pull back the shell and expose the meat. A couple of pats of butter and cook until opaque. Again, roughly 10 minutes.