Learn How To Take Better Food Photos With Your Phone
It's become a cliché: cringe-inducing smartphone food photos. You know what we're talking about. Maybe you've scrolled through Instagram only to have your eye snag on a greasy-looking puck of filet mignon or a pâté that looked a little too much like chopped liver. Or maybe you've been the perpetrator yourself. But if you're frustrated that your iPhone snaps of your morning smoothies end up looking more radioactive than refreshing, don't go shelling out for a bank-breaking professional camera just yet.
Our friends at ChefSteps promise that you can take unforgettable food photos in the kitchen with nothing more than your smartphone. To master that convenient little camera in your pocket, all you need are a few simple tips and tricks. Learn the keys to great lighting, choosing your angle, and styling your shot, and soon enough, you'll be able to turn any lunchtime snapshot into an art-worthy work.
Tips for Food Photos
1. Use natural light whenever possible
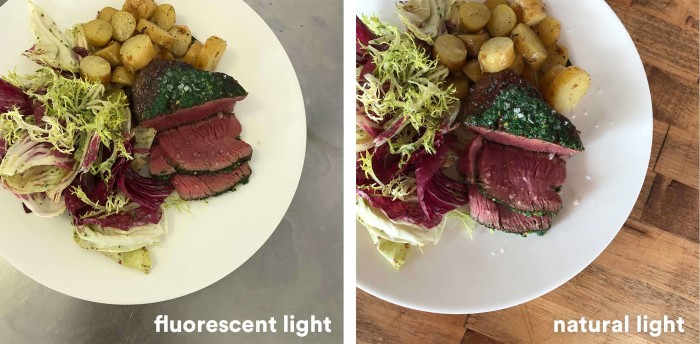
Your first rule of photography: natural light is best. Our friends at ChefSteps are lucky to have huge windows lining their kitchen and can shoot almost everything using natural light. Too much or too little light will greatly affect your food photos. Thankfully, there are work-arounds for all your lighting needs. If it's too dark outside, use artificial lights or move closer to the window to make use of whatever light you can. When it's too bright, pull the shades to diffuse the light or move plated food farther from the window.
2. Stay away from the flash, please!
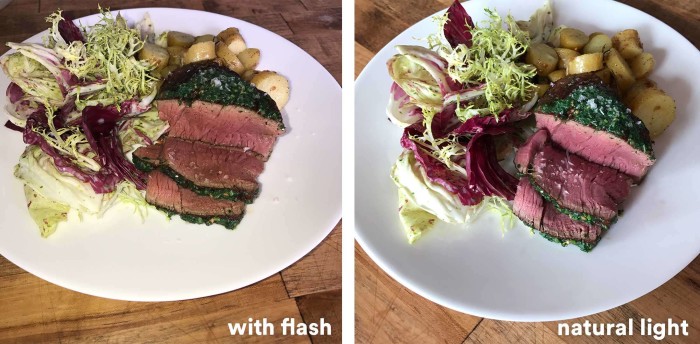
We know it might be tempting to add some brightness to a dark dish, but please, fight this desire. The flash creates super-harsh light, which will bounce off of anything shiny or any bit of moisture on your plate, making it look totally unappealing. It can also create some odd shadows, which will not do your food any favors. If you need more light, move your food into another room with a stronger light source, try brightening the photo afterward with an editing app on your phone, or just enjoy the food and save the photo shoot for another day.
3. Get an editing app that you like
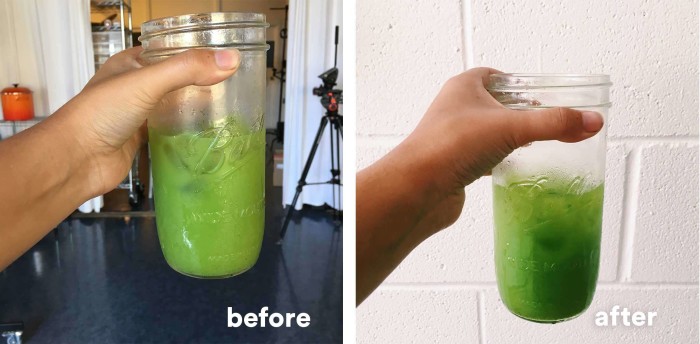
The colors in your food photos can end up looking off if you're not shooting in natural light. No matter what you do, the artificial lighting in your home will never be as good as natural light, but it is possible to do some color correcting. Apps like VSCO, Snapseed, and Afterlight let you edit your smartphone photos and adjust the color temperature (also known as white balance), brightness, contrast and more.
4. Declutter your life
Picture this: You're in the kitchen preparing a scrumptious meal, and you want to share it with the world (or your Instagram buddies, at least). You go to snap the photo but are distracted by the mess that your kitchen has become. Another key rule of food photography: keep it simple. Before you even start cooking, remove clutter from the area and make sure everything is clean and orderly.
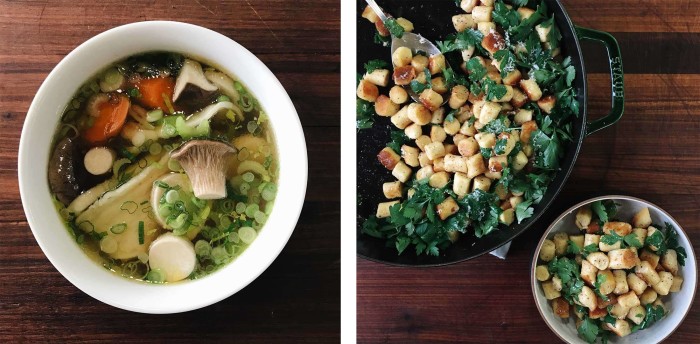
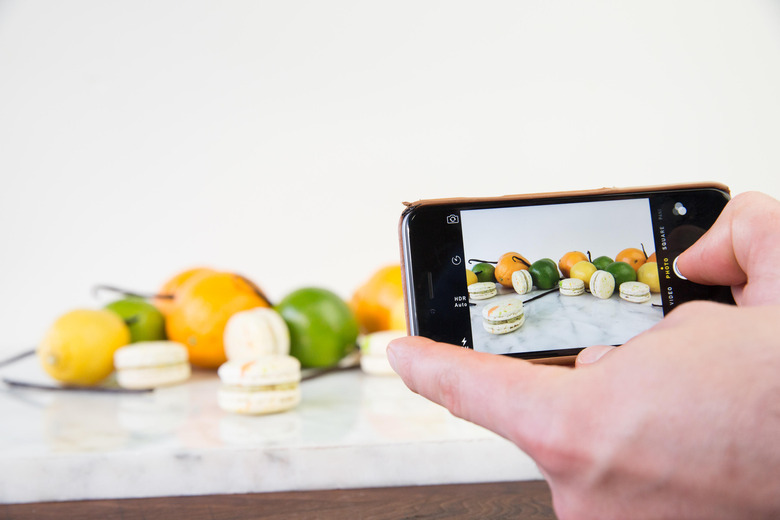
5. Shoot from above
It can be hard to clean your entire space just to snap food photos. Here's our tip: Shoot your dish from above. It's a great look for the food itself and means you have a much smaller space to keep tidy. But you don't want to shoot too small a space; stay far enough away from the food that you can show off the entire plate, not just one bite of steak. This will make the subject of the photograph clearer — and make the viewer imagine an entire experience, not just one taste.
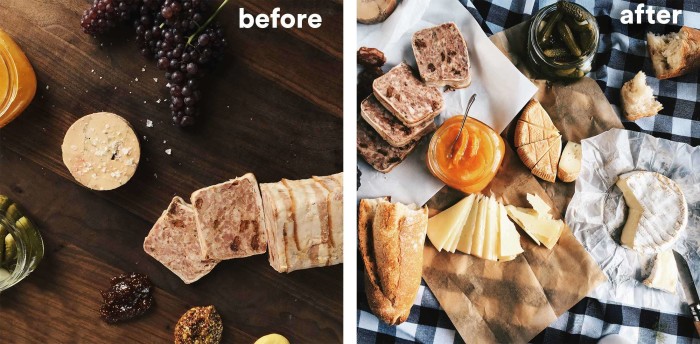
6. Think about the background
While your photo will focus on the food itself, there is still room to add some personal flair. Think hard not just about the plate, but also about the backdrop. Does it actually look good? Is it too busy? How can you improve it? For example, in the photo below, we add a blue-and-white-striped tablecloth, which cleans up the look but also enhances the rustic, picnicky feel.
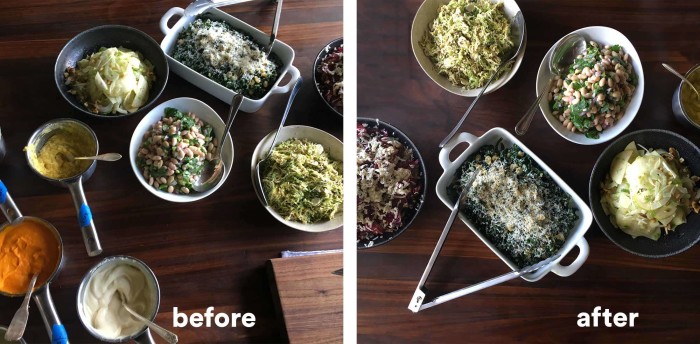
7. Feel free to move things around
This is your photo, and you can move things if you want to! Half the fun of taking photos is the fantasy of it—your kitchen may look like a bomb went off in it, but your food photos can make that elaborate meal look easy. Putting some thought into setting the stage will help your photo tell a more compelling story—even if it's partly fiction.
8. Set the scene
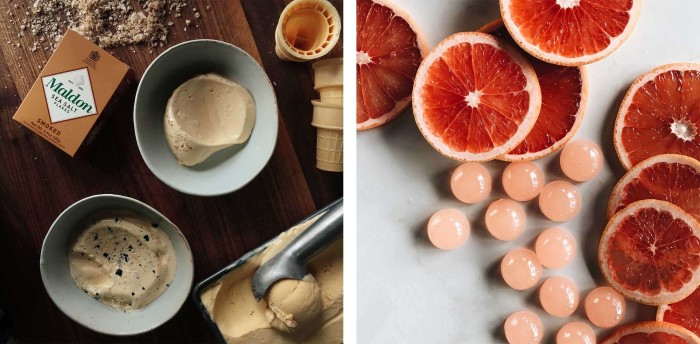
While we're on the topic of telling stories, don't forget to set the scene. For example, include silverware with your finished dish, as if you've just set the table and plated the food for the viewer. Throw a serving utensil into a homemade pint of ice cream or a ladle into a pot of soup to make sure your audience knows what they are looking at. Show off the process of cooking by putting a raw ingredient next to a finished product—making it clear that your little pink candies are indeed made from grapefruit.
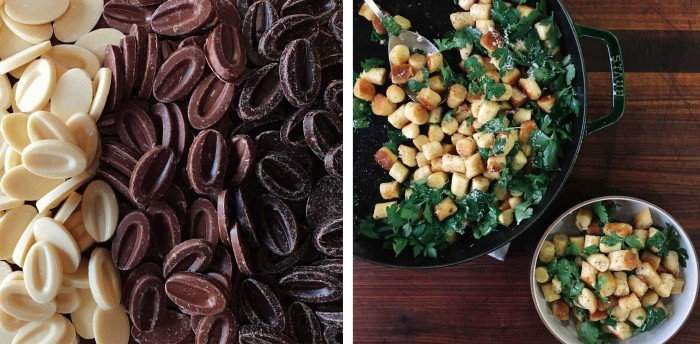
9. Show it all off
When you want to show off your dishes and hide any imperfections, sometimes more really is more. A hundred little handmade chocolates are much more impressive than one perfect piece. Using a hundred chocolates also means you don't need to find that perfect piece—your audience will be looking at the whole shot rather than each little chocolate. Likewise, when making a big, family-style dish, consider showing the serving plate along with individual portions.
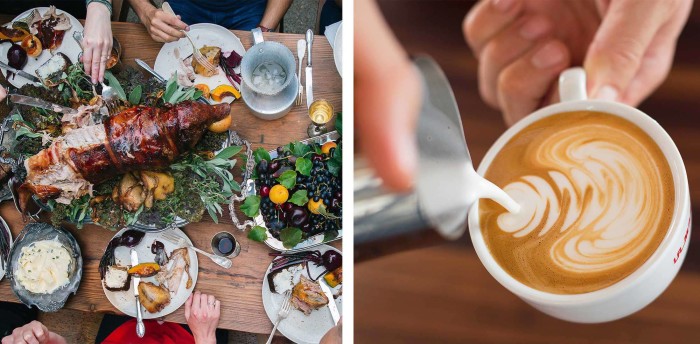
10. Get your friends involved
We're all human—and we like seeing photos of people along with food. Use the promise of a delicious dish to entice your friends to be your models, and feature them in your photos. Get your best friend's hands holding a cup of coffee or your significant other's arm reaching for the last biscuit. To make sure you get a good, realistic-looking action shot, use burst mode and lock the focus. This will ensure at least one good photo of a specific action.
ChefSteps comprises a team of award-winning chefs, filmmakers, scientists, designers and engineers focused on revolutionizing the way people cook by inspiring creativity and encouraging expertise in the kitchen. You can also get access to all of ChefSteps' Premium content — including paid classes and dozens of recipes available only to Premium members for a onetime fee — for the special price of $24 (regularly $39). Classes include Sous Vide: Beyond the Basics, Fluid Gels, French Macarons and more!