How To Easily Make Maki At Home
We've spent the past couple of weeks talking about making sushi at home. If you've been following along — and we know you have — you should have a firm grasp on how to assemble sushi rice and how to top it with perfect slivers of fish as pieces of nigiri. But what about the standby American favorite: maki (aka rolls)? Our friends at ChefSteps have got you covered there, as well.
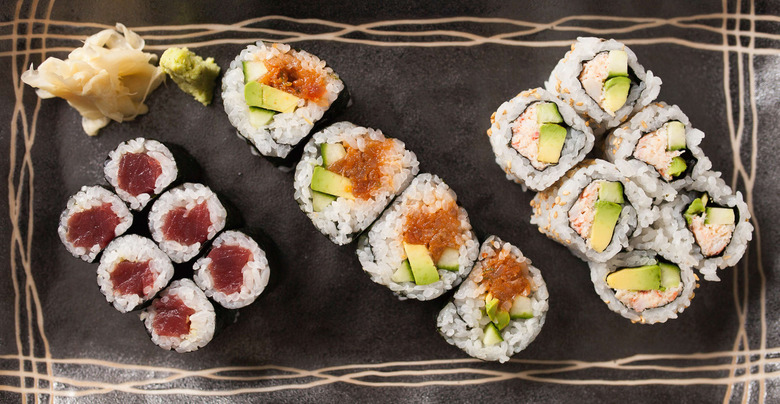
Rollin' with your homies takes on a totally new meaning with the help of Taichi Kitamura, executive chef at Seattle's, Sushi Kappo Tamura. Taichi walks us through the steps of making three different types of maki: futomaki, uramaki and hosomaki. All of them are easy and fun to make, with endless opportunities for creativity, and they'll wow your raw-fish-loving friends any day of the week.
One of the best things about sushi-making is that once you've mastered the technique, you can use as many new flavor combinations as you can dream up for your homemade sushi. An Americanized sushi-house favorite like spicy tuna? Sure! A Northwest-inspired salmon-and-kale roll? Sounds delightful and daring. Don't be afraid to get creative when it comes to rolling on your own. Check out the video and full three recipes, here below.
Ingredients
Perfect sushi rice (see above), as needed
Wasabi, optional, as needed
Pickled ginger, for serving, as needed
Water, lukewarm, as needed
Fish, or other filling, as needed
Vegetables, as needed
Nori, as needed
Sesame seeds, optional, as needed
FAQ'sWhat exactly is maki?
Short for makizushi, maki are cylindrical rolls of sushi usually cut into six to eight bite-sized pieces. Chefs traditionally wrap maki in nori and use a bamboo mat— a makisu —to roll them.
What should I use to fill my sushi?
You can get as creative as you'd like! The perfectly seasoned sushi rice and seaweed are there to showcase the perfect protein. Whatever you buy, make sure you look for fish that's sustainable and vendors that are environmentally friendly.
Directions:
1. Make sushi rice.
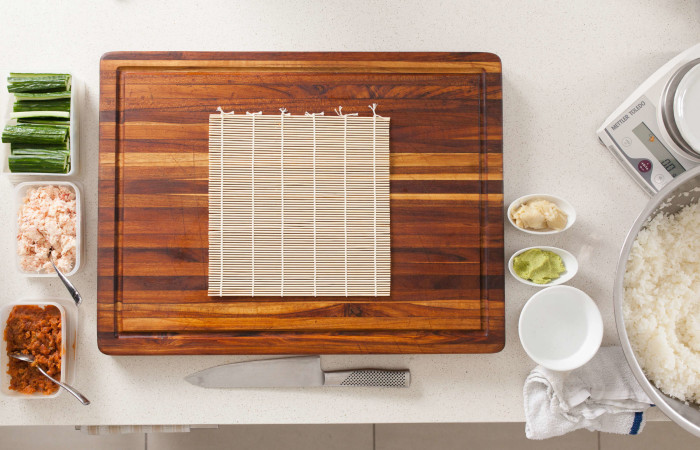
2. Set up your workstation in advance to make creating party-starting rolled sushi a breeze. To make any of these rolls at home, you'll need a cutting board, a bamboo rolling mat, a chef's knife, some lukewarm water, and some pickled ginger, wasabi, sushi rice, and fishy fixins.
3. Nori, a type of edible seaweed used for sushi, has two distinct sides to it. One side is rough and the other is smooth. When you lay your nori down on the bamboo mat, make sure the rough side faces up.
4. Taichi walks us through the steps of making three different types of rolls. Pick one type, or roll them all for a simply splendid sushi shindig.
Futomaki
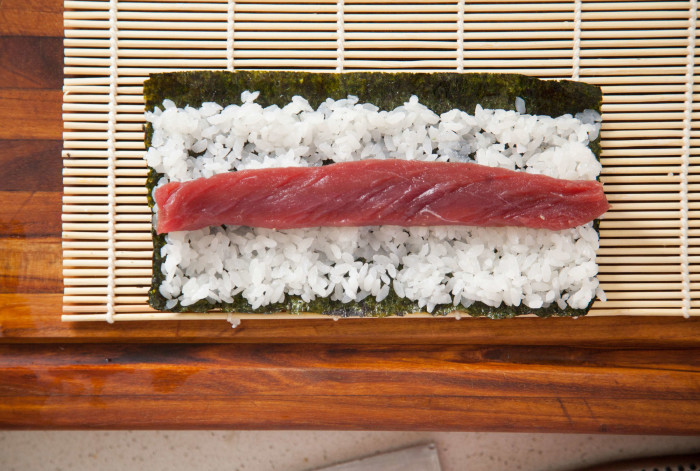
Futomaki translates to "fat rolled sushi." These are larger rolls with the nori on the outside, the rice on the inside, and multiple types of fillings. This is the rolling technique typically used for spider rolls and shrimp tempura rolls.
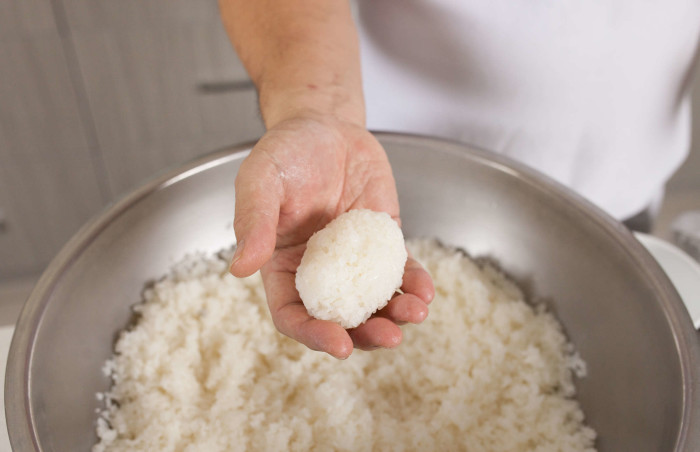

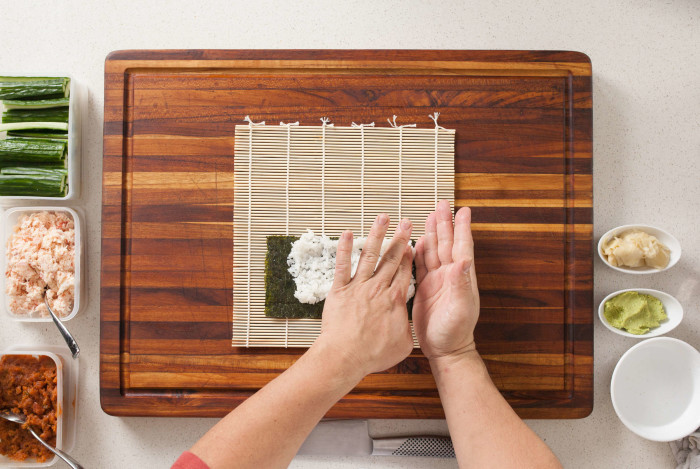
1. Moisten your hands with water to prevent the rice from sticking to them. Form a loose ball of 85 grams of sushi rice. Place the ball of rice in the center of the nori and spread it out. Leave some space free along one of the shorter sides of the nori. Move the nori to the near side of the mat and position it so that the free space is farthest from you.
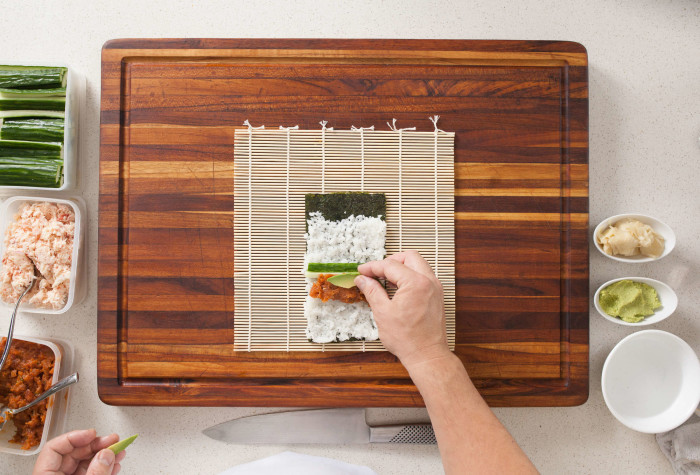
2. Lay 25 grams of fish and 20 grams of vegetables horizontally across the center of the nori. Be sure not to overstuff — you've gotta make this thing roll!
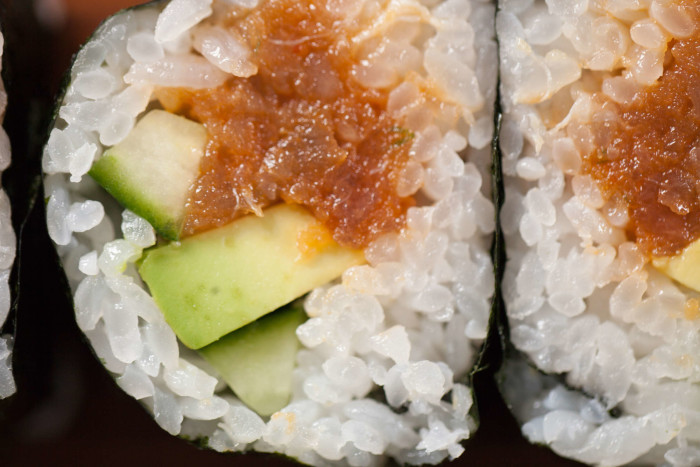
3. Pick up the near end of the bamboo mat and, using a little bit of pressure, start to roll up the sushi. Stop just when the nori and sushi rice touch. Apply light pressure so that the rice sticks in place. Unfurl the bamboo mat, leaving the sushi in place, and then roll again. This time, roll all the way, then give the roll a squeeze. Finally, remove the mat and place the roll on your cutting board. Dampen your chef's knife to prevent sticking, then cut the roll into six to eight bite-sized pieces.
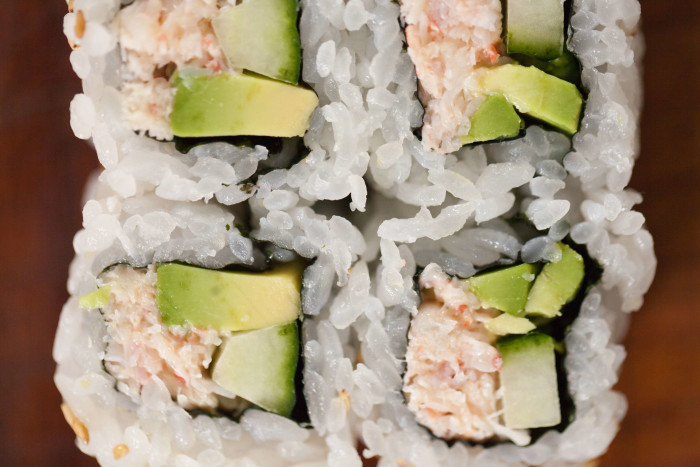
Uramaki
Uramaki are also called "inside-out rolls" because the rice is on the outside. They were invented by a Japanese chef to appeal to American customers in LA's Little Tokyo in the '60s. The rice hid the funky texture of seaweed, and the avocado provided a means of adding fat to regular tuna when toro (fatty tuna) was hard to find. The customers in LA loved this new creation so much they named it the California roll — and it's easily the most famous type of uramaki.

1. Wrap your bamboo mat in plastic to prevent the rice from sticking to it. Then lay the nori down rough-side up on the near side of the mat, with one of the long edges nearest you.
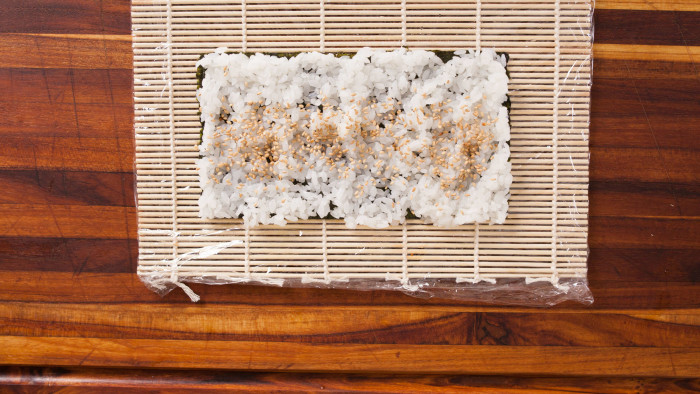
2. Moisten your hands with water to prevent the rice from sticking to them. Form a loose ball of 85 grams of sushi rice and cover the nori with it completely. Top with sesame seeds and flip so that the rice faces down.
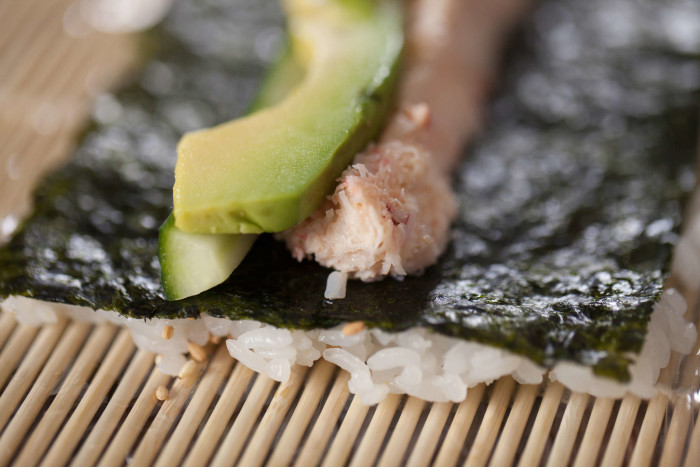
3. Make a little moat horizontally across the nori with the tips of your fingers. Then add 25 grams of fish or other protein and 20 grams of vegetables.
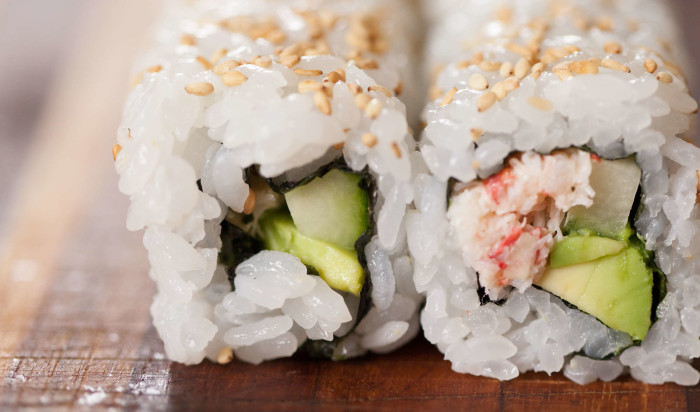
4. Pick up the near end of the bamboo mat and, using a bit of pressure, roll the sushi just until the rice touches the nori. Apply light pressure so that the rice sticks in place. Unfurl the bamboo mat, leaving the sushi in place, and then roll again. This time, roll all the way, then give the roll a squeeze. Finally, remove the mat and place the roll on your cutting board. Dampen your chef's knife to prevent sticking, then cut the roll into six to eight bite-sized pieces.
Hosomaki
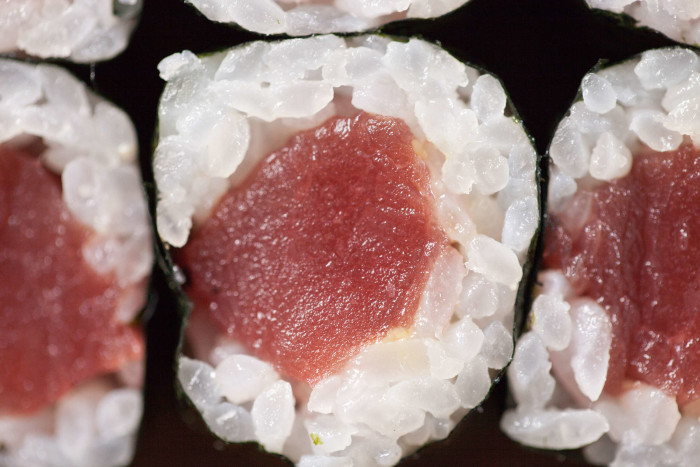
1. Last but not least, hosomaki are skinny sushi rolls. This technique is used for a number of different rolls, usually containing just one filling, and it's an especially popular method for making vegetarian rolls with cucumber or avocado.
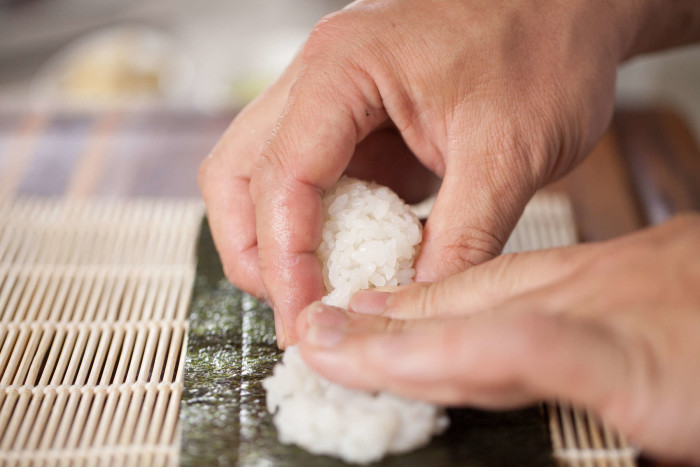
2. Moisten your hands with water to prevent the rice from sticking to them. Lay down a sheet of nori, rough side up, with one of the longer edges nearest you. Form a loose ball of 50 grams of sushi rice and spread it across the center of the nori, leaving a small space along the far edge. Move quickly to prevent the nori edges from curling.
3. Spread a dollop of wasabi horizontally along the center of the rice. Then place 30 grams of fish on top of the wasabi.
4. Pick up the near end of the bamboo mat and, using a little bit of pressure, start to roll up the sushi. Stop just when the nori and sushi rice touch. Apply light pressure so that the rice sticks in place. Unfurl the bamboo mat, leaving the sushi in place, and then roll again. This time, roll all the way. Finish it off with a tight squeeze — a little hug, if you will — to keep everything in place. Finally, remove the mat and place the roll on your cutting board. Dampen your chef's knife to prevent sticking, then cut the roll into six to eight bite-sized pieces.
5. Now you're a pro — you can roll three different types of maki. With these skills, the flavor possibilities are endless.

Our favorite way to eat these bad boys? With friends! Invite your favorite food-focused friends over and make it a sushi party.
ChefSteps comprises a team of award-winning chefs, filmmakers, scientists, designers and engineers focused on revolutionizing the way people cook by inspiring creativity and encouraging expertise in the kitchen. You can also get access to all of ChefSteps' Premium content — including paid classes and dozens of recipes available only to Premium members for a onetime fee — for the special price of $24 (regularly $39). Classes include Sous Vide: Beyond the Basics, Fluid Gels, French Macarons and more!