How To Cure Your Own Meats At Home. Mini-Fridge Required.

We may receive a commission on purchases made from links.
Food Republic's column Ask Your Butcher seeks to answer FAQs in the world of butchery. Ethically minded butcher Bryan Mayer has opened butcher shops and restaurants and has trained butchers in the U.S. and abroad. He helped develop the renowned butcher-training program at Fleisher's, where he was recently named director of education. In each column, Mayer tackles a pressing issue facing both meat buyers and home cooks. This week, he offers an innovative idea for making delicious use of that old mini-fridge sitting around in your garage.
When I was growing up, I knew something special was happening when the meat-and-cheese plate came out. Whether it was for a holiday or for my grandparents' weekly visit, my mom made sure to provide salty cured meats for all. We spent what felt like hours shopping for the meal. But my childhood impatience was subdued as soon as we entered the now-shuttered Battaglia Brothers Meat Market in New Rochelle, New York. To this day, I can still smell the aroma of dry cured meats and hard cheeses that filled the cases and hung from the ceiling. Prosciutto, mortadella, soppressatta — all the usual suspects were present. For the better part of my life, this was charcuterie to me.
It wasn't until I started butchering that I began to get the urge to make my own variations. I made tons of fresh sausages, rillettes, terrines and mousse, and even tried to get a little fancier and venture into the world of pâté en croûte. All these preparations are excellent use of offal and trim for the whole-animal butcher. But when that eye round is staring back at you and it's July — and you know no one is going to roast it — it's just begging to be turned into bresaola. And it's possible with just four ingredients: salt, humidity, temperature and a little time. Okay, maybe you'll need a few more ingredients and a couple of toys (inexpensive, I promise), but I guarantee that curing your own meats at home will make you a hit at any party — and will make your grandparents proud. So let's build you a curing chamber and give you a recipe to get started!
The Chamber
A quick look around the internet and you'd think you'd need to find some sort of secret cave on the side of a hill. (Of course, that cave would be in Parma.) Or perhaps that you'd have to shell out thousands of dollars for a Stagionello — yeah, they're awesome. But I'm here to assure you that you don't. You don't even need to devote your basement or even a portion of your closet to this. After all, who really wants to hang a duck breast in their closet?
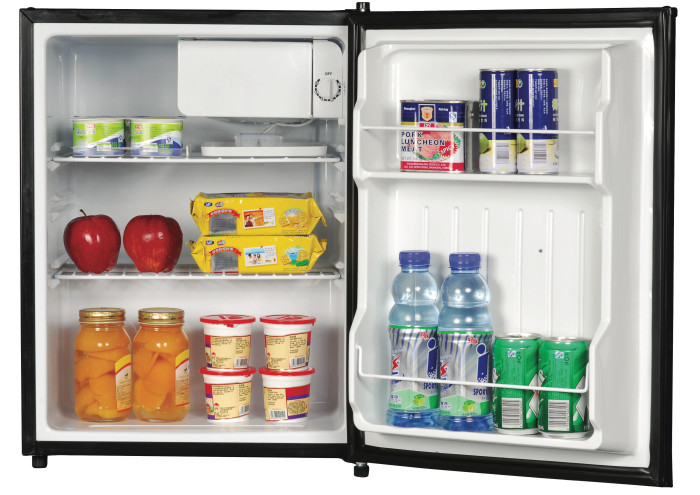
The answer: a mini-fridge. Yes, that little cube that once sat in your dorm dispensing beer, or Lunchables, or anything else that clearly wasn't nutritious, has a new purpose: salty meats. That is, after you tinker with the temperature, humidity and airflow.
Temperature
Ideally, you're looking for a temperature between 50° and 60°F. That range is key. Anything above 60°F and you're creating an environment that bacteria loves (not the good kind). Anything below 50°F and the drying process slows to a crawl, affecting water activity. Not to get too geeky here, but water activity is important. So keep the temp between these two integers.
Humidity
Just like temperature, humidity has a sweet spot. That would be between 70 and 75 percent. Muscles have a water content of about 75 percent, so in order to achieve proper drying, you want to keep the humidity below that point. But keep it below 70 percent and you'll dry the outside of your meat, which won't allow the moisture inside the muscle to evaporate, causing spoilage. Keep it too high, and — you guessed it — you're creating a breeding ground for the type of bacteria you don't want. While I can get all geeky on different types of mold spores and how each of them looks, if it's not a white mold, remove it immediately with a quick wipe of vinegar. If you've let the mold grow on there for a while, please toss it and start over. Thanks.
Air
As in airflow. This benefits the curing process in two ways. First, it pulls moisture off the surface of what you're dry-curing. Second, it helps to keep bad mold (anything that's not white, for our purposes) at bay by reducing the amount of damp air surrounding your meat. There are a couple of ways to do this. We'll get to that later.
So now that you've got a bit of an understanding of some key principles, you're ready for some equipment. A quick search on Craigslist results in several options, from full-on upright refrigerators to the mini-fridge. While I think the mini-fridge is your best bet, if you choose to go full-on fridge, make sure it's not the side-by-side type, so you can get maximum space in case you want to venture into hanging larger pieces like prosciutto.
And now for the toys. Since refrigerators are self-regulating, most of them will hold temps at around 35 to 37°F, with a possible slight increase into the low 40s. That is way too low for curing. Fortunately, and thanks to all you homebrewers, there's a great little device to help regulate your temps. Johnson Controls makes a few temperature controllers — both analog and digital — that run interference on a fridge's thermostat. Simply plug the fridge into the controller, plug the controller into the wall, place the temperature control in the fridge and set your desired temp: It's that easy! The controller regulates the desired temp by cutting the power to the fridge.
Now that you can control the temperature, you need to control the humidity. But first, I must recommend another piece of equipment: a hygrometer. It may sound fancy and expensive, but it's not. For about $15 on Amazon, this will measure the relative humidity in your fridge as well as the temp. They're handy: Why not make your life a little less complicated and pick up a humidity controller and humidifier? Dayton makes an easy-to-use, inexpensive unit that will turn a humidifier on and off (much in the same way the temperature controller does) to maintain the level you've set. As for humidifiers, make sure to go with the "ultrasonic" type, as they have a finer mist than regular humidifiers. Look for units with a small footprint, like Crane. You want as much room as possible for your meat.
Details
That's your basic setup. You've got temperature control, humidity control, and, if you want, you can mod it out even more and add a fan, or go full-on geek and pick up a digital temperature and humidity controller, like the one made by Auber Technologies.
If you find that your humidity is too high, try removing the humidifier. If high humidity still persists, you can try a couple of options. You've got your fancy humidity controller; just plug a small fan into it. Much like the humidifier, the controller will kick on the fan when the relative humidity reaches a programmed level. If that doesn't work, you might have to go the opposite route and purchase a dehumidifier. Eva-Dry makes a small unit that's perfect for this application.
Okay, you're all set up with your fridge and controllers. Now, let's get some meat! Before you dive in headfirst, run off to your local butcher shop and pick up a whole-hog leg for some prosciutto. But why not start off small and test things out a bit? Allow me to suggest something simple, but no less tasty — duck prosciutto.
Duck Prosciutto
Ingredients
1 full duck breast (that means two halves), skin on, and make sure you record its weight
1 cup kosher salt
2 tablespoons sugar
2 tablespoons garlic powder
1 tablespoon paprika
1 tablespoon ground black pepper
1 tablespoon anise
1 teaspoon allspice
Directions: